
Tour Prepping NEEDTOBREATHE
Project Summary
- 412 hours
- 20,000 feet of Kevlar/Nomex thread
- About 40,000 mirrors (backdrop + jackets)
- 262 yards of flame retardant fabrics
- 12 bent/broken needles (including hand sewing needles)
- 2 serviced sewing machines / use of 3 machines
- An average sleep schedule of 3am - 7am for 4 weeks straight
- One random flight to Denver
Two weeks prior to taking Music City sewing out of the house and into a separate studio space, NEEDTOBREATHE asked me to come up with some mirror-covered jackets. A week later, I was prepping their entire tour.
I said yes and started specking out supplies. The first roadblock I ran into was finding round mirrors pre-drilled with holes in them - turns out they're harder to come by than you'd think. I ordered 600 1" round mirrors custom from China and waited. They asked for another jacket. We're up to 2 jackets now.
Jacket 1: noose & monkey yellow gold crushed velvet bomber jacket. All 600 mirrors went on this jacket and I was still about 250 short. Crazy, huh? I ordered an additional 900 mirrors and waited.

photo by Tyler Leaman
Jacket 2: Levi black Trucker jacket
This jacket ended up needing 1400 mirrors. I ordered another 2 batches of mirrors asap since vendors only have so many, and drilling those little sew-on holes isn't an overnight thing. This isn't something you can glue onto.. or at least, you could, but you'd constantly be glueing, and the end result would just look messy. I'm really glad we went this route, even though sourcing these mirrors was tough, and sewing them all on was tougher.

Photo by Nolan Feldpausch
Photos just don't do these jackets justice since the fun is in the lighting. Here's how they look in action:

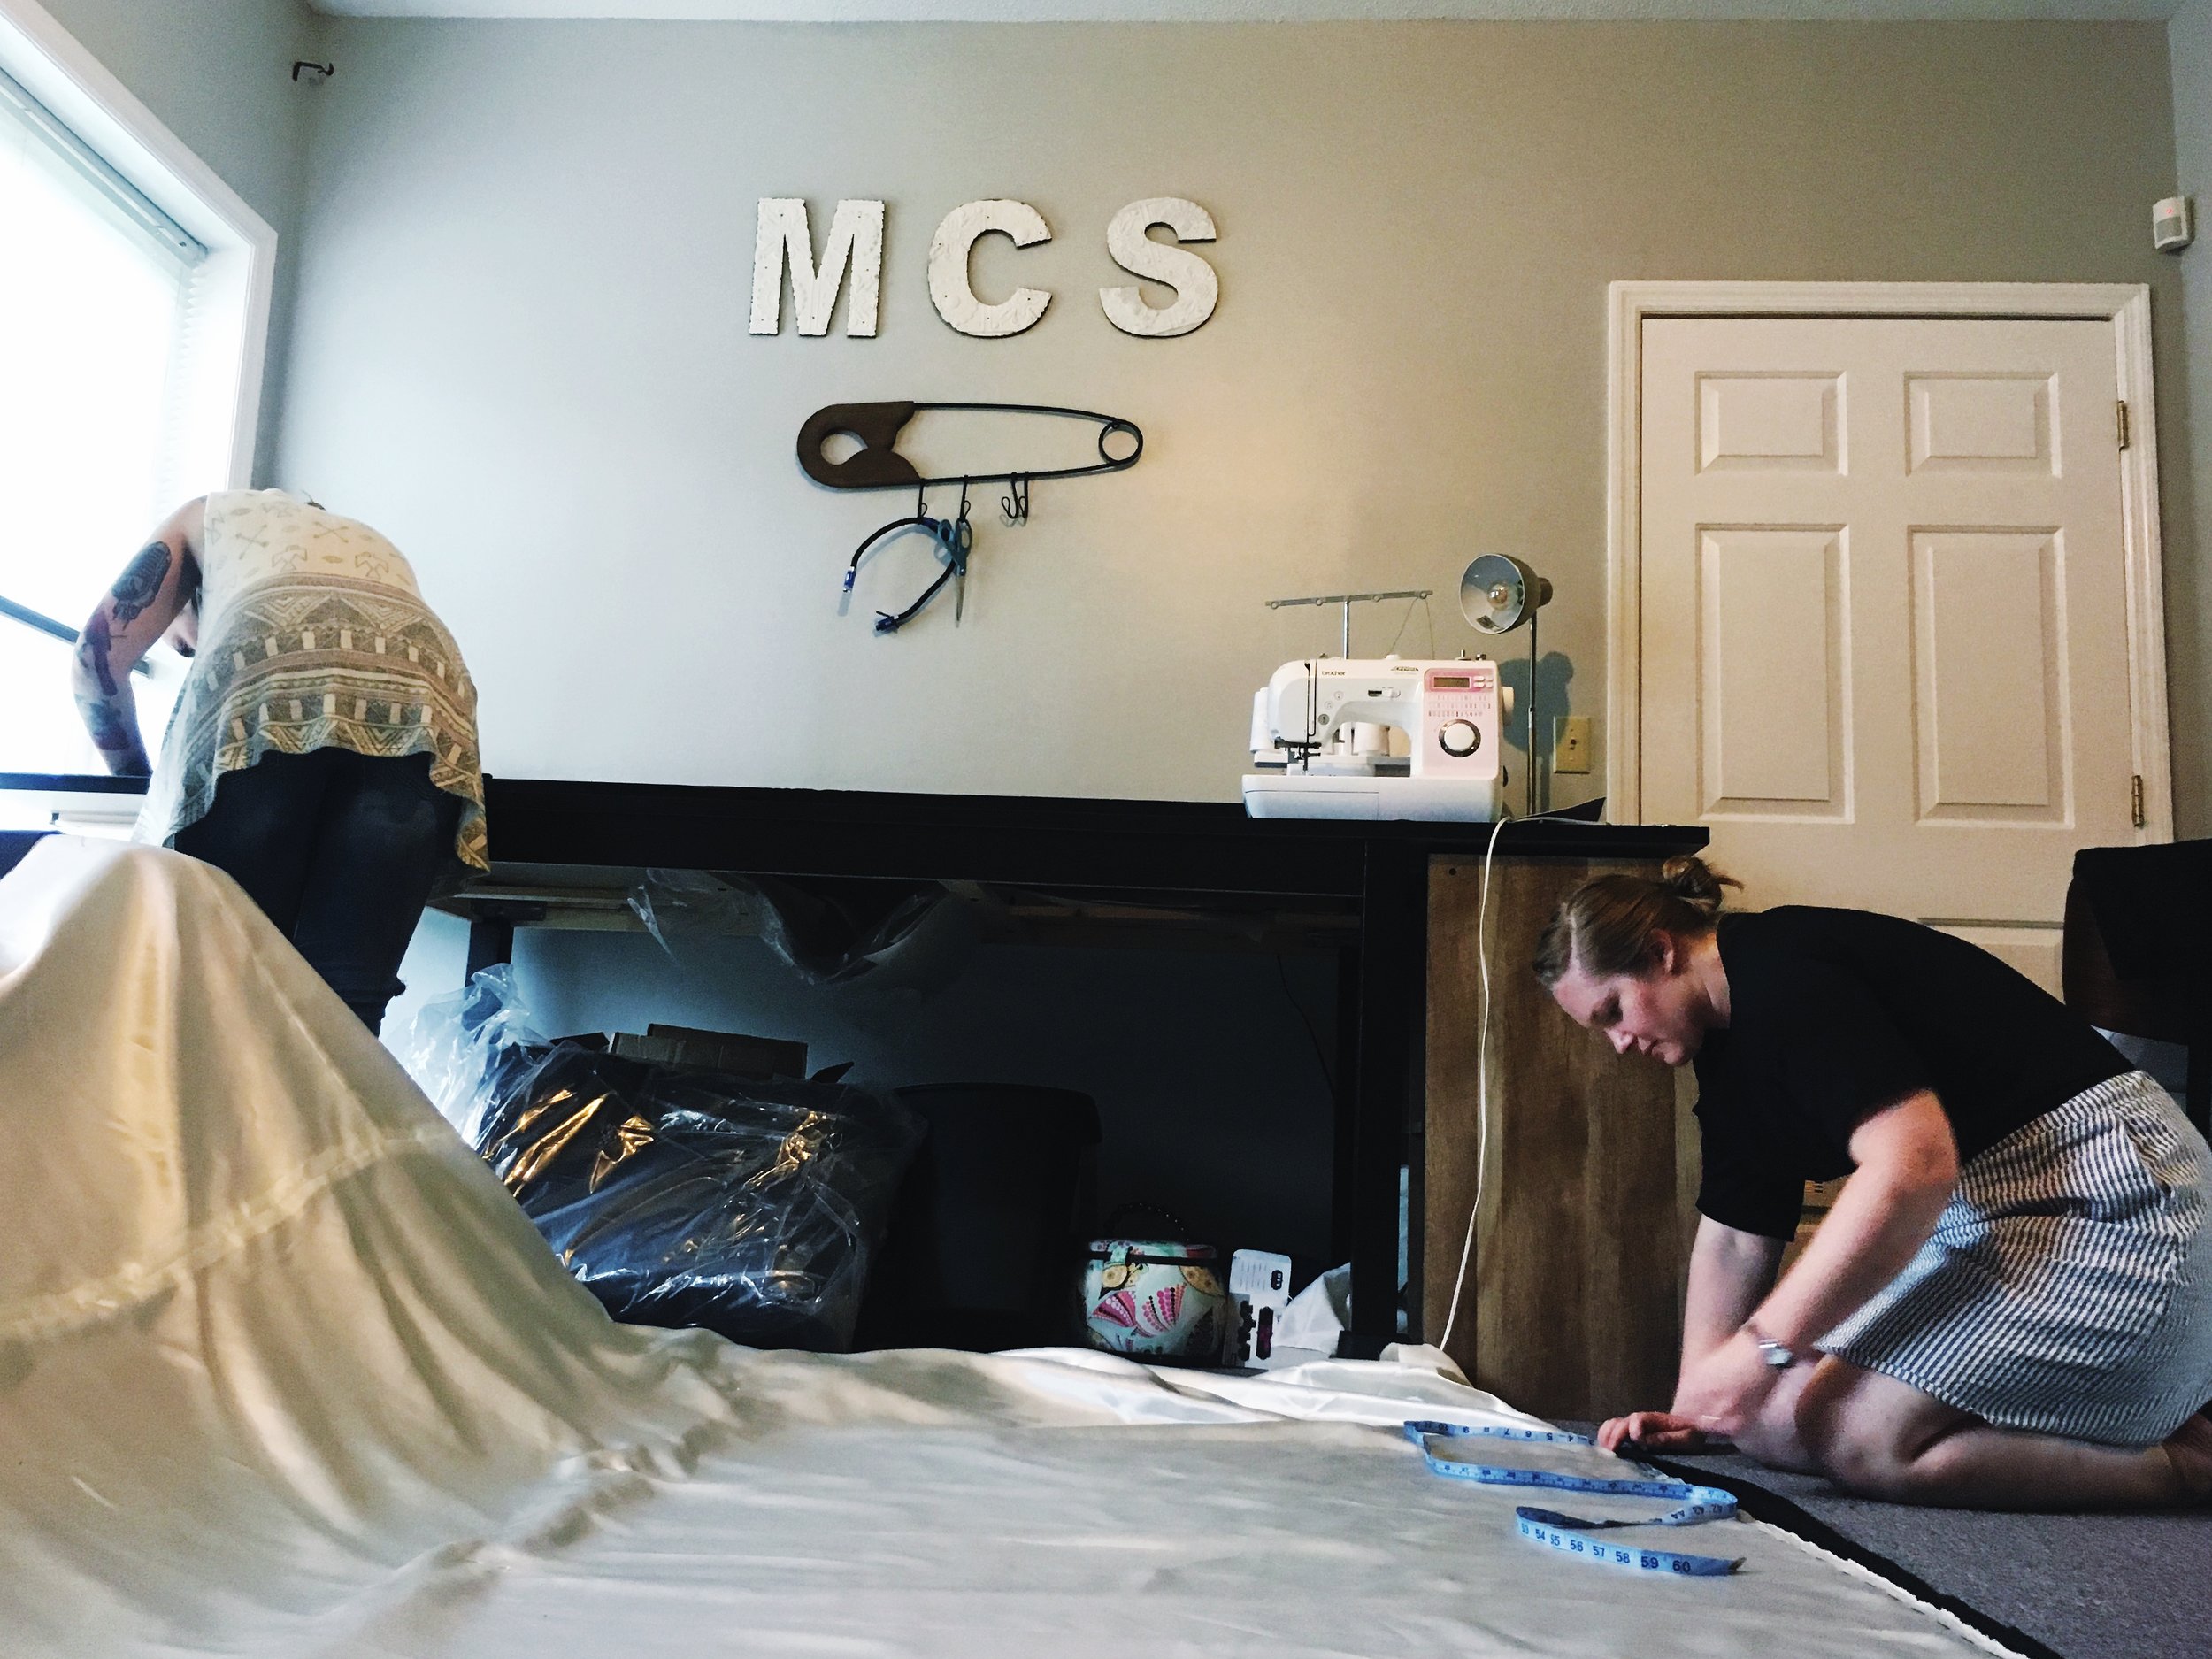
Four days later I was asked if I'd be interested in creating their backdrop for the next 40-ish shows. "Sounds like fun- I'm in." This is a huge learning experience for me. I decided to go ahead and share my worksheet, just in case someone else out there is facing a project like this.

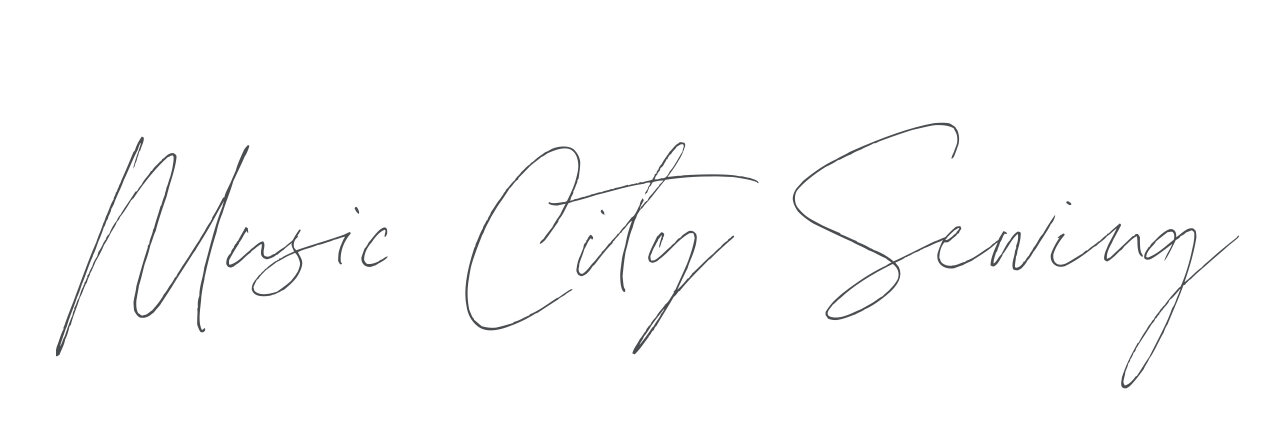
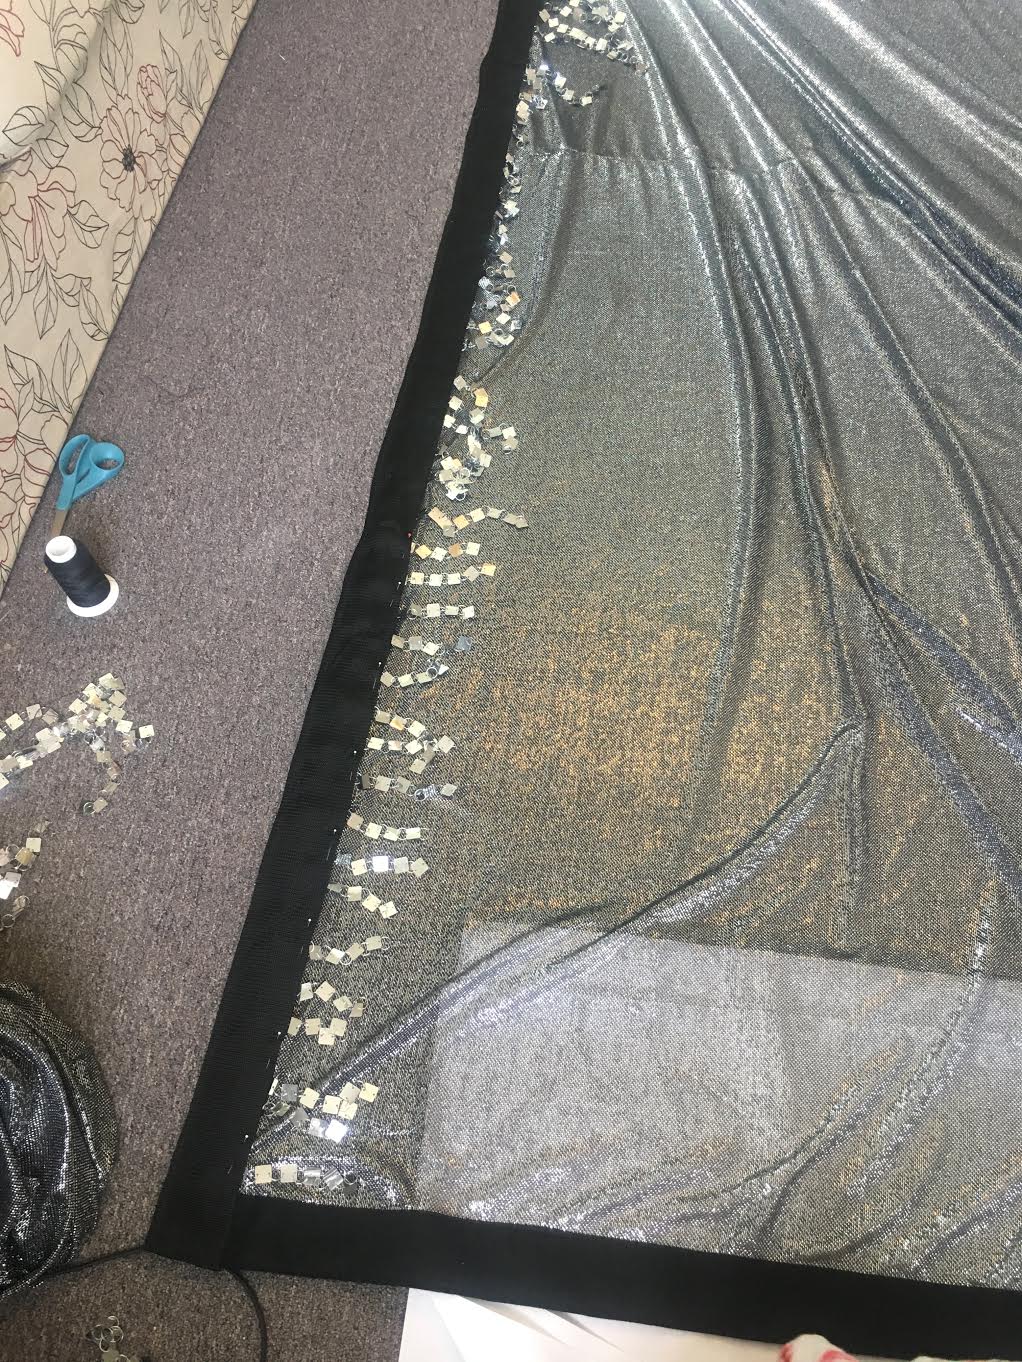
Planning began and I started drafting out the numbers. Yardage. Weight. Tension. Stitch widths for seams on the weft. Stitch lengths for weight chains that wouldn't reshape the lines underneath the vertical seams. Potential lighting issues regarding warp/weft directions. Geometry/math to get the angles right. Pythagorean theorem. Percentages of stretch with weight combining and potential shrinkage since it's stored in heat. Stitching strands of mirrors over the top of a VERY delicate mesh means if the mesh stretches or shrinks either way, things are going to look odd. This backdrop brought about a TON of thought - mixed materials sewn into odd shapes are going to look differently suspended in the air than they do on a table (or the floor). We later ended up adding velcro in between the three panels to create the same amount of tension throughout the three panels as there is across the top.

backdrop side panel, stage left
Two days later they asked if I'd make covers that would create opacity behind their lighting carts (giant lamp and LED-filled carts, 12 x 8' each). "Why not." I specked more fabric. The order grows and grows and I'm getting to know Mariana, my sweet sales rep at Rosebrand.

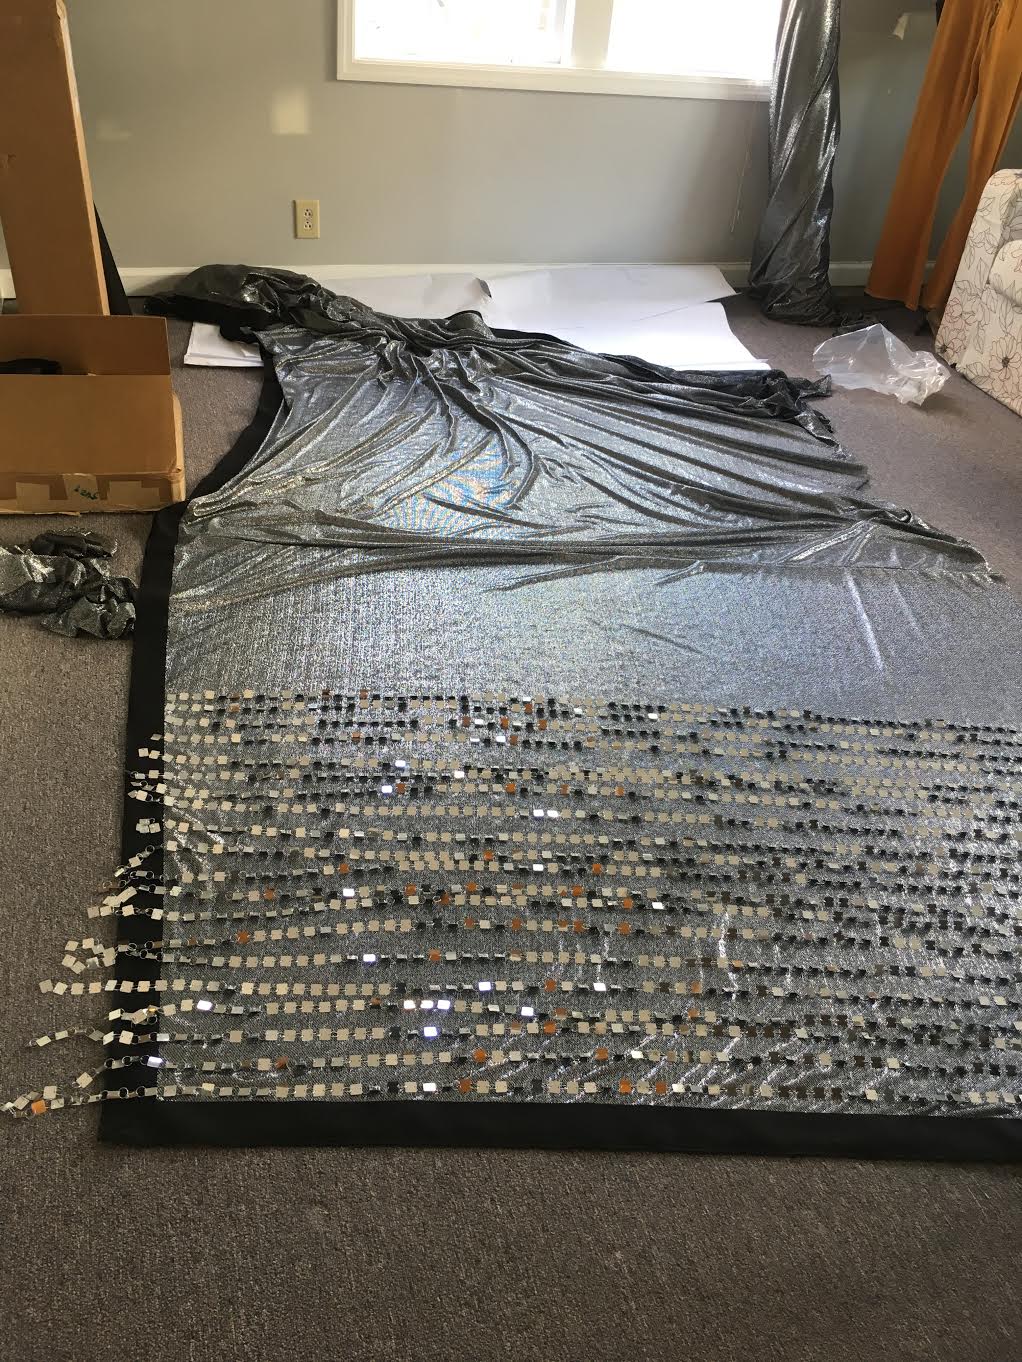
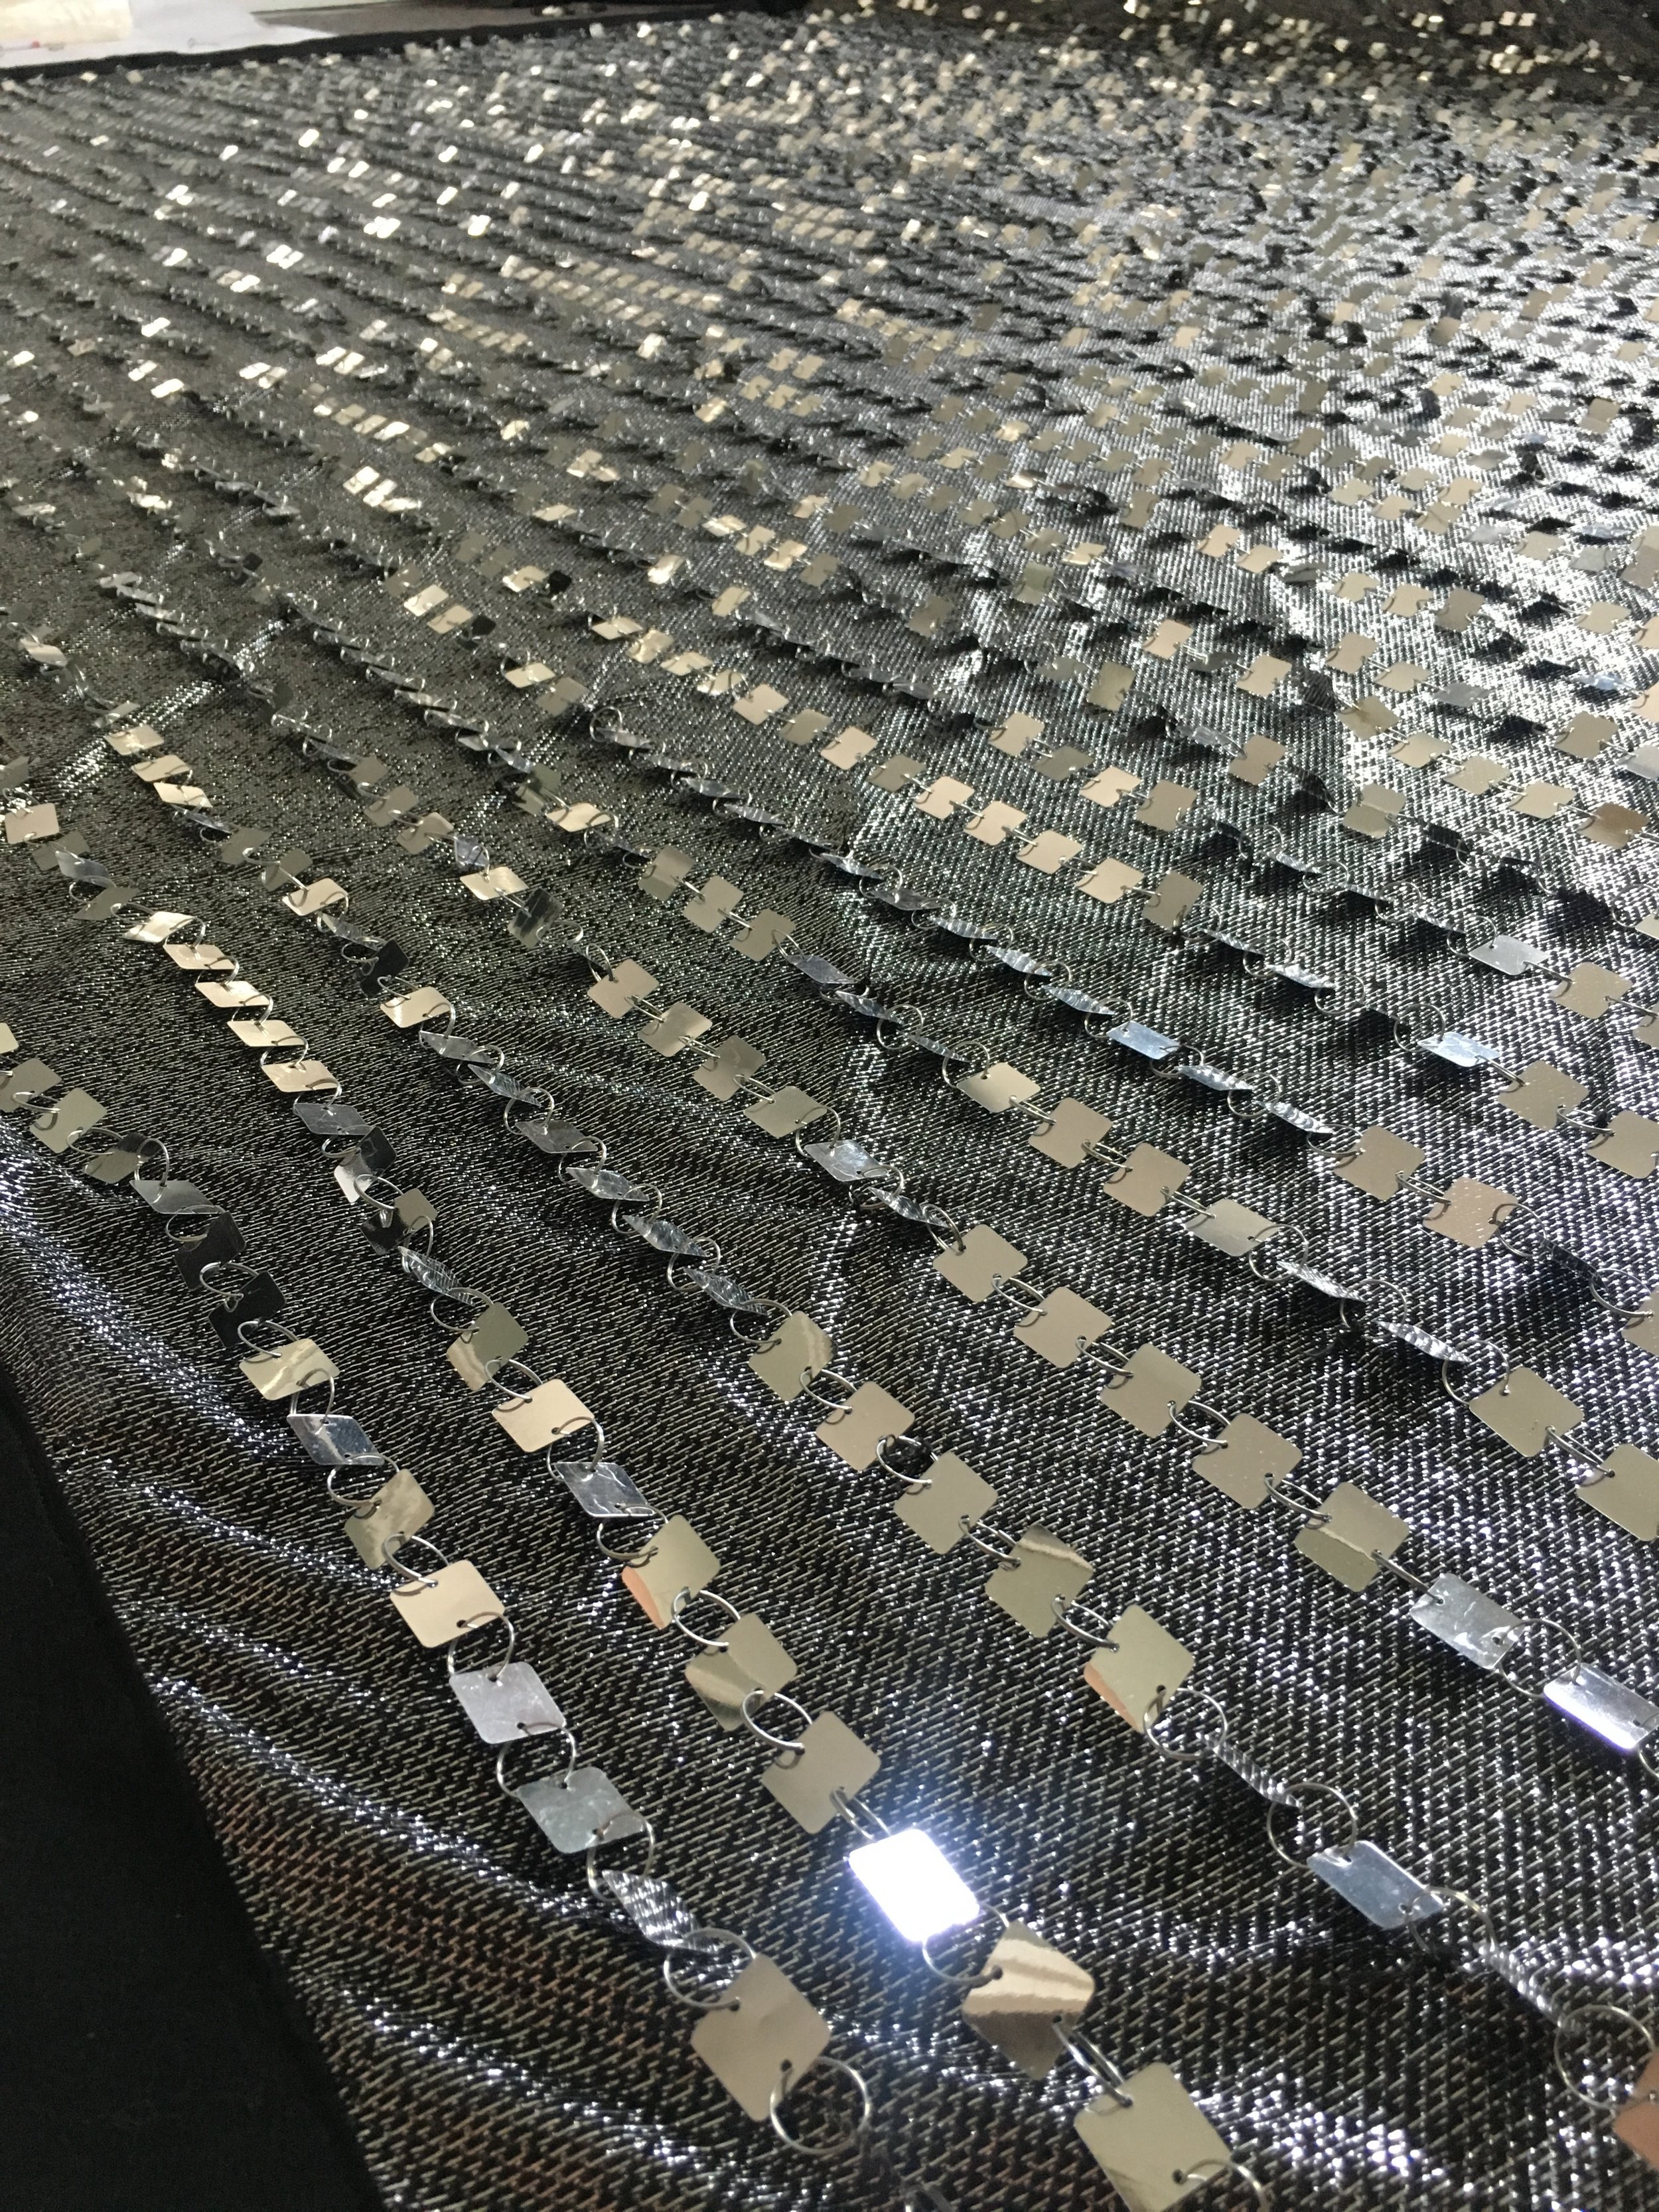
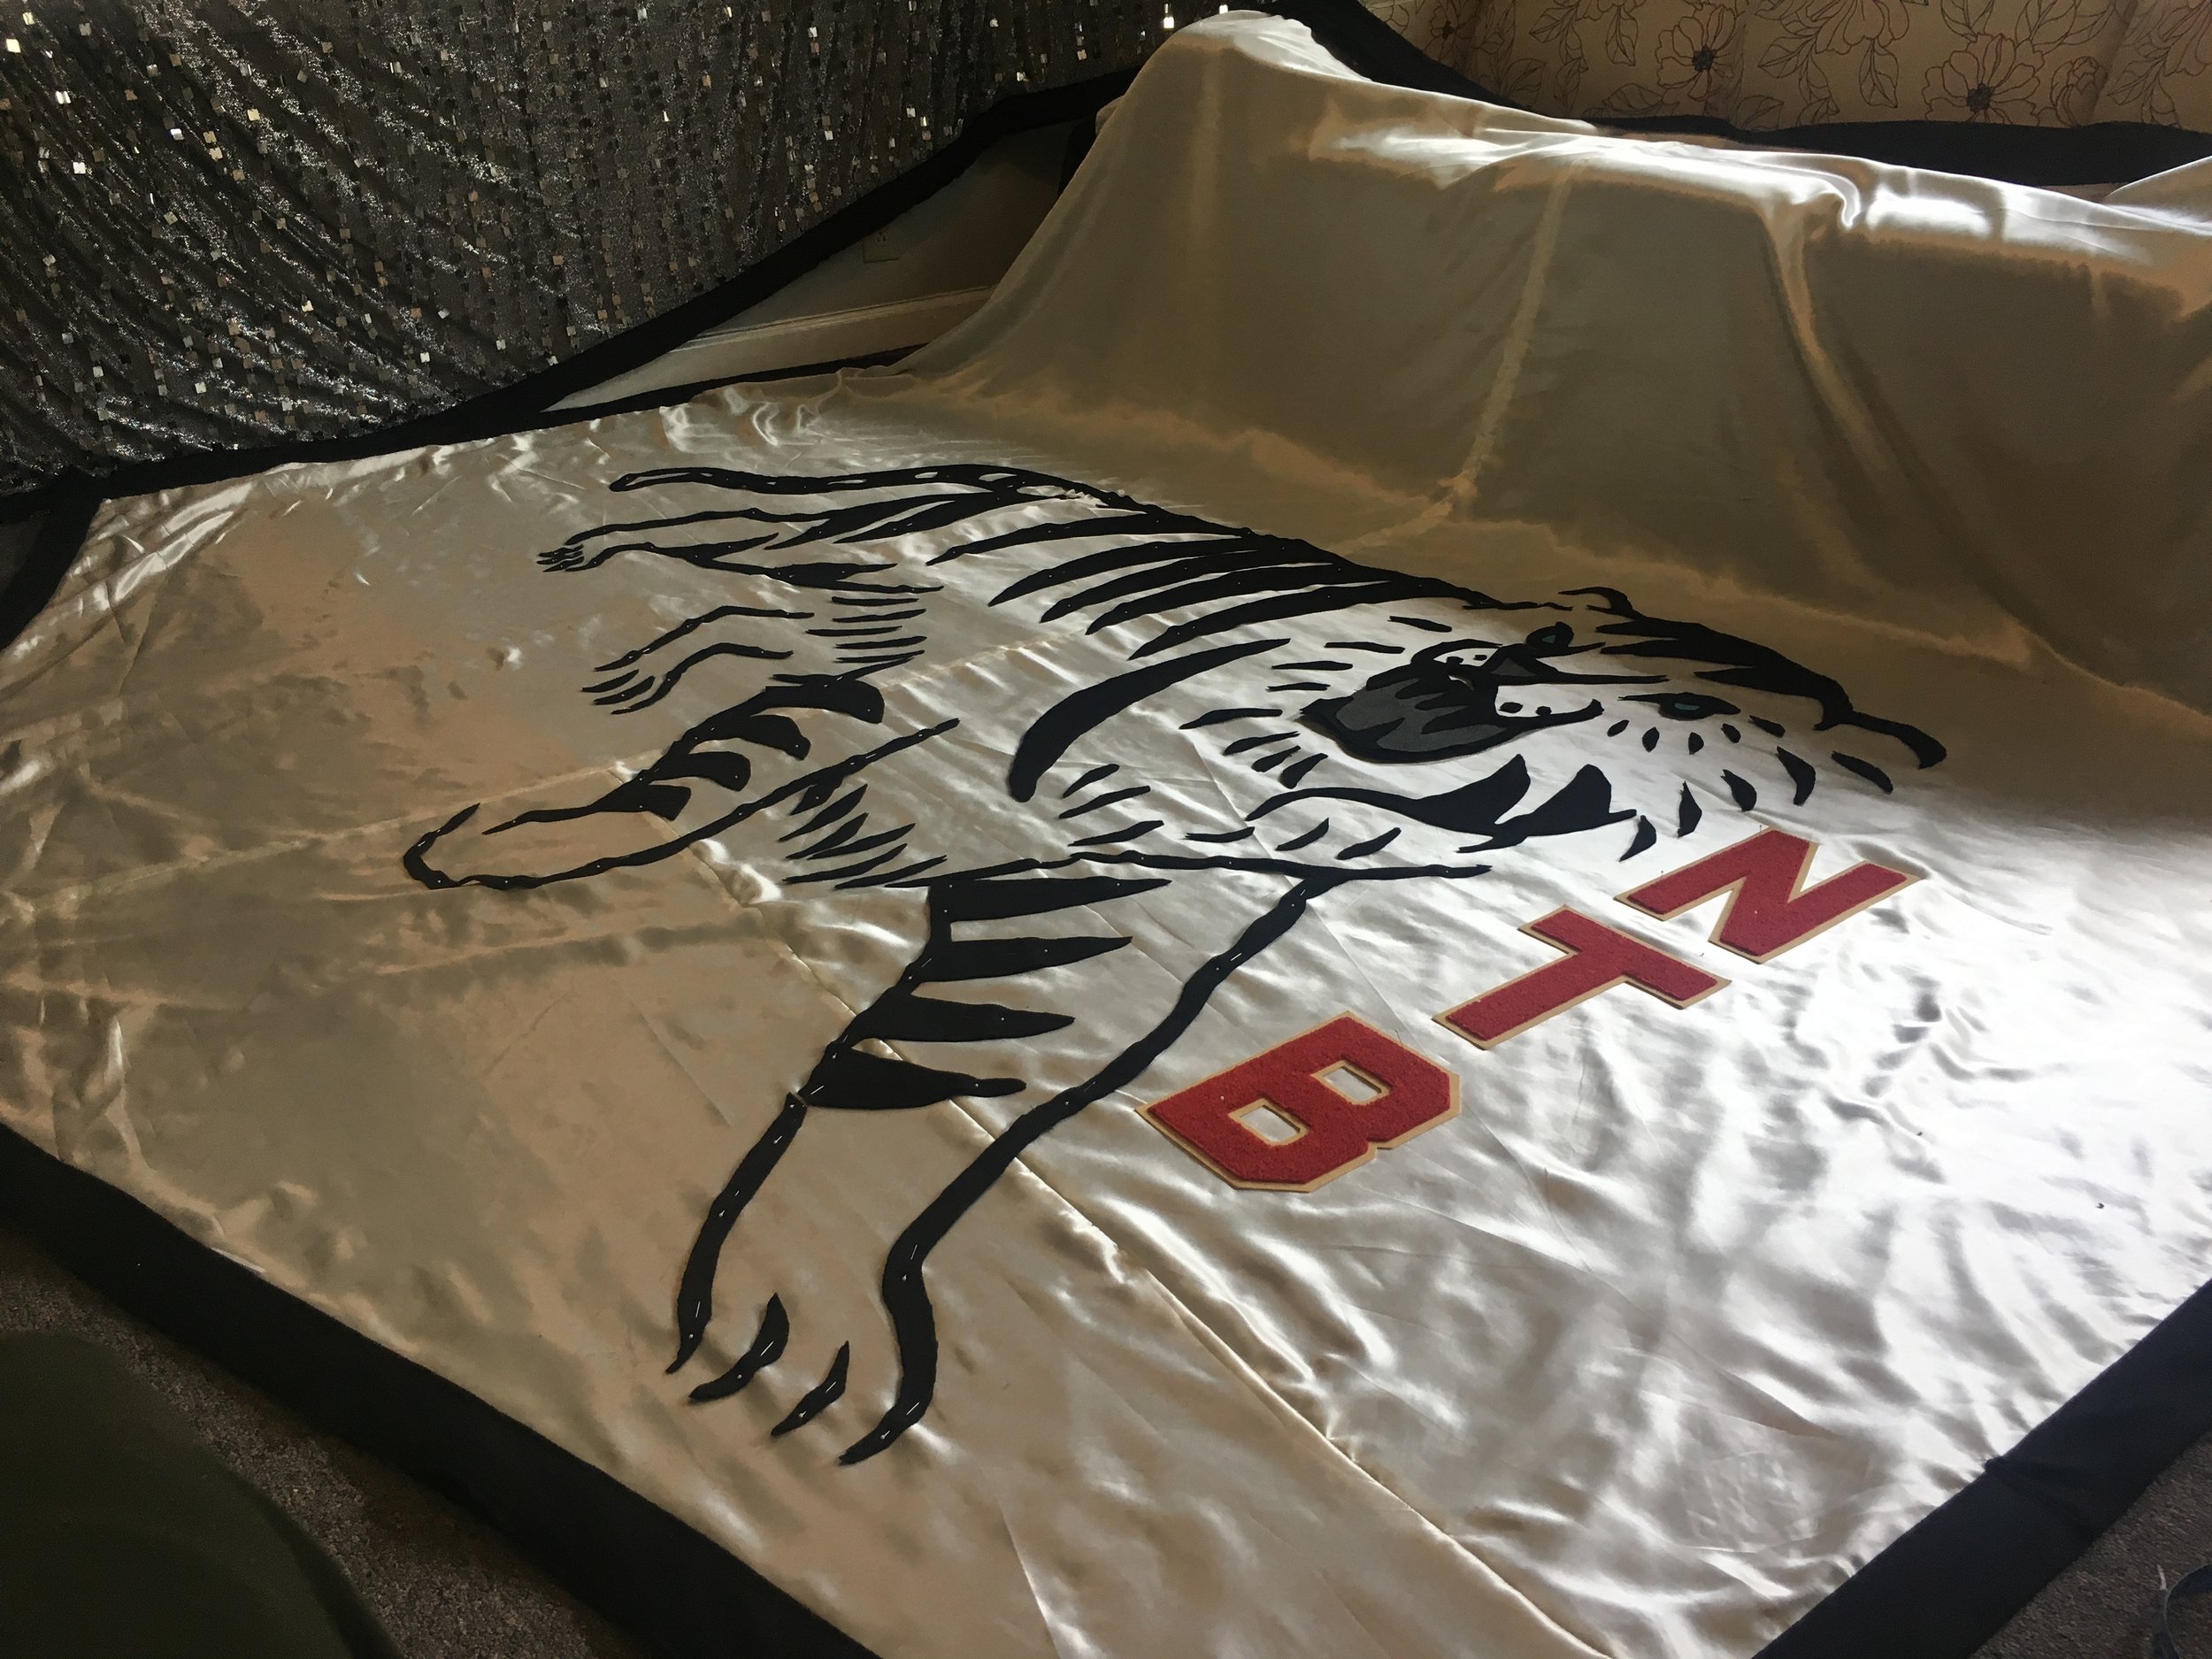
I started with a high res logo and hit up Fedex to print out the tiger to be 7' wide, from tail to toe. The structure of the side panels took a day to put together. Whew- we're running on time. It took one day to install the mirror rods into the side panels. But then it took four days to tack mirror strands down onto one side panel.. about 3000 tacks. It took three days to do the second one. The toughest part to this was making sure my strands stayed straight as they were tacked down, and the disagreement between flame retardant Nomex thread and the thin domino material. I found the best way was to work within each panel, short side to long side, taking a step back every 10 minutes to course correct when needed. After coming out of panel one half crippled from doing all the hand tacking on the floor, we ended up doing panel two by draping it over the work table (thankfully it's 8' long.. not long enough, but still better than the floor).
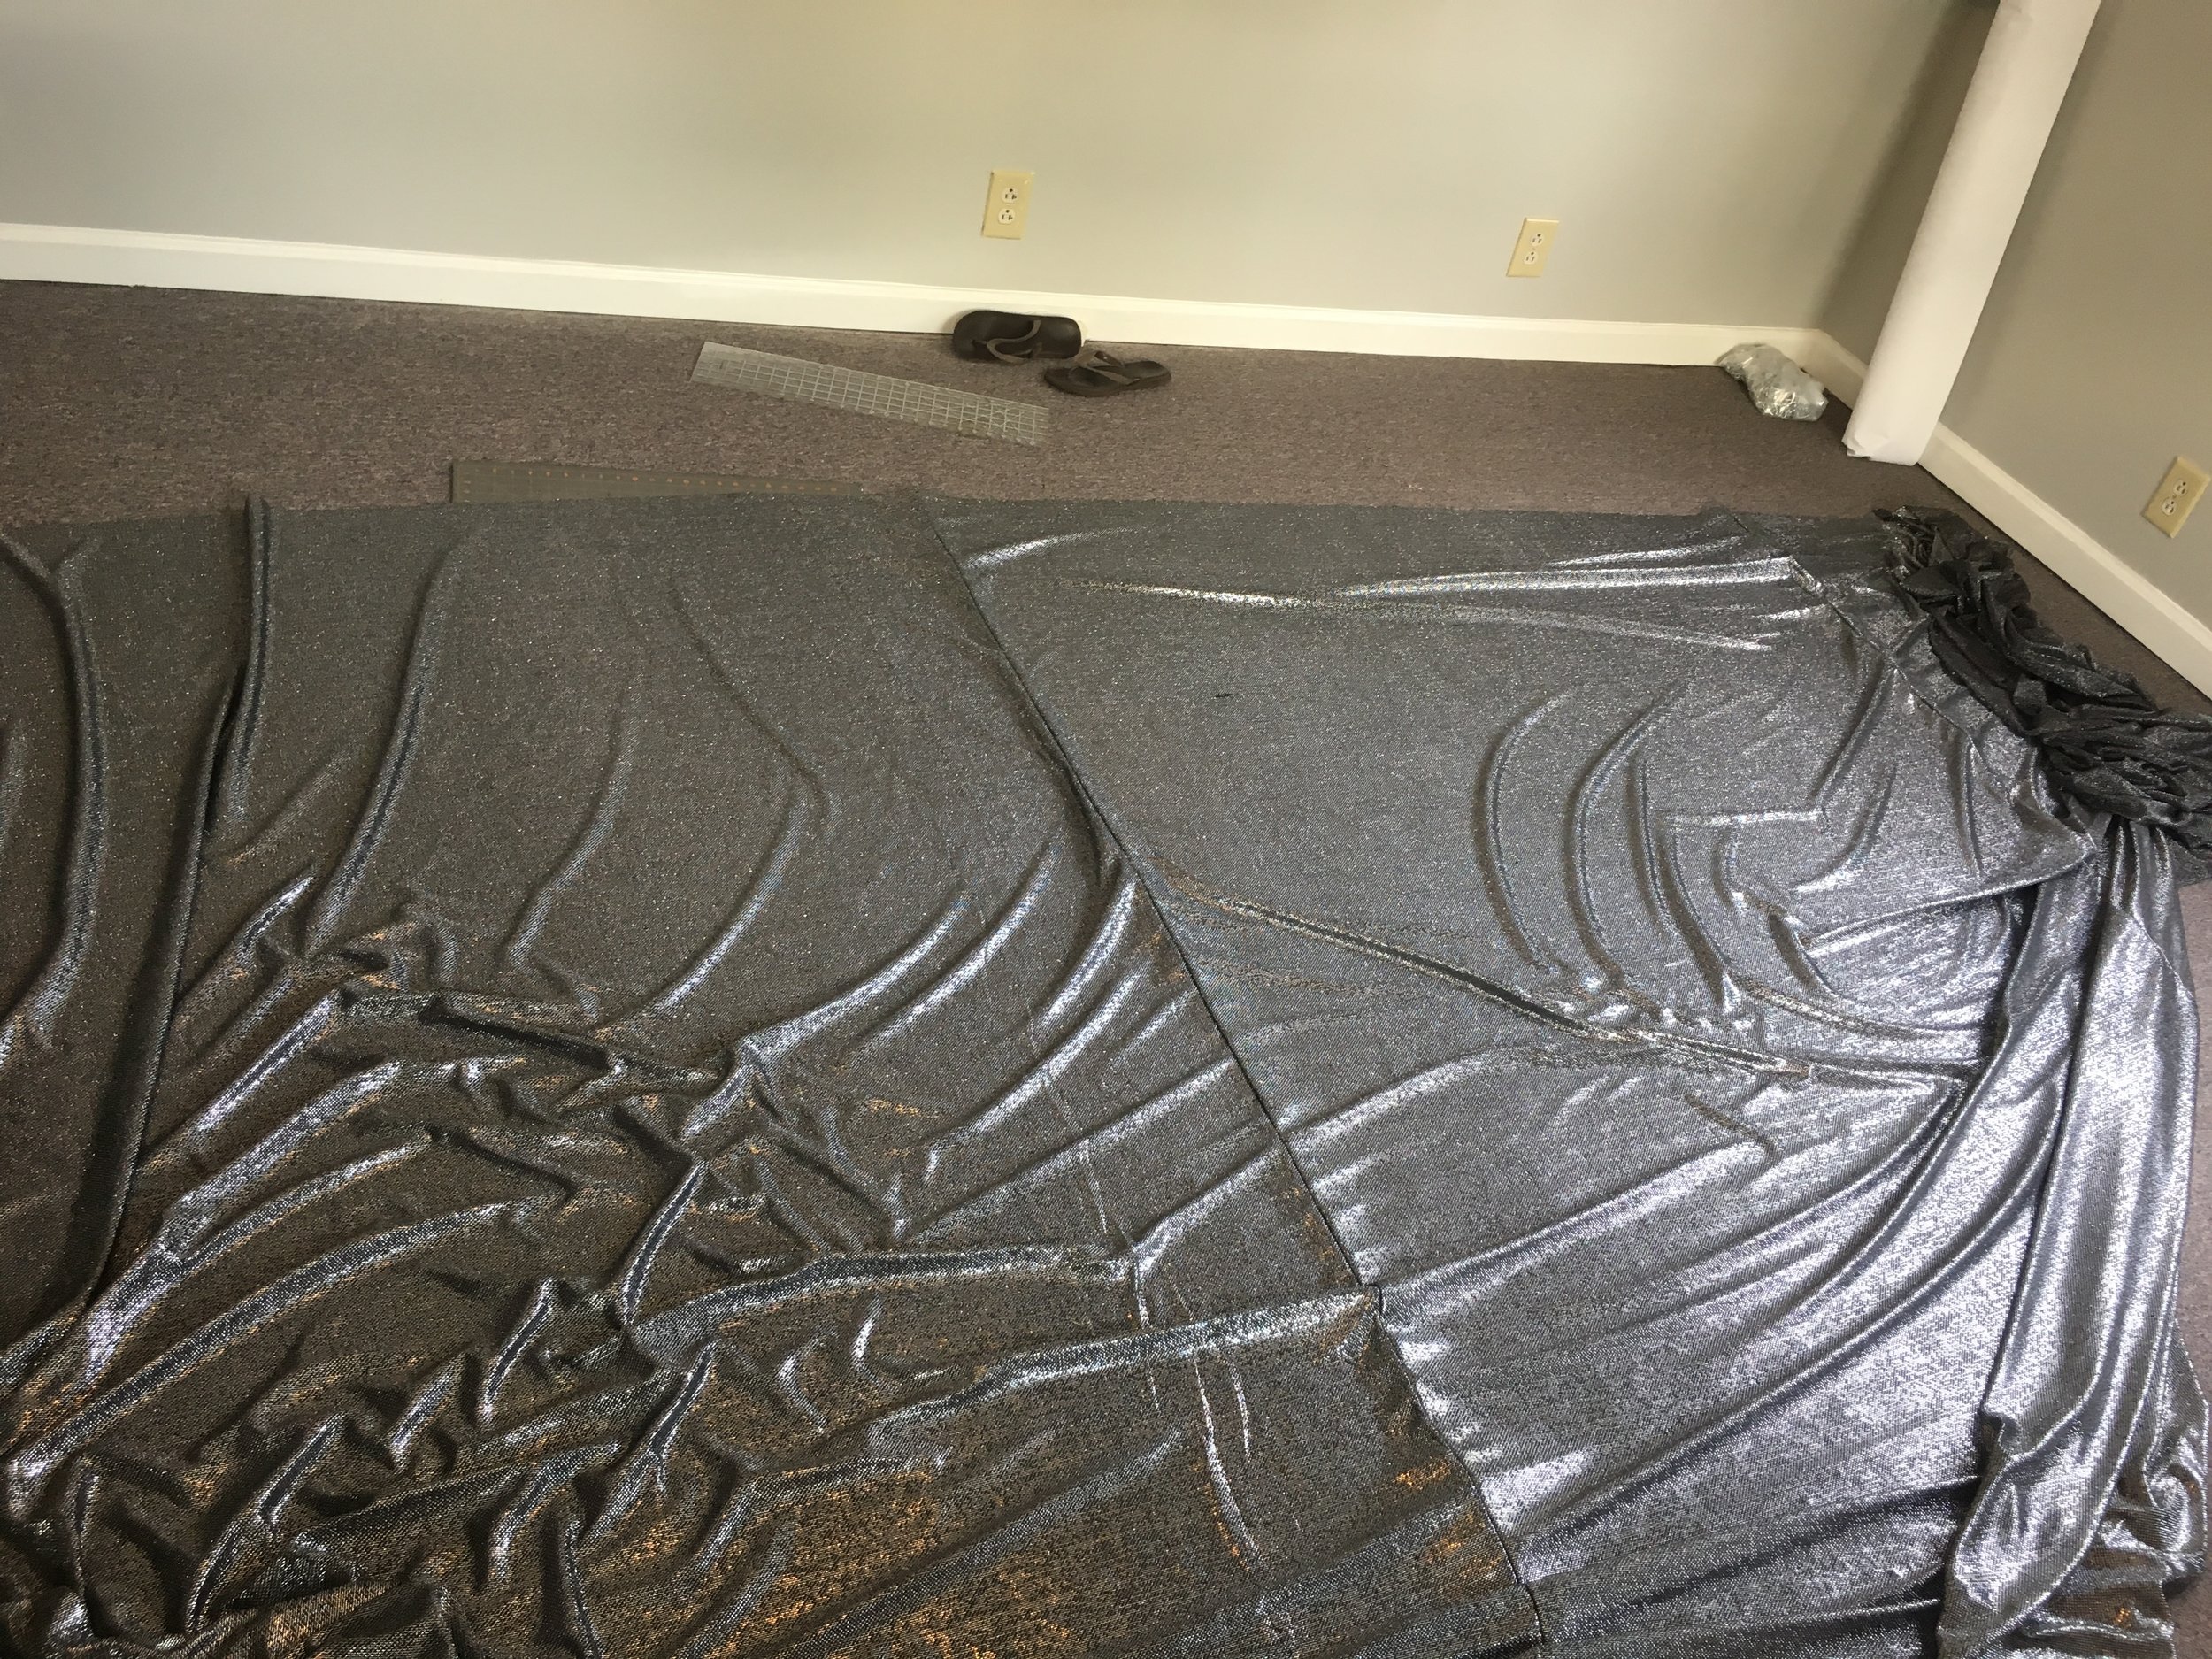
I brought my sister into town to tackle the middle panel because at this point I'm having 4am meltdowns for how much of a time suck this thing is. Something simple in theory isn't simple at all when it's too large for your workspace. Fabric widths meant the black commando fabric behind the charmeuse needed a vertical seam, while the charmeuse required a horizontal one. Unfortunately, each horizontal charmeuse panel was supposed to be 4 yards, but what I received was 7 yards, and 1 yard, cut separately. So that bottom right panel ended up needing a little quilted patchwork. Mismatching seams brings about new issues (your fabrics are never truly going to be happy together), but in an effort to achieve the affect they wanted, 'done' is better than perfect. After we managed to get the center panel the correct width/length/shape, I added the felt trim around the edge and nylon webbing across the top.
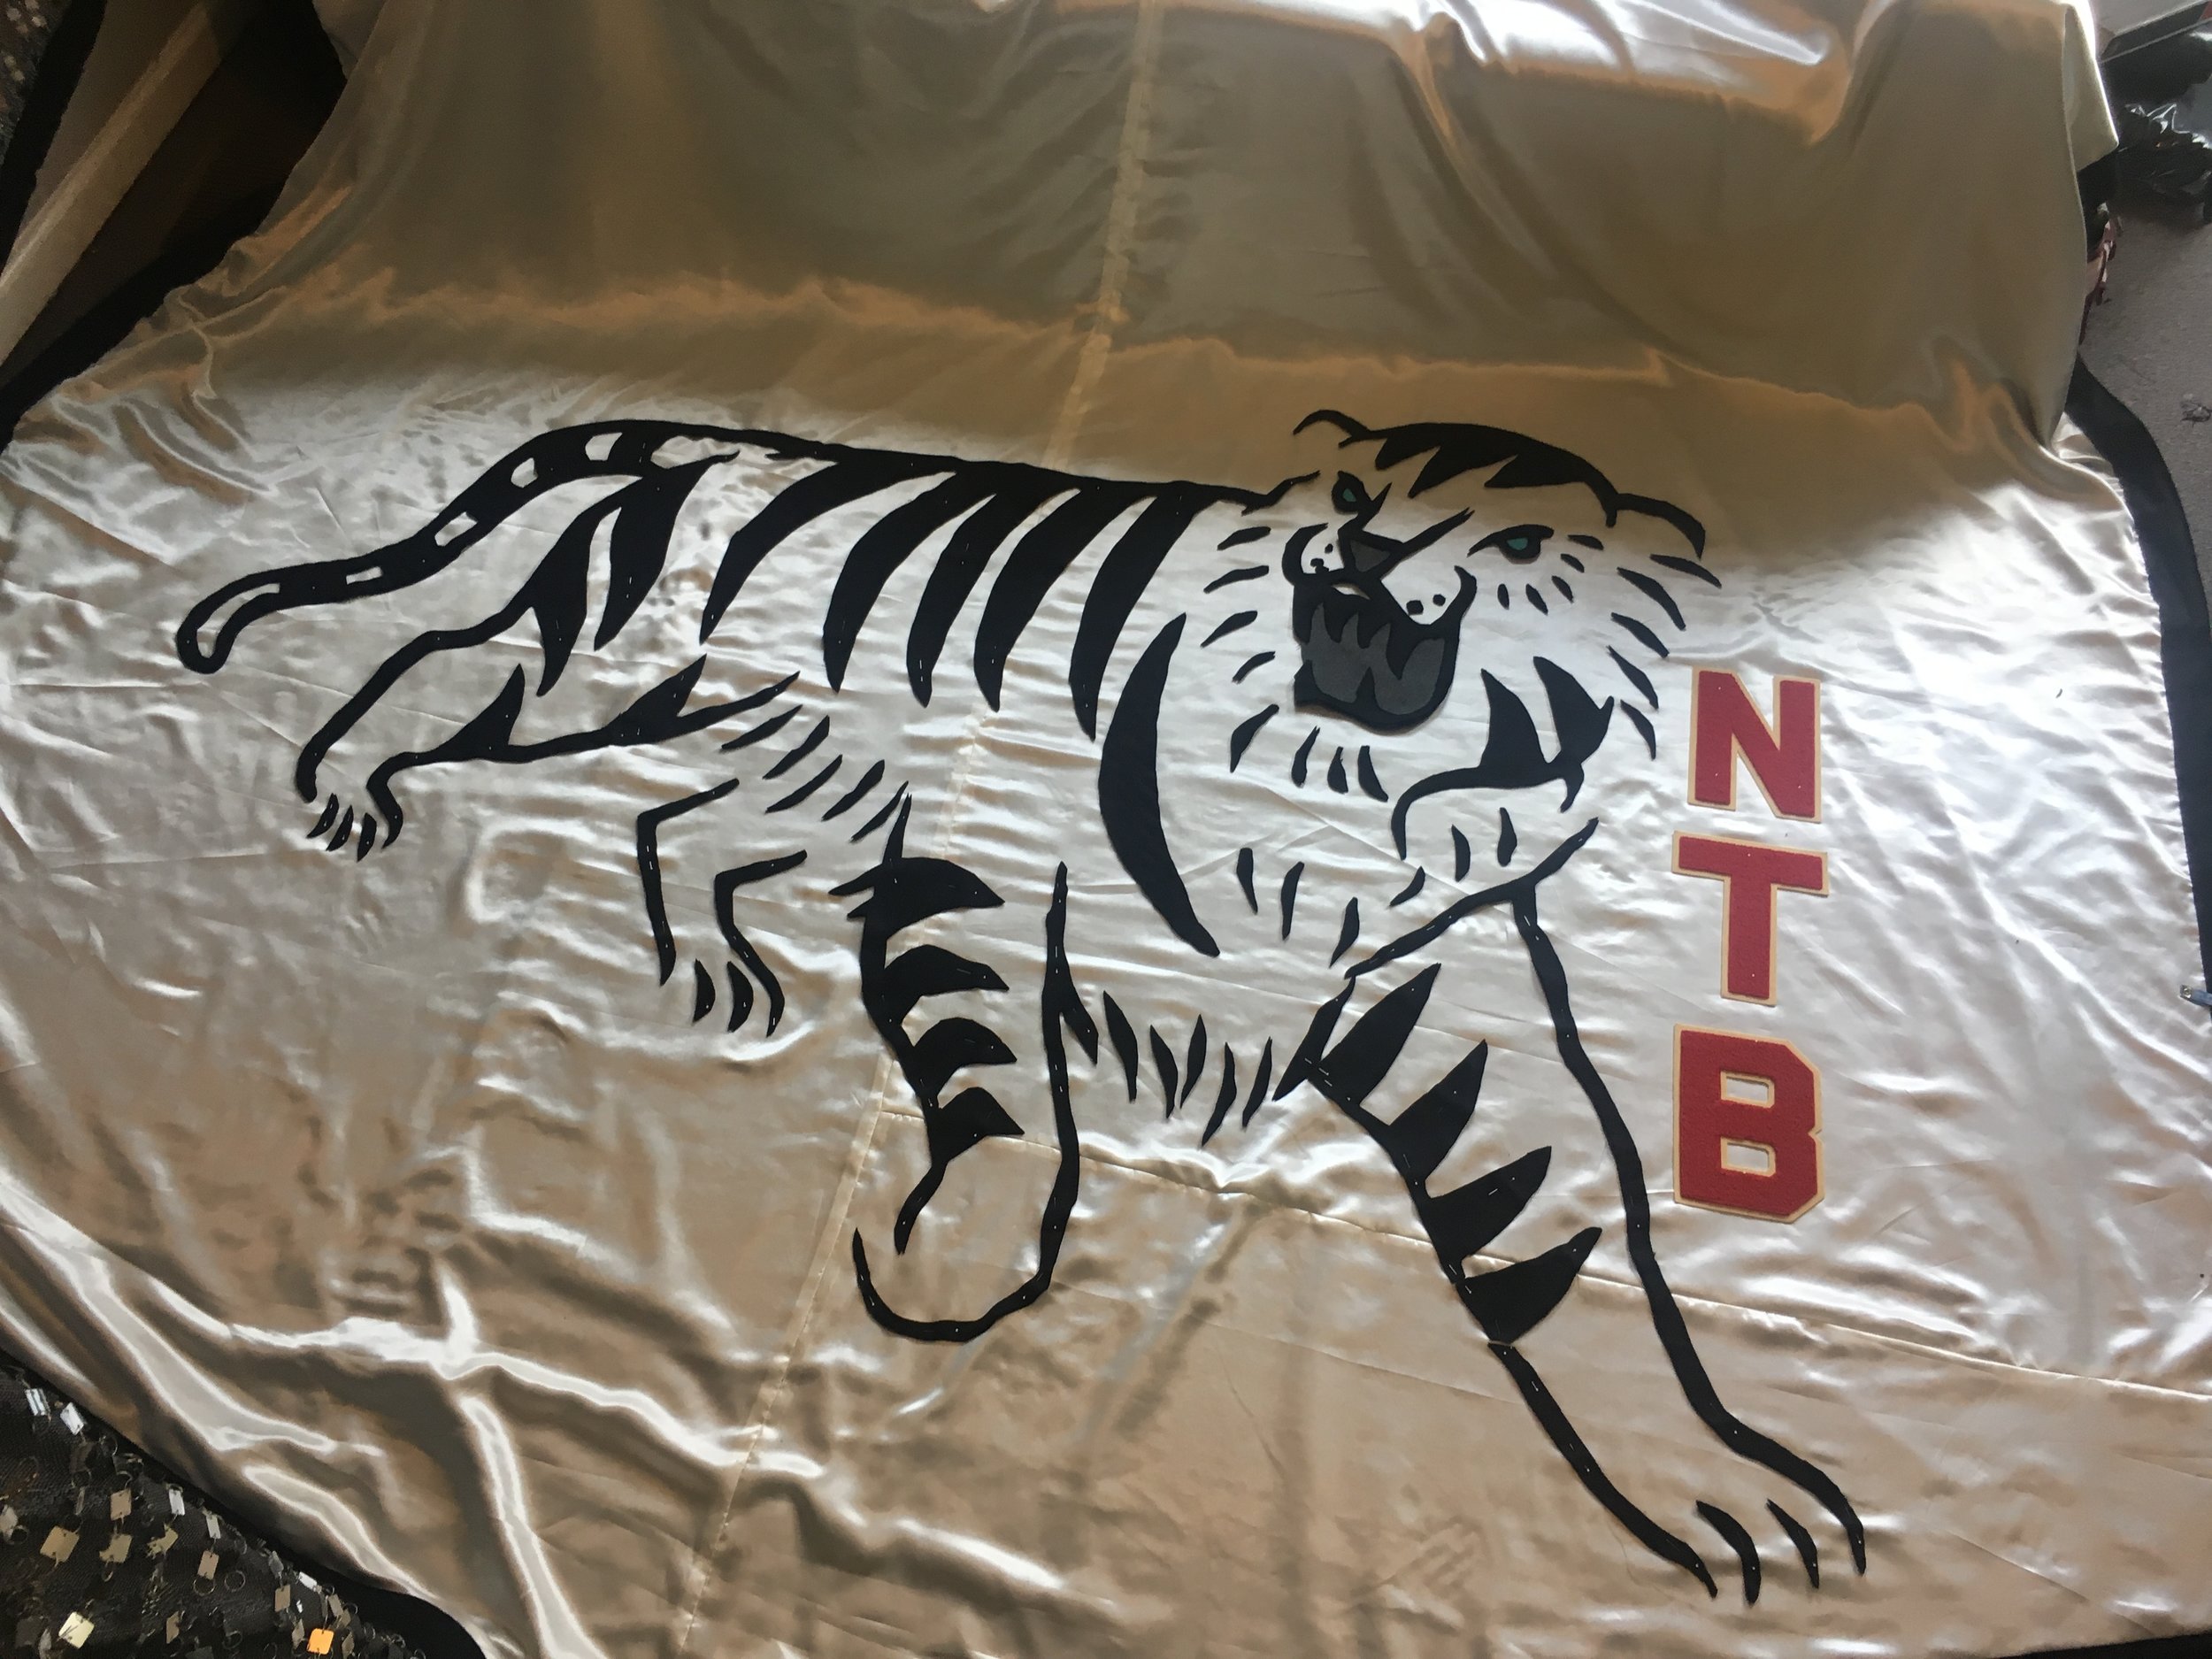
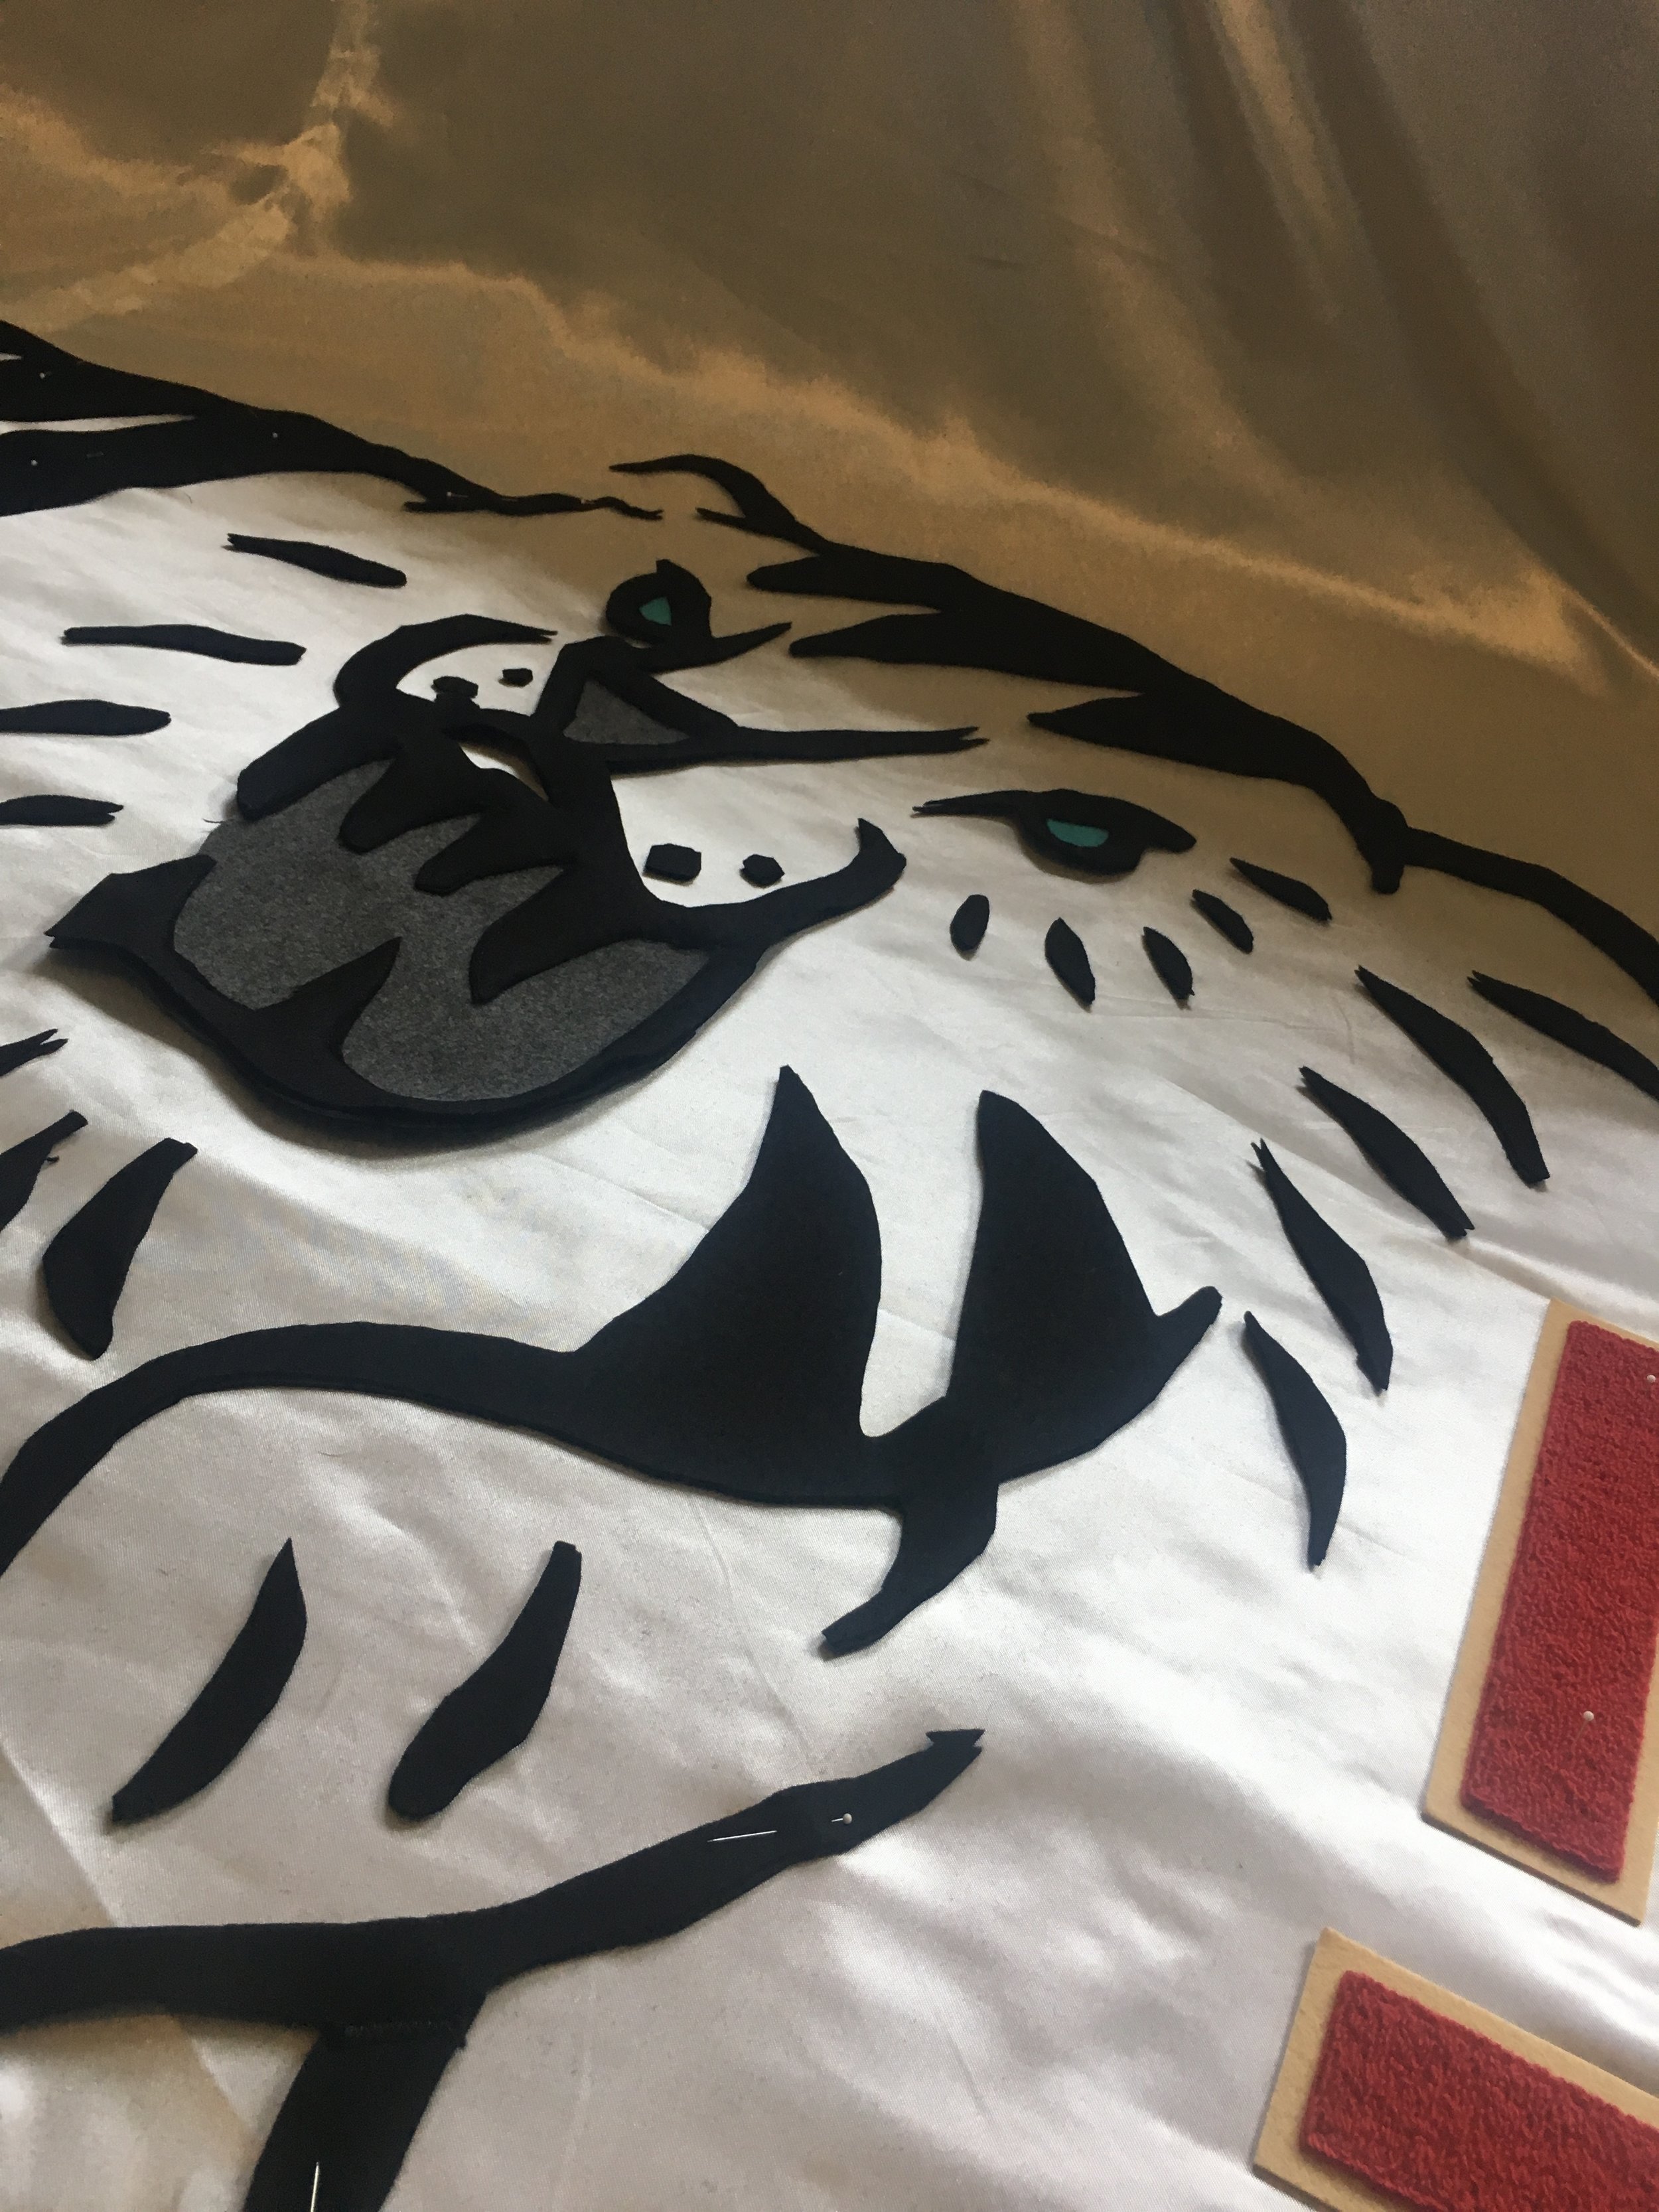
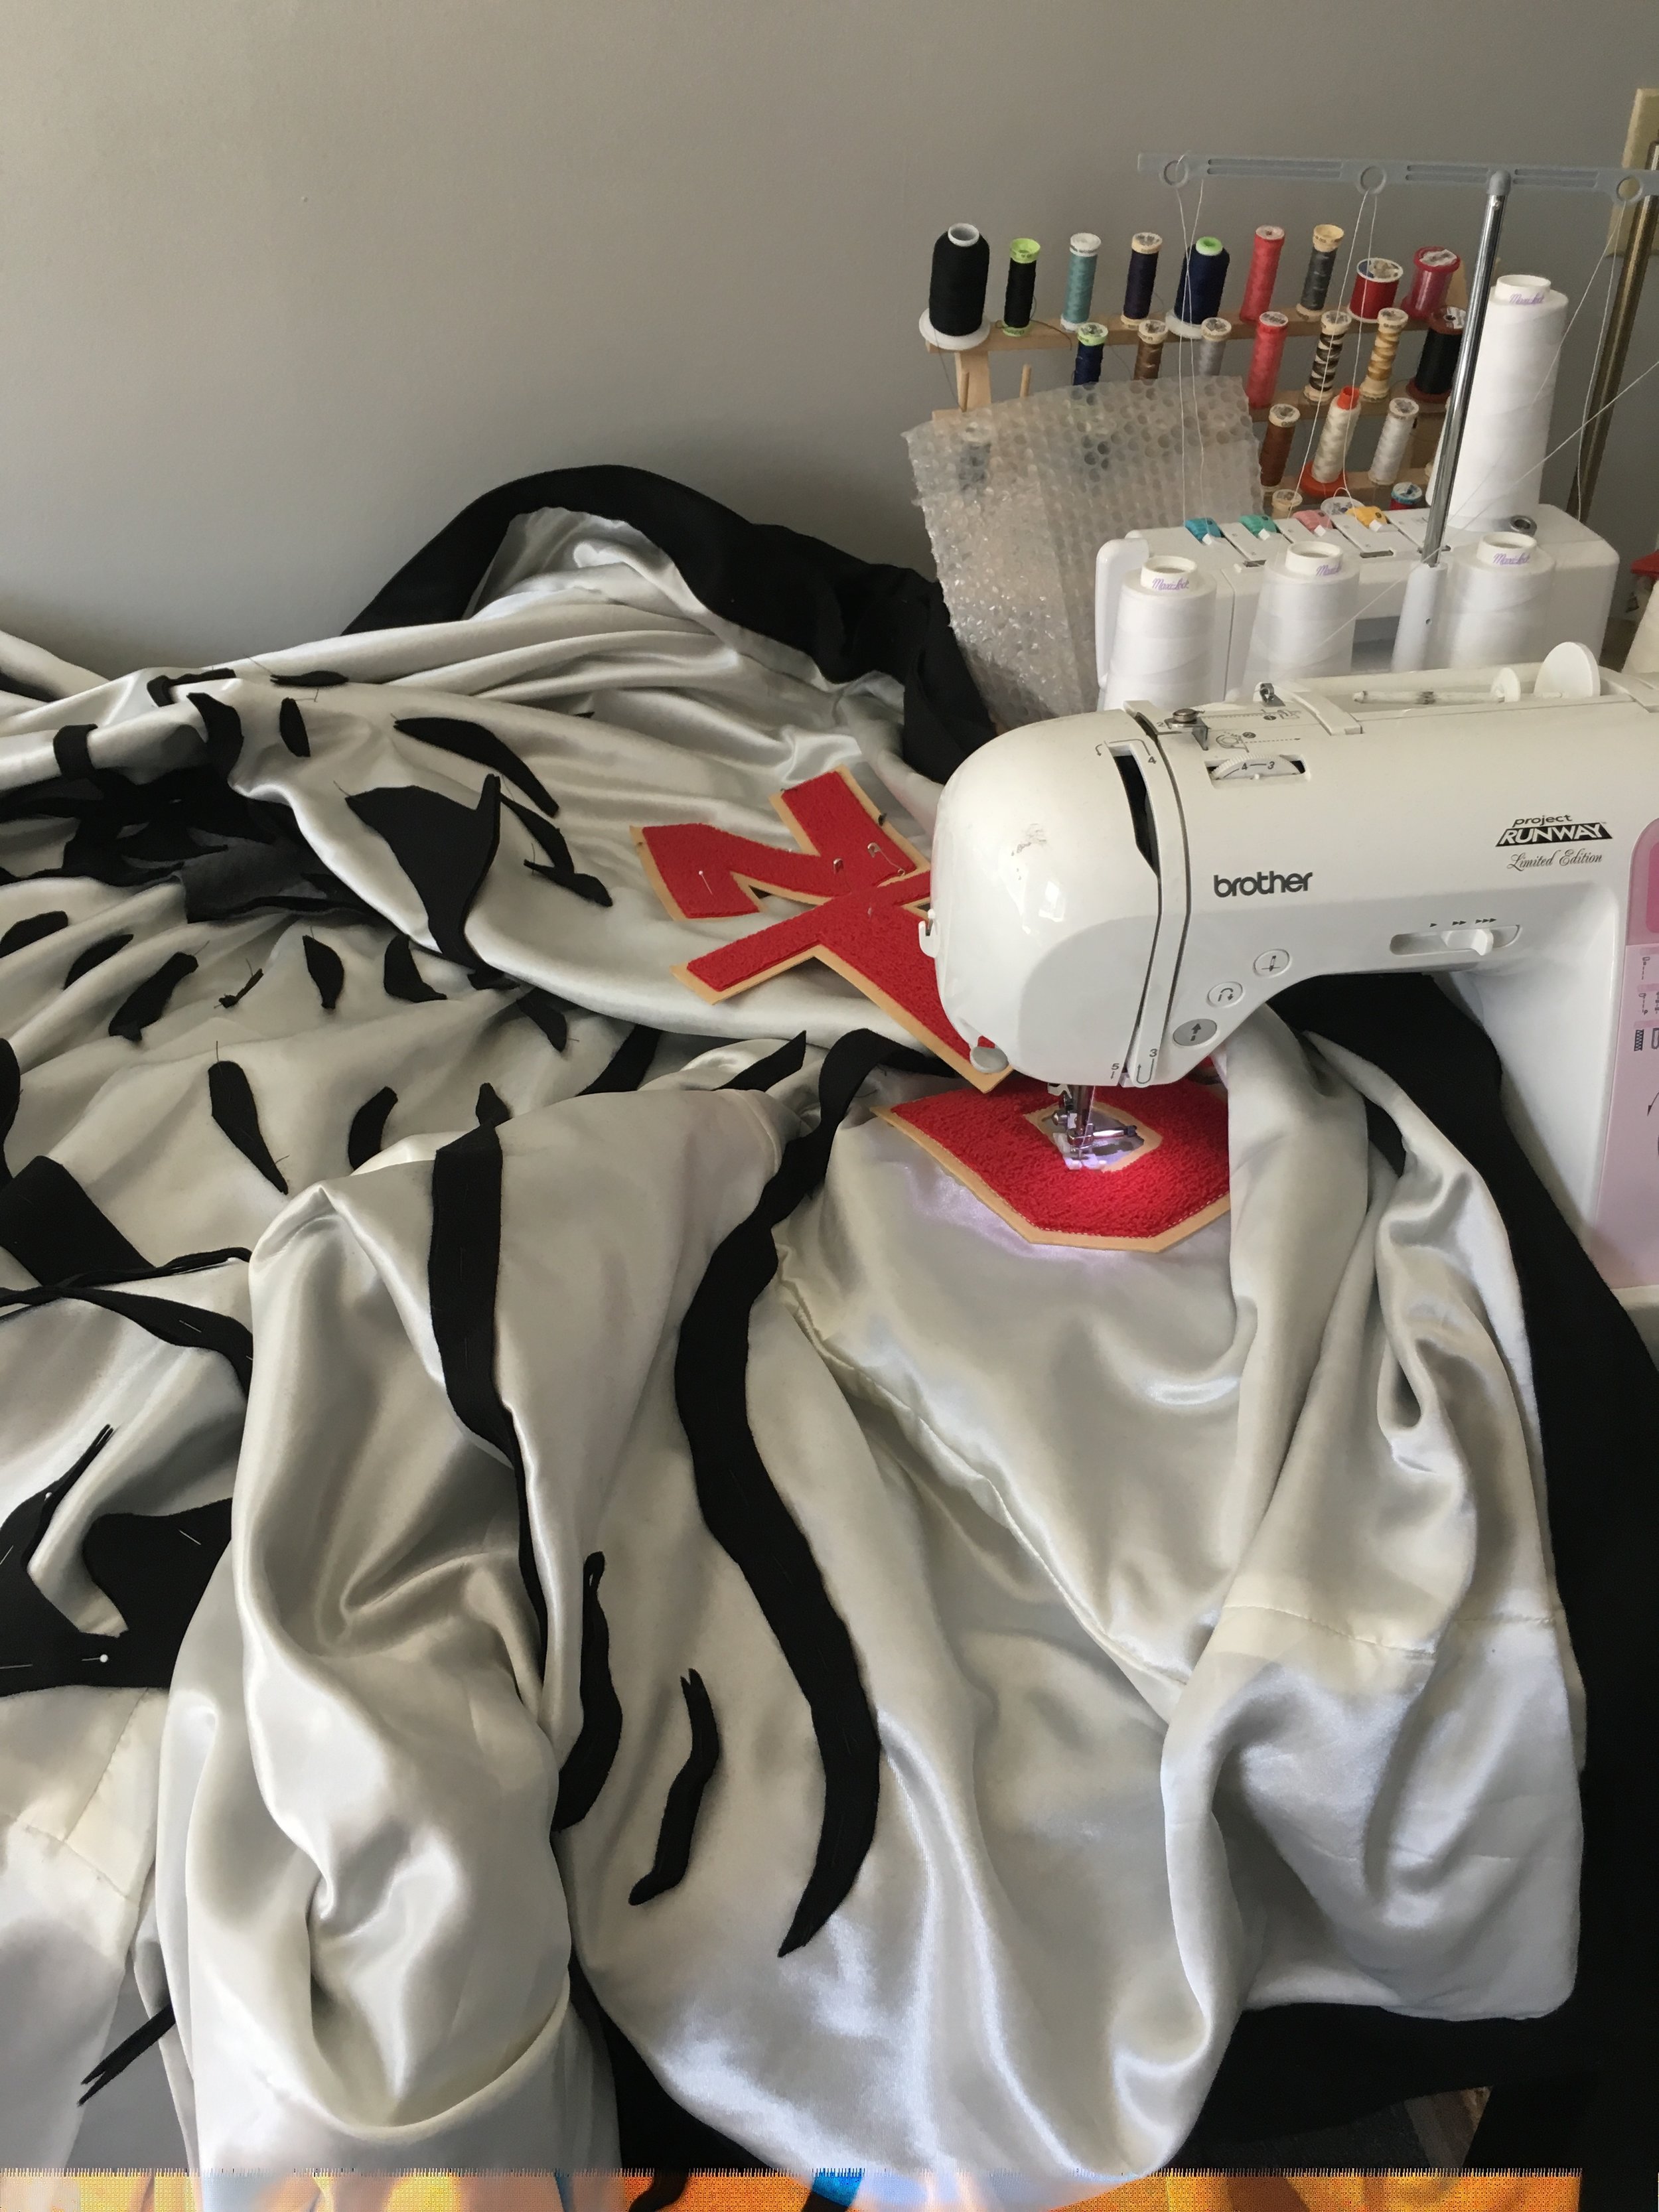
The next step was cutting out the tiger pattern from Fedex office and pinning it onto two layers of flame resistant felt. The layers were just too thin to stand on their own, and since we wanted that vintage-varsity look, this gave the tiger more depth. To keep the little stripes organized, we worked from toe to tail cutting pieces out of paper, then felt, then placing them on the backdrop. After about 3 hours of moving pieces around, we had a tiger. But then the tiger needed to be centered more so I had to start over. By hour five it felt right enough to baste in place. This thing is 7' wide.. straight pins going through 2 layers of felt, 1 layer of charmeuse, and 1 layer of canvas isn't a thing.
After basting the crap out of every stripe I rolled up the right and left sides the same way we always did quilts growing up. Starting on the right side, I locked down the varsity NTB letters, the toe, the face, the leg, and so on, turning the 'quilt' to reach the felt pieces in the middle. This was a 4 hour process alone in sewing because the layers and size meant a lot of rolling, turning, unrolling, and re-rolling. My machine stuck it out with me and I managed to get all the layers shoved into the machine and locked down.
If it didn't need to be flame retardant, I would've sealed the charmeuse and the commando fabric together and turned them into one piece. I'd use a spray fabric adhesive, or a fusible interfacing to lock those fabrics together permanently before putting the tiger on, but unfortunately that's not an option for heat resistant projects. The reason for this is that one fabric weighs more than the other, and hanging, the charmeuse separated slightly to create a balloon affect. It was infuriating. Tacking isn't an option because the charmeuse is so delicate, so I was out of options for this one. If I did it again, I think I'd prefer finding a different solution.
Tip for anyone doing anything similar: The sheer weight of this panel made it impossible to trim bottom threads. Skip those threads and only trim the tops when you need to move your needle to another section. After the whole tiger was locked down permanently I flipped the panel and got rid of all the crazy threads. I couldn't imagine doing it differently.
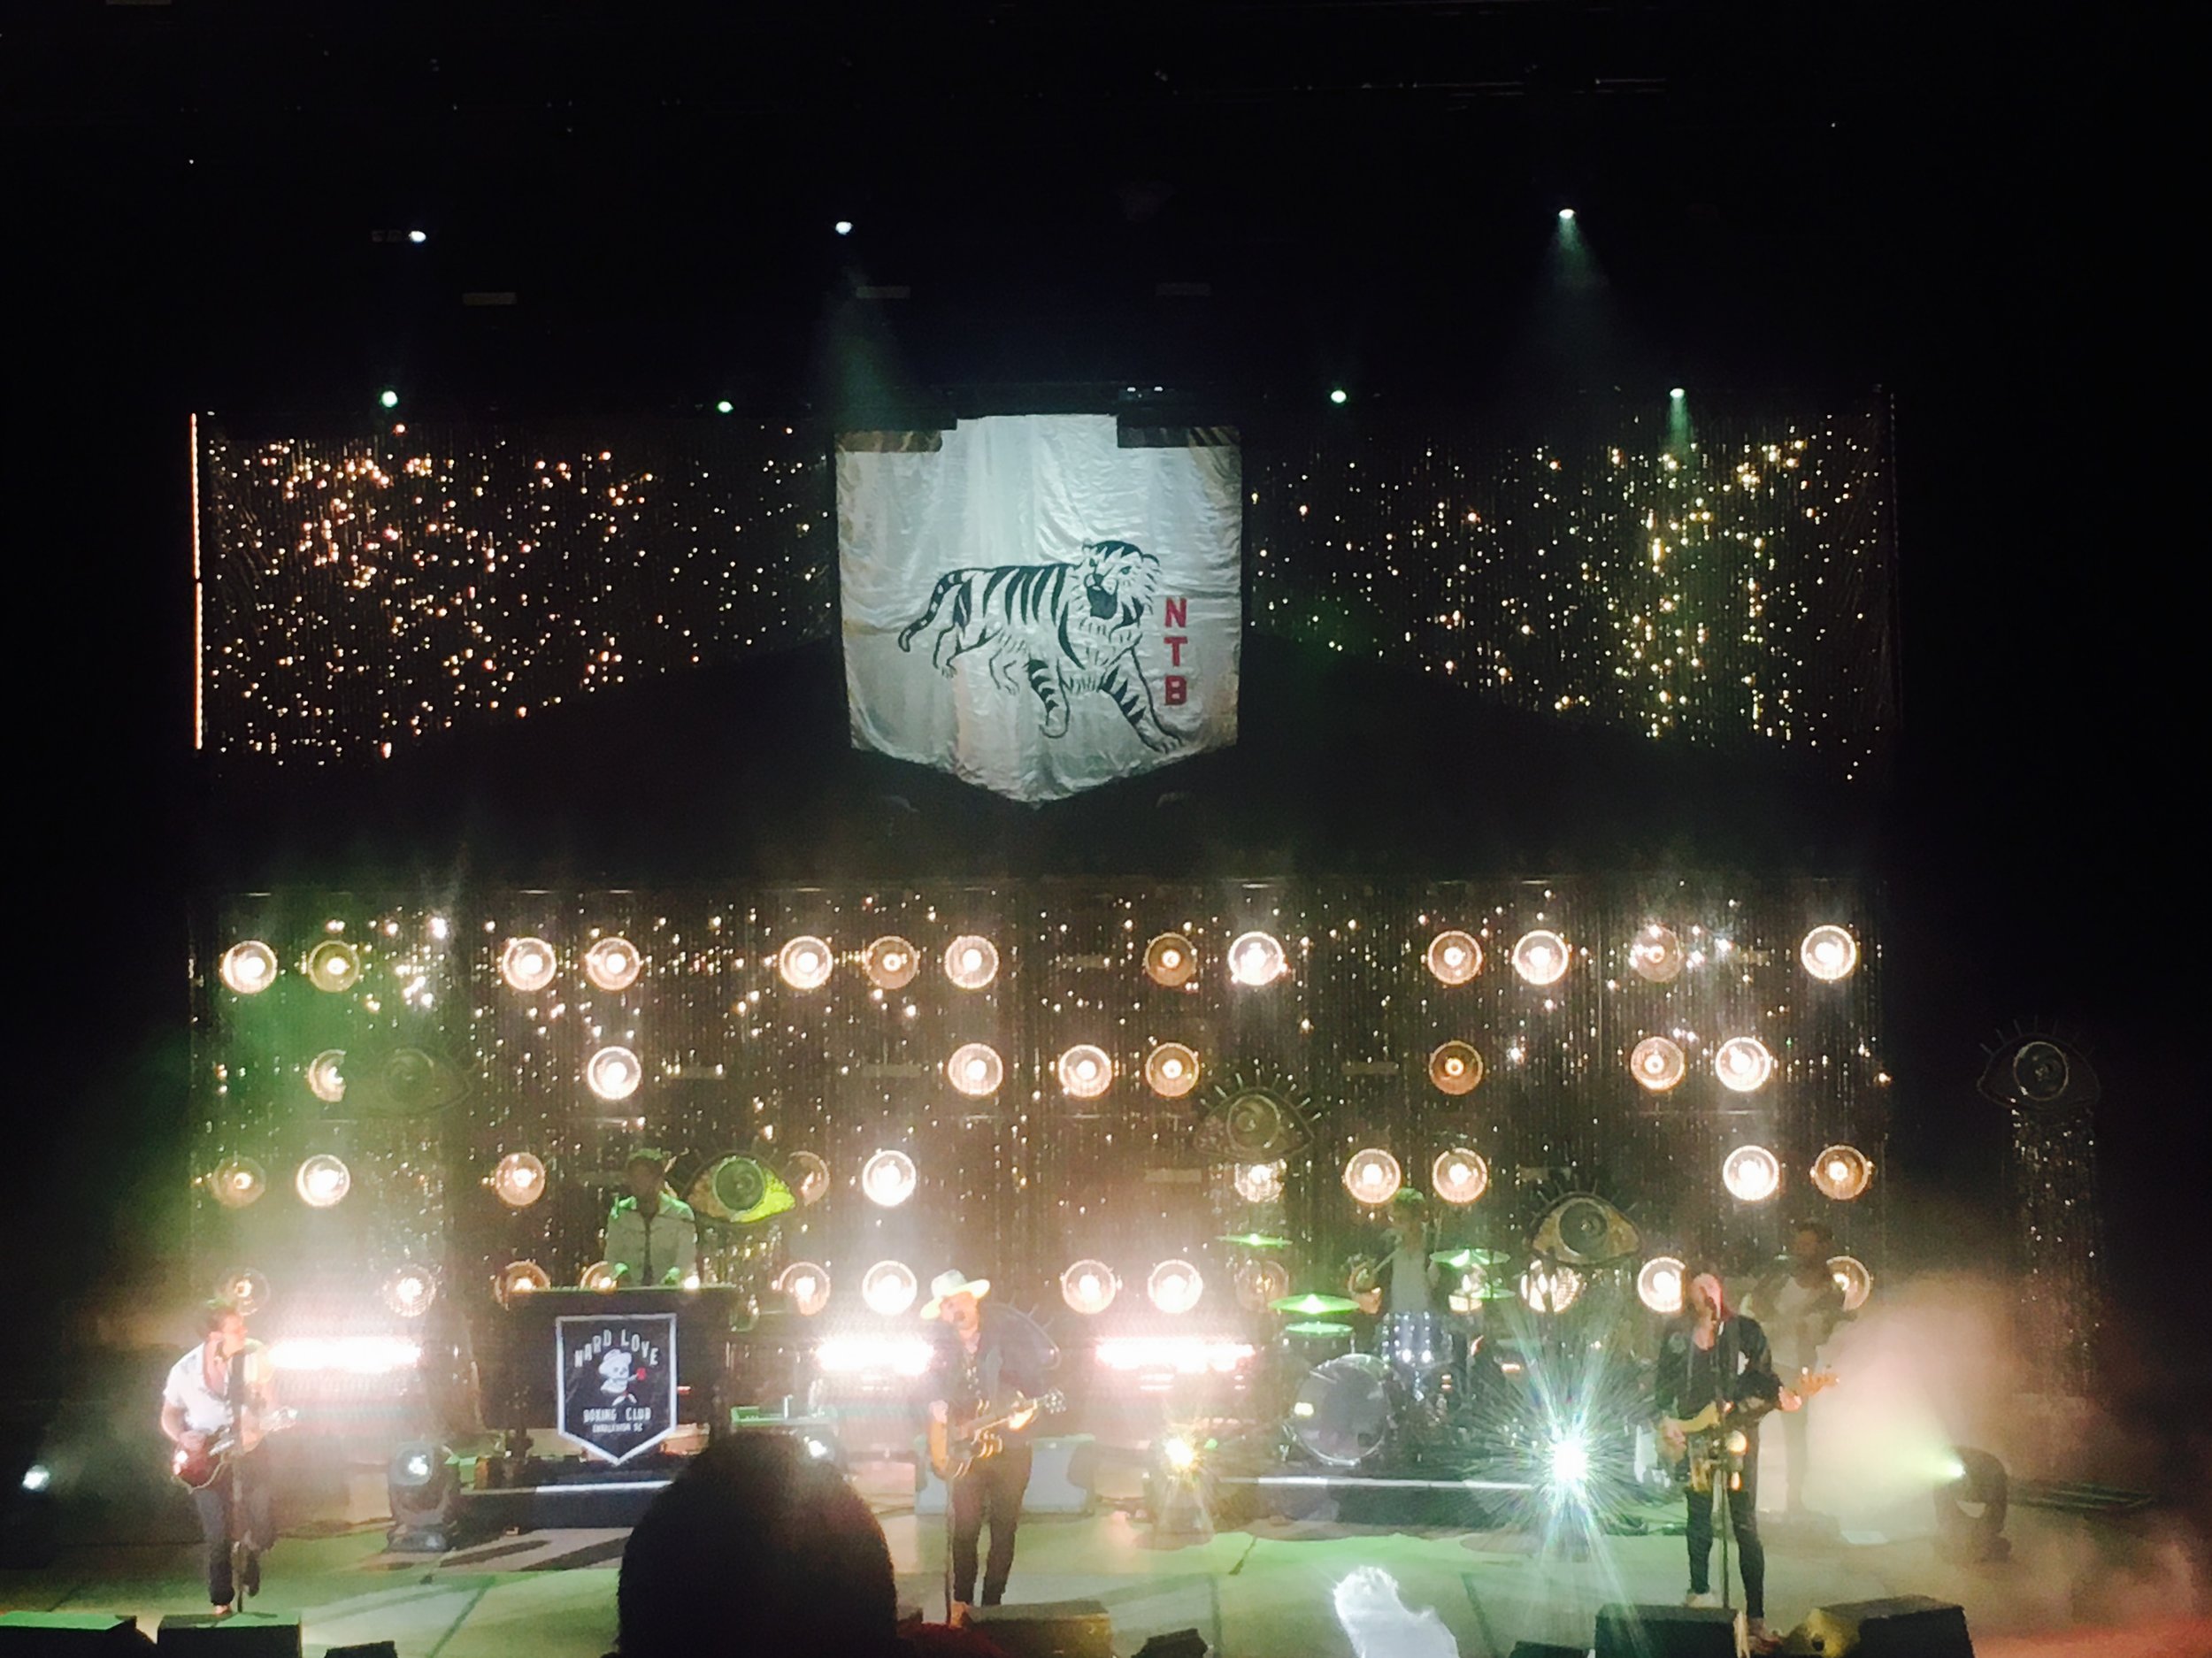
The lighting cart covers presented a different challenge, not because of their size but because of the fabric widths. While the backing fabric, the black commando cloth (for opacity) could be pieced together horizontally, the domino fabric (aka 'fabric from hell' or 'curtain fabric for the Deathstar') had to be pieced together vertically, and matching those two up size-wise was a serious challenge for some reason. I ended up pulling all the seams apart in the domino cloth (silver-black) and adding a strip of commando fabric as a stabilizer. We then attached female velcro looping to the front-facing side so that they'd stick onto the backs of the lighting carts and create silvery shadowboxes for the lamps onstage. When we assembled them, there were at least TWENTY seams that just weren't smooth and looked like they needed stabilizer even though they were already stabilized (I was ready to THROW SH**, especially after how much time I invested to ensure that WOULDN'T HAPPEN). If anyone can tell me why this is, even after playing with tensions, stitch sizes, needle sizes, and adding stabilizer, I'd like to pay you to come live in my studio and share knowledge. This was solved by breaking every other stitch in the trouble spots and hand stitching to fill in the holes. Here's the finished product, both with the lighting cart covers and the backdrop:

The first time I got to see all three panels together was at rehearsals. Talk about stressful! Look closely at the fabric behind the lighting carts and you'll see the tension issues I ran into.
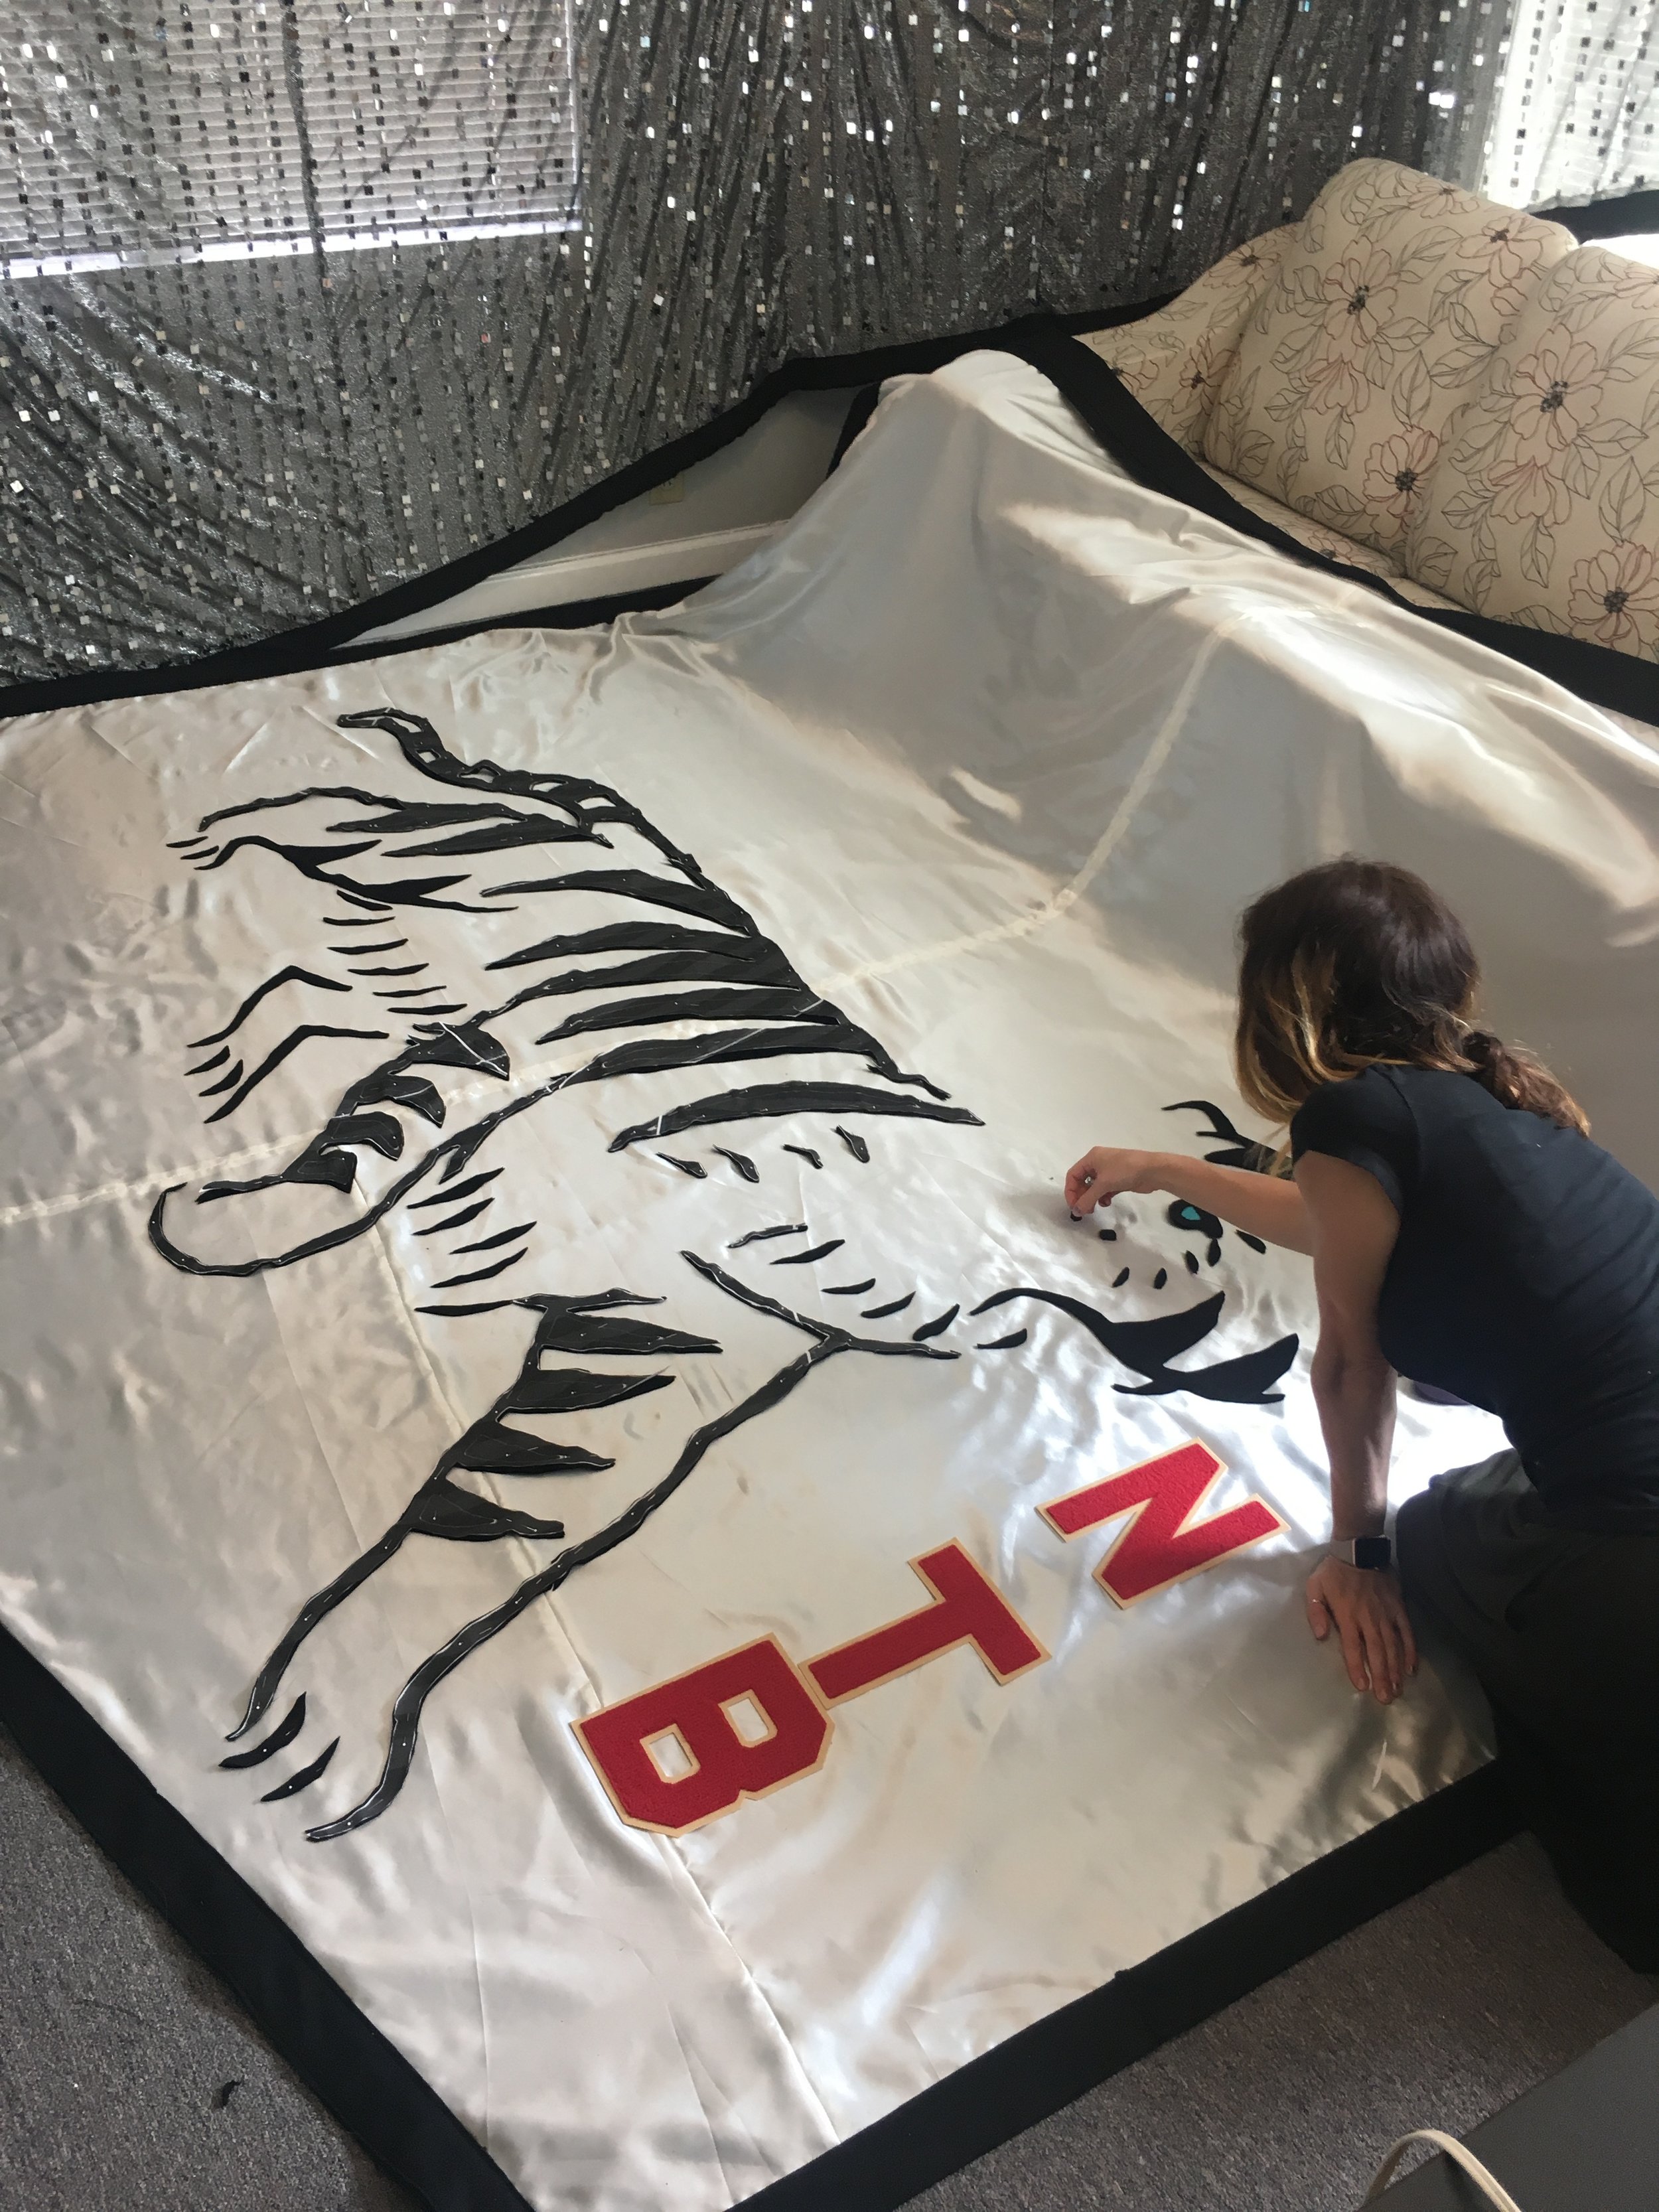
I stayed the week for rehearsals to put together final changes, move velcro around until the backdrop hung justtt right, and give that charmeuse a little facelift (see the slight separation from the backing fabric? Once again, wishing I could've sealed these fabrics together.) After the backdrop came together (and we moved the NTB around about 4 times to get it straight (slippery charmeuse), rehearsals went well. I ended up glueing a couple hundred glass mirrors onto Bear's guitar and sliced my fingers up pretty badly (sharp little suckers). I also made a cape to cover the mirror jackets so the surprise lighting gag wouldn't be ruined until it was time.
Overall, I listened to the same song about a hundred times while whipping up whatever was asked of me, got in on all their bomb catering, and managed to sew through 3 different fingers, so a pretty standard rehearsal week.
Right before load out I tailored a few jackets/blazers for the band and shaved down the quilt batting inside an over-puffy puffer jacket so it was less 80's and more 'I'm the bass player in a super cool band'.

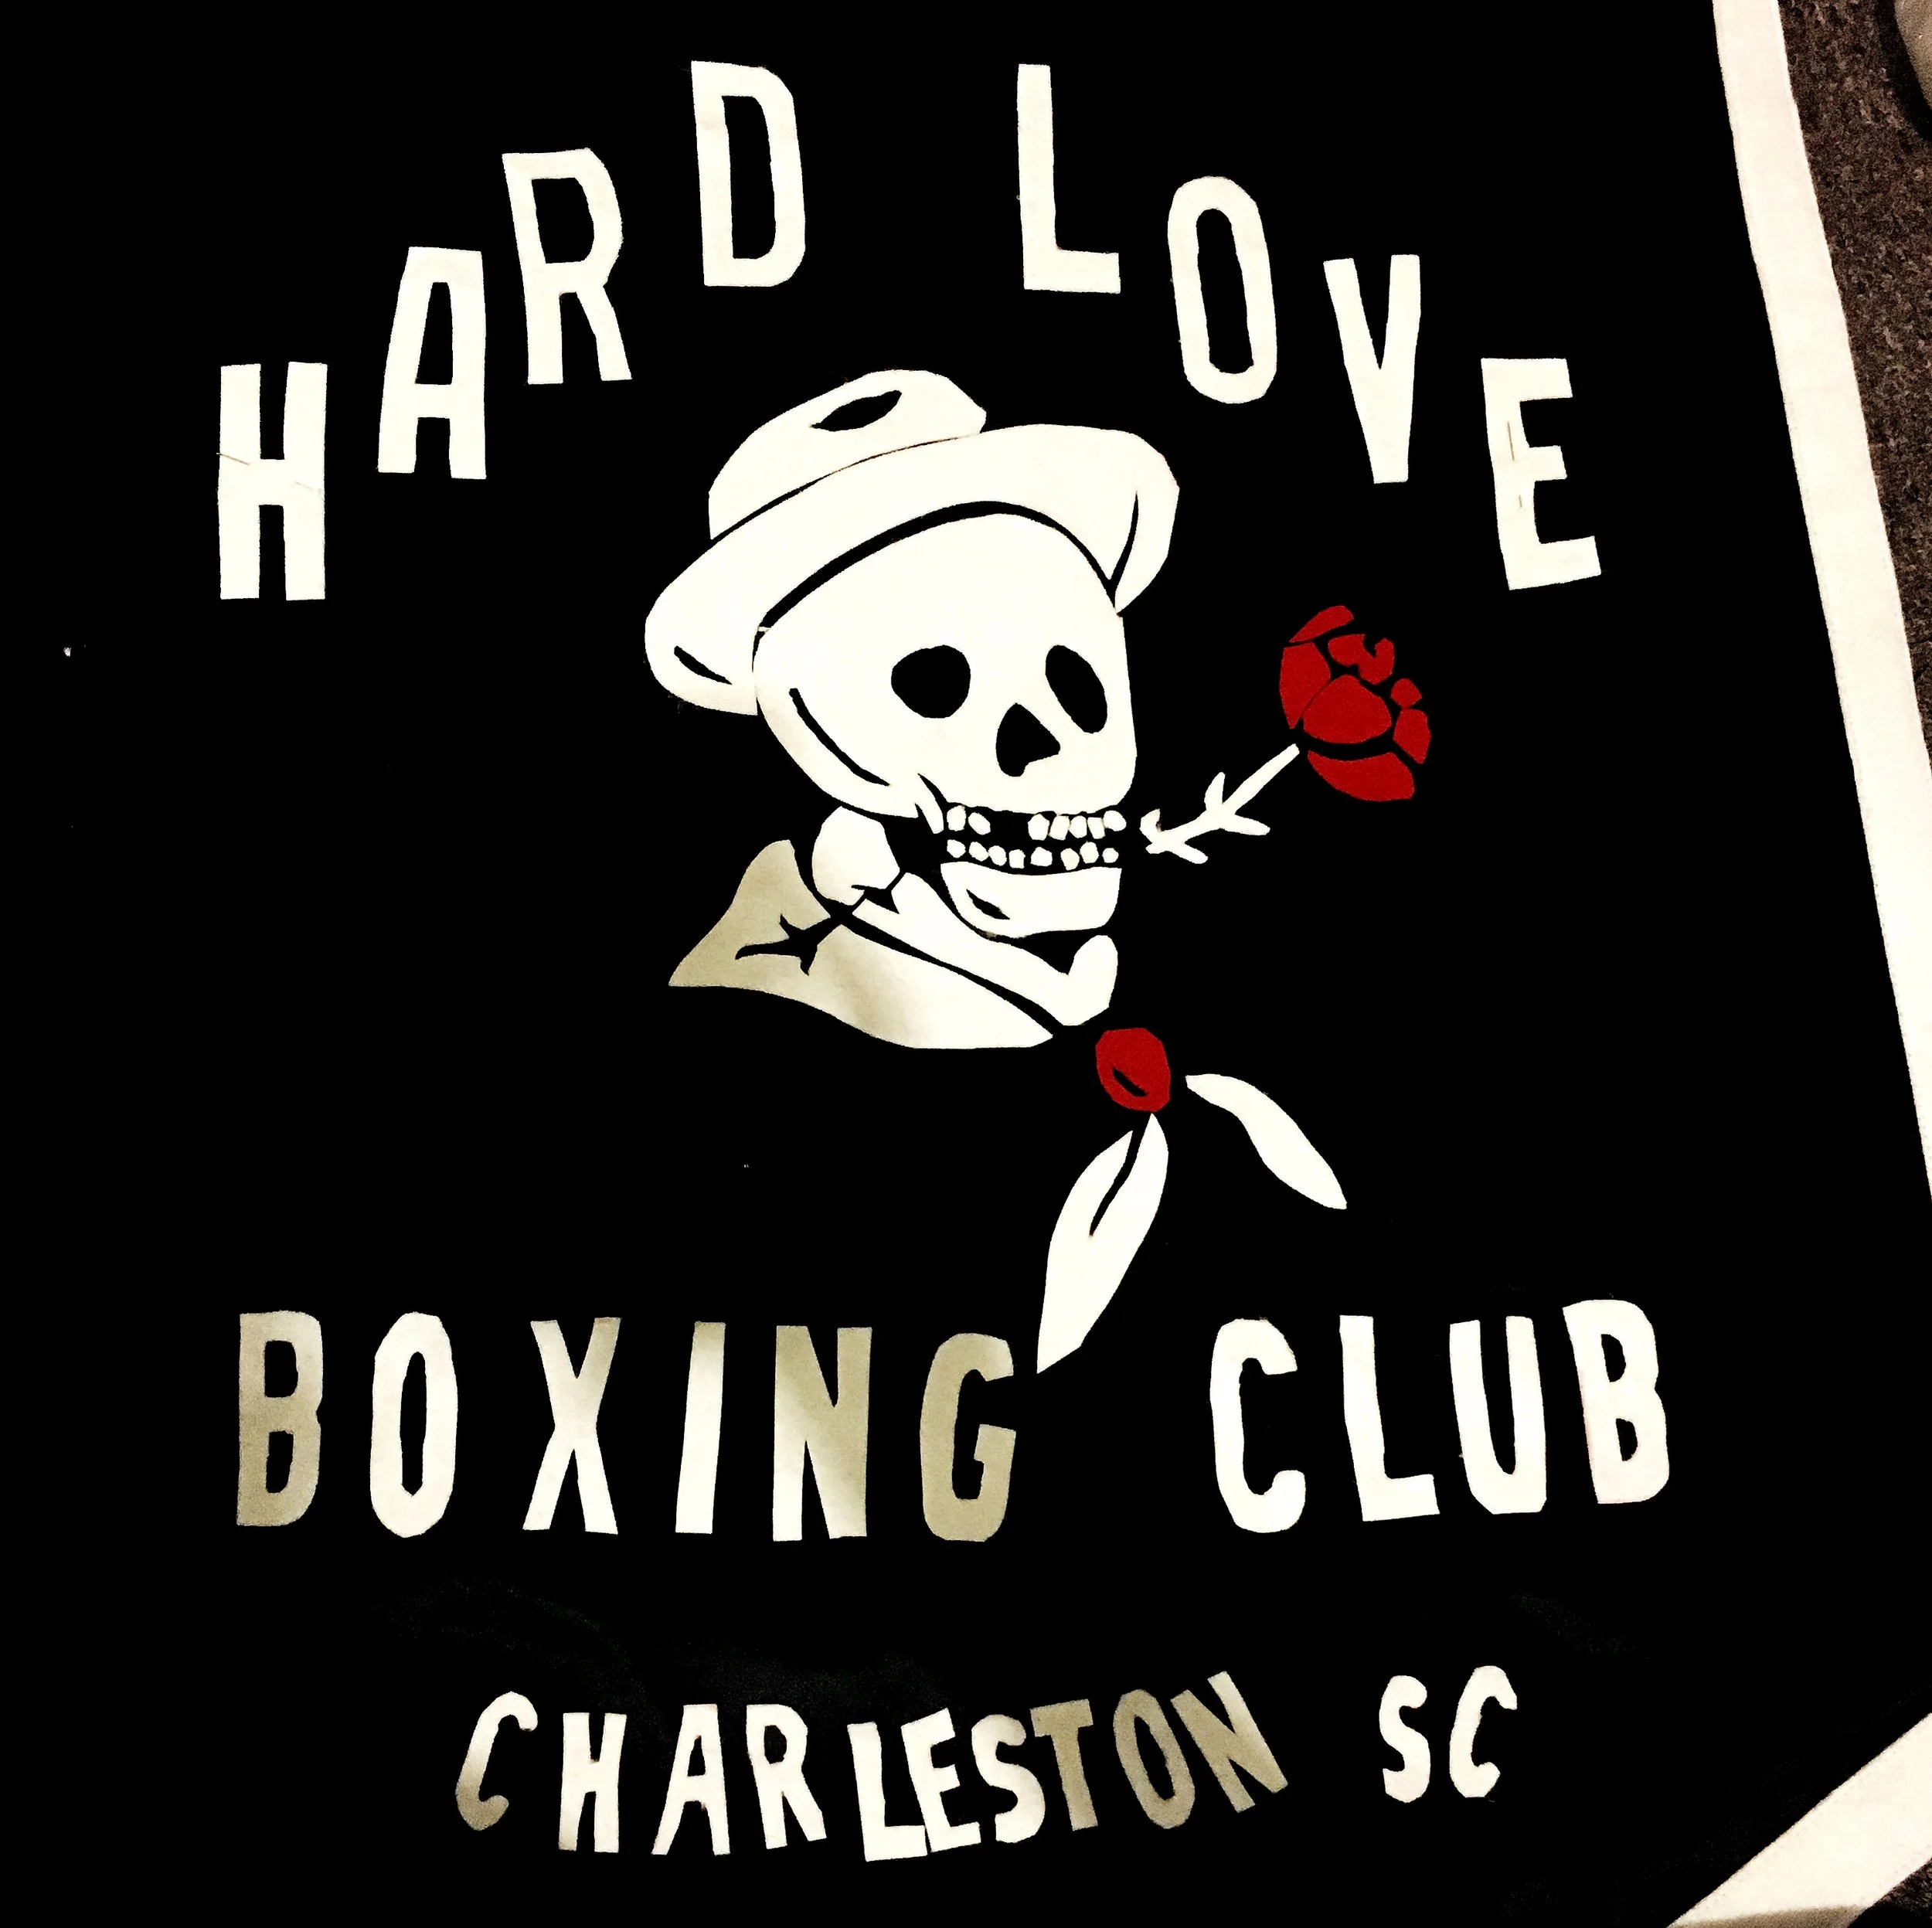
I also ended up whipping up a few felt banners, one for the organ, and another for the upright piano (which was ordered after the band flipped over the initial 'Hard Love' skull banner). I did these by taking the logos they had, removing the color, and having them printed to the right size within the banners. I used the prints as patterns, and once the felt pieces were cut out I just quilted them onto the banners I made out of charmeuse and leftover commando fabric (for stability). These were really fun to make, and their size made them super controllable in my machine compared to what I had just survived :) In hindsight, I wish I had time to double up the felt on these too.

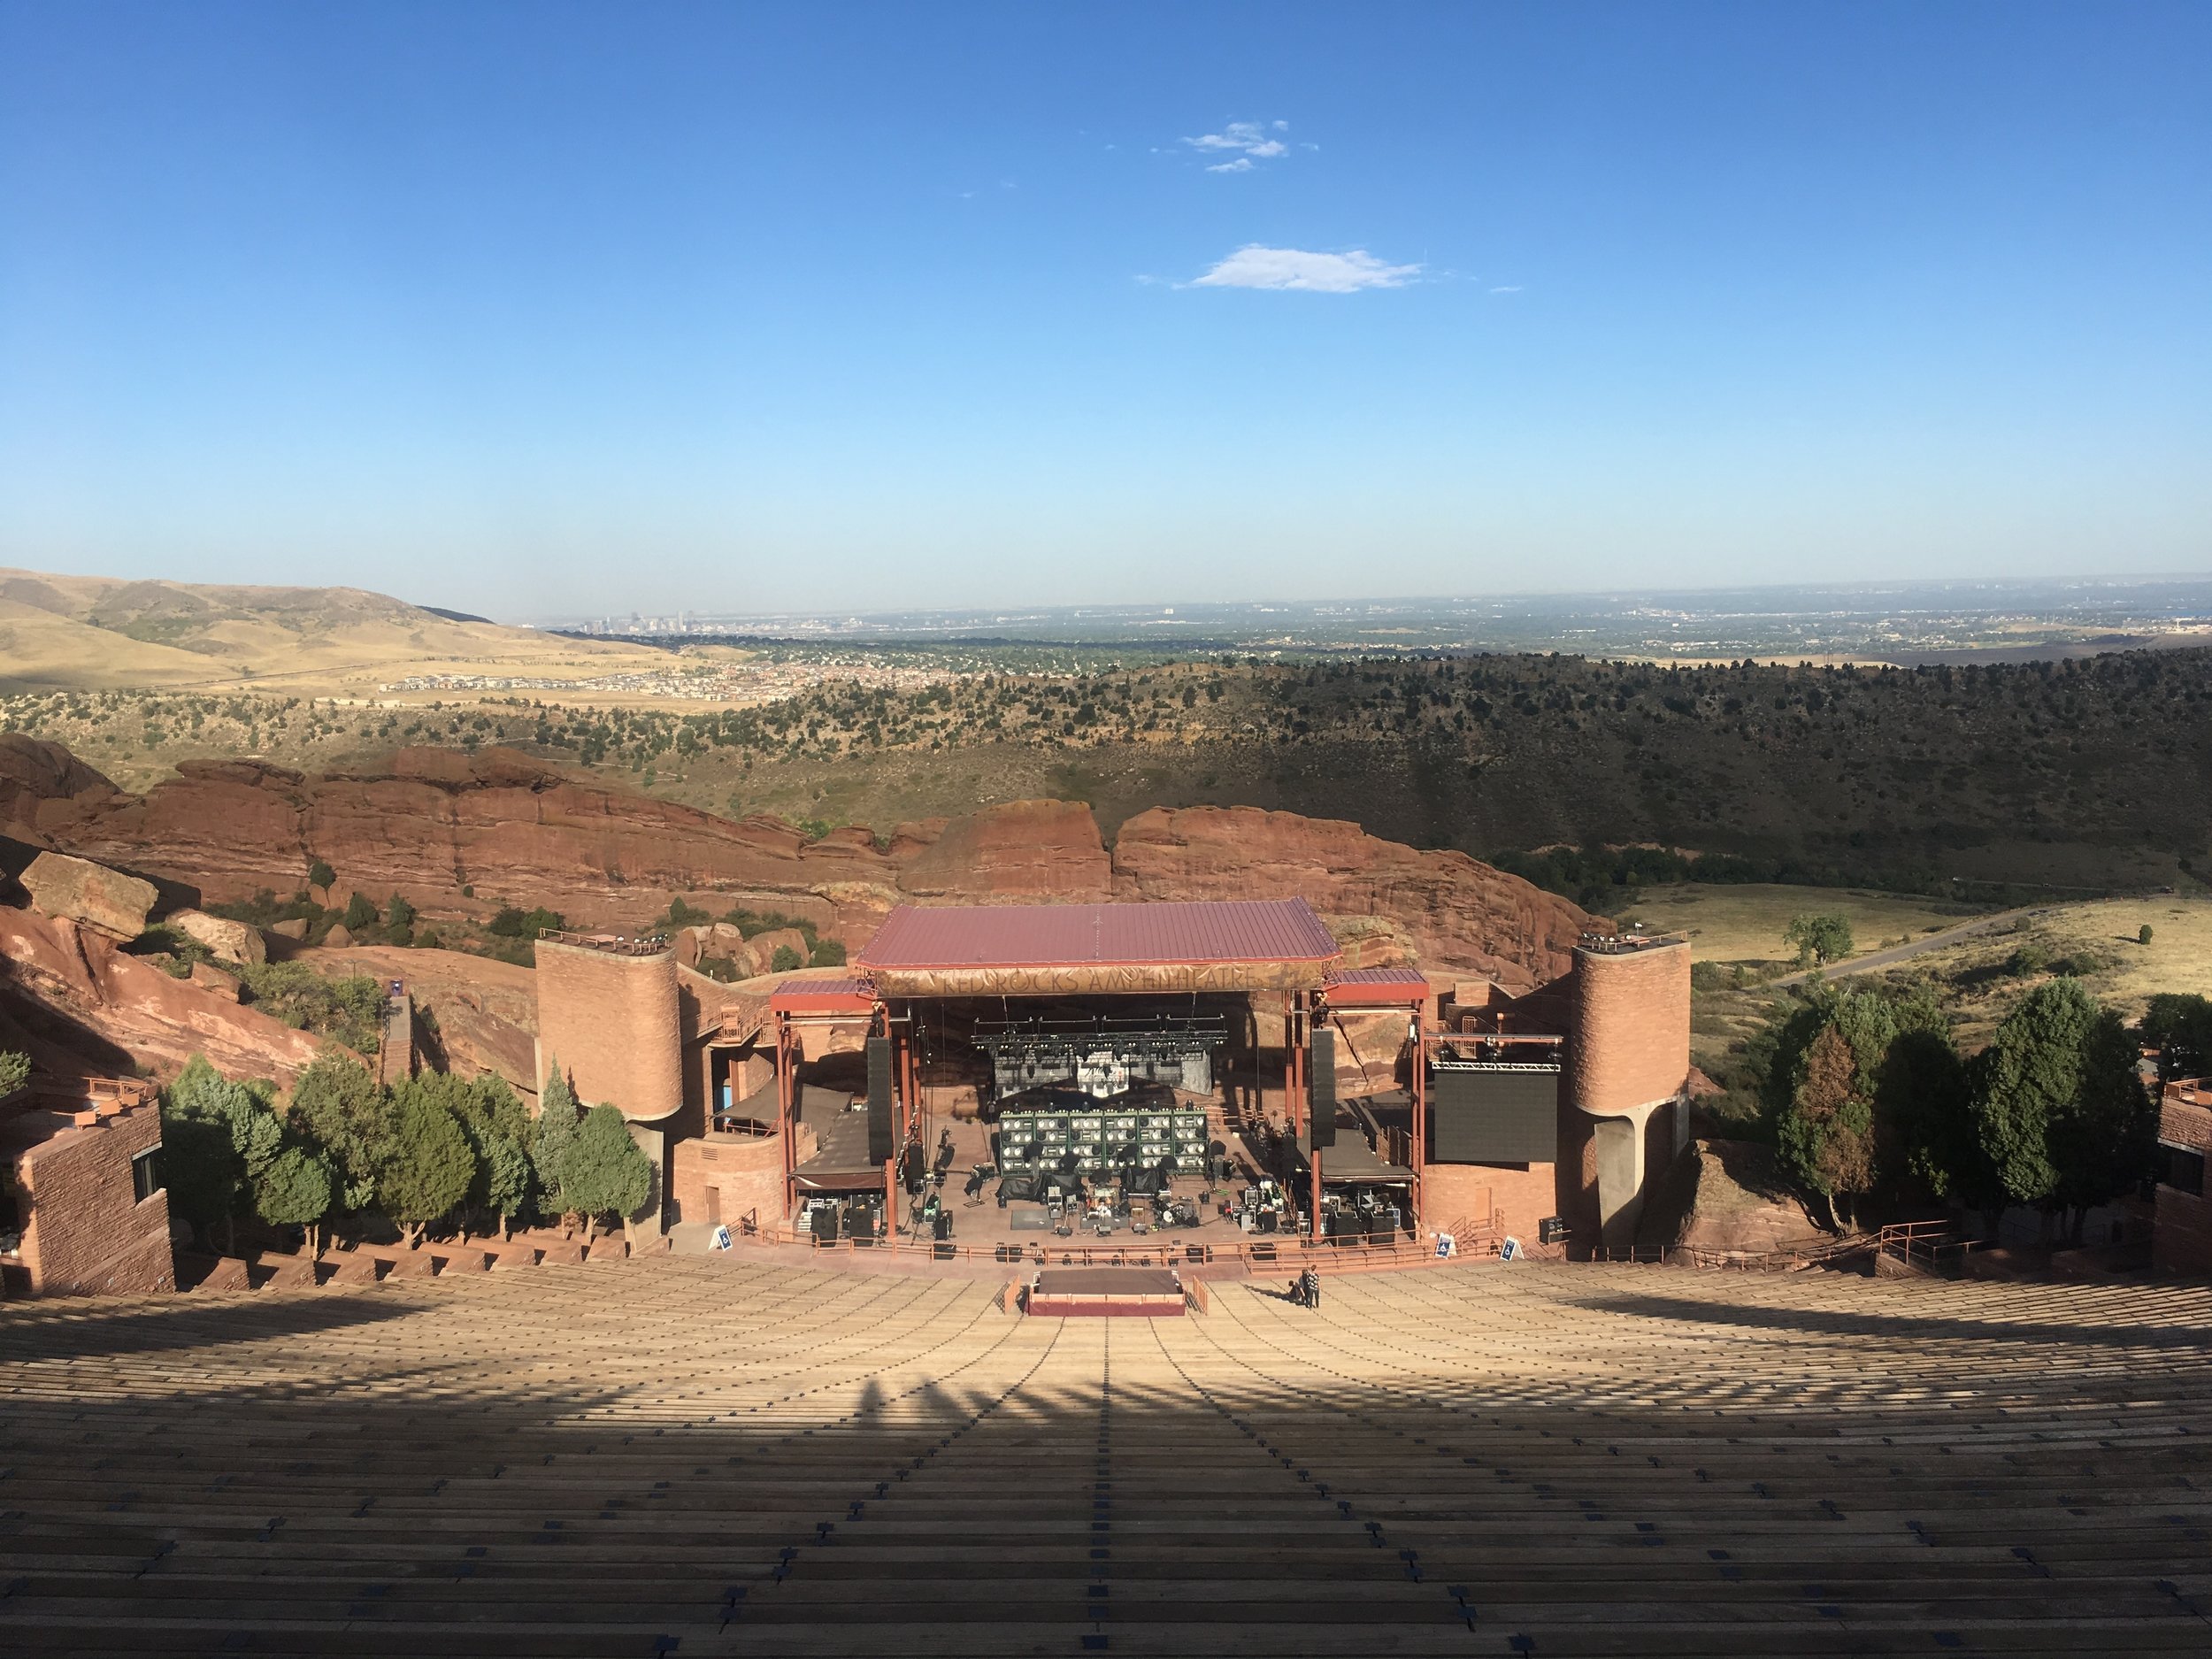
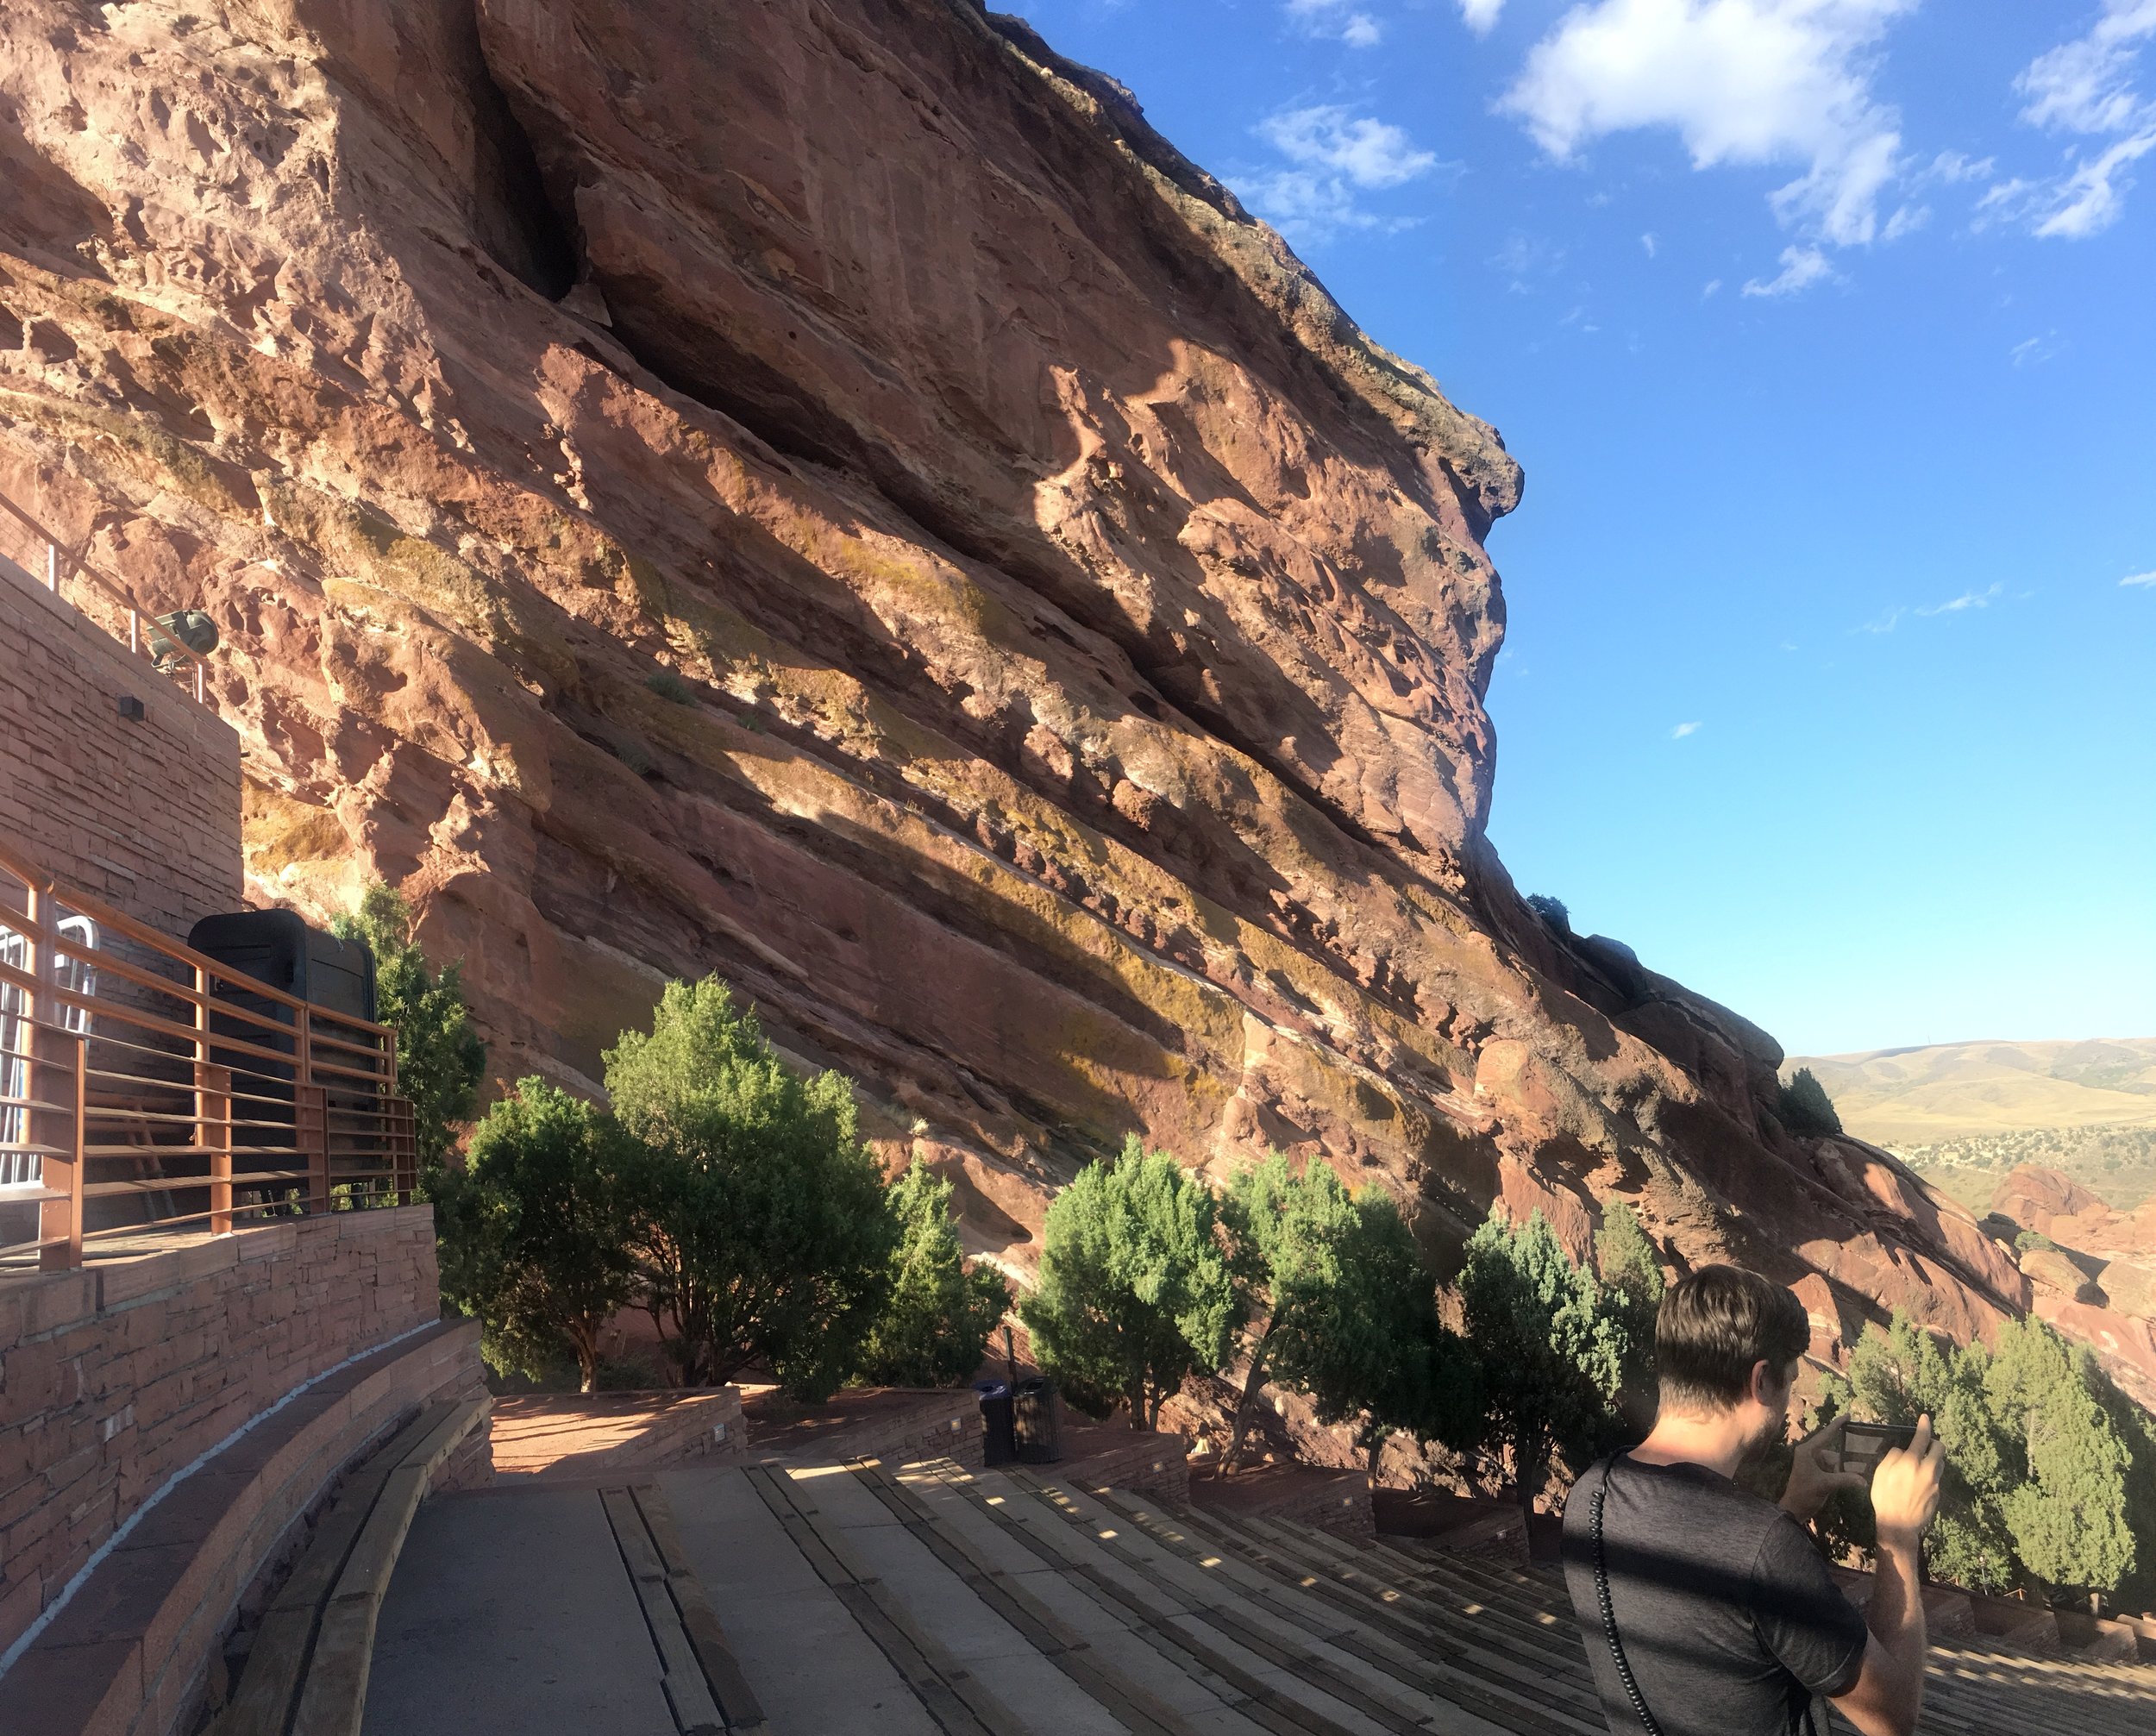
I finished the black mirror jacket at 3:45 AM Wednesday morning, the day of their Red Rocks show. After a brief delay at TSA (they did NOT love how that jacket looked on the screen, I was on a flight from Nashville to Denver by 10 AM and had it in the production office at Red Rocks by 3 PM so Bear could wear it that night. Although I'd been staring at all the individual pieces for a month, and seen everything in rehearsals, it was a really great to experience most of the show at such an awe-inspiring venue on a random Wednesday.
Thanks for the experience, guys ❤️

Issues that taught me things:
- Have a workspace at least twice the size of your finished project.
- Fabrics that don't agree shouldn't be made to- here, a stiff canvas paired with light scrim-like stretchy wovens, and shape-shifting charmeuse on top of stiff canvas. Charmeuse also posed a problem with the placement of the NTB - it slides on top of its base, and shape shifts when it's hung, meaning the NTB went a bit wonky. This took 3 tries to get the placement right.
- Nomex thread catch up pretty badly on scrim material - if I did it again I'd opt for a lighter weight (I used Tex 50 for non-weight bearing stitches and Tex 90 for weight bearing)
- Grommeting 2 layers of material created issues (nylon webbing did fine, nylon with a tiny bit of light scrim became a nightmare to get the grommets to stay)
- The opacity of the two side panels meant that even though you'd traditionally sew stabilizer lines into the seam to get a clean, perfect no-pull seam, ANY COLOR would make for a visible line when the backdrop is backlit. Thus tension was a serious issue- I ended up with a stitch size of 5 and a thread tension of 2 to make these 4 seams happen (there are 3 panels of fabric that make up 1 side panel).
- The shape of the bottom of each side panel made the side pieces oblong - meaning that although it's perfect on the ground, when it hangs, the long end is going to weigh more than the short end, thus creating a wavy/bubbling curtain effect. A jack chain won't fix this problem. We had to create tension across the bottom of the backdrop as a whole in order to 'straighten' the weight while it's suspended - velcro does the trick, ties do not.
- I needed 8 continuous yards of charmeuse to make the middle tiger panel, and received 7 continuous yards and 1 yard cut separate- ARGGHH. Every time you add a seam you add a weight issue, a hanging issue, and potential for separation when there's two layers (I'd use an adhesive or fusible interfacing next time around, even if it takes Flamex-ing it myself).


