
Tour prep: Home Free
After putting together a custom piece for Home Free a while back, I got to come back and play when it came time to tour prep them for Fall. Olena had several designs put together, and after a quick trip to Fedex to turn her designs into printable patterns, I was ready to begin the pieces.
Black and red leather jacket
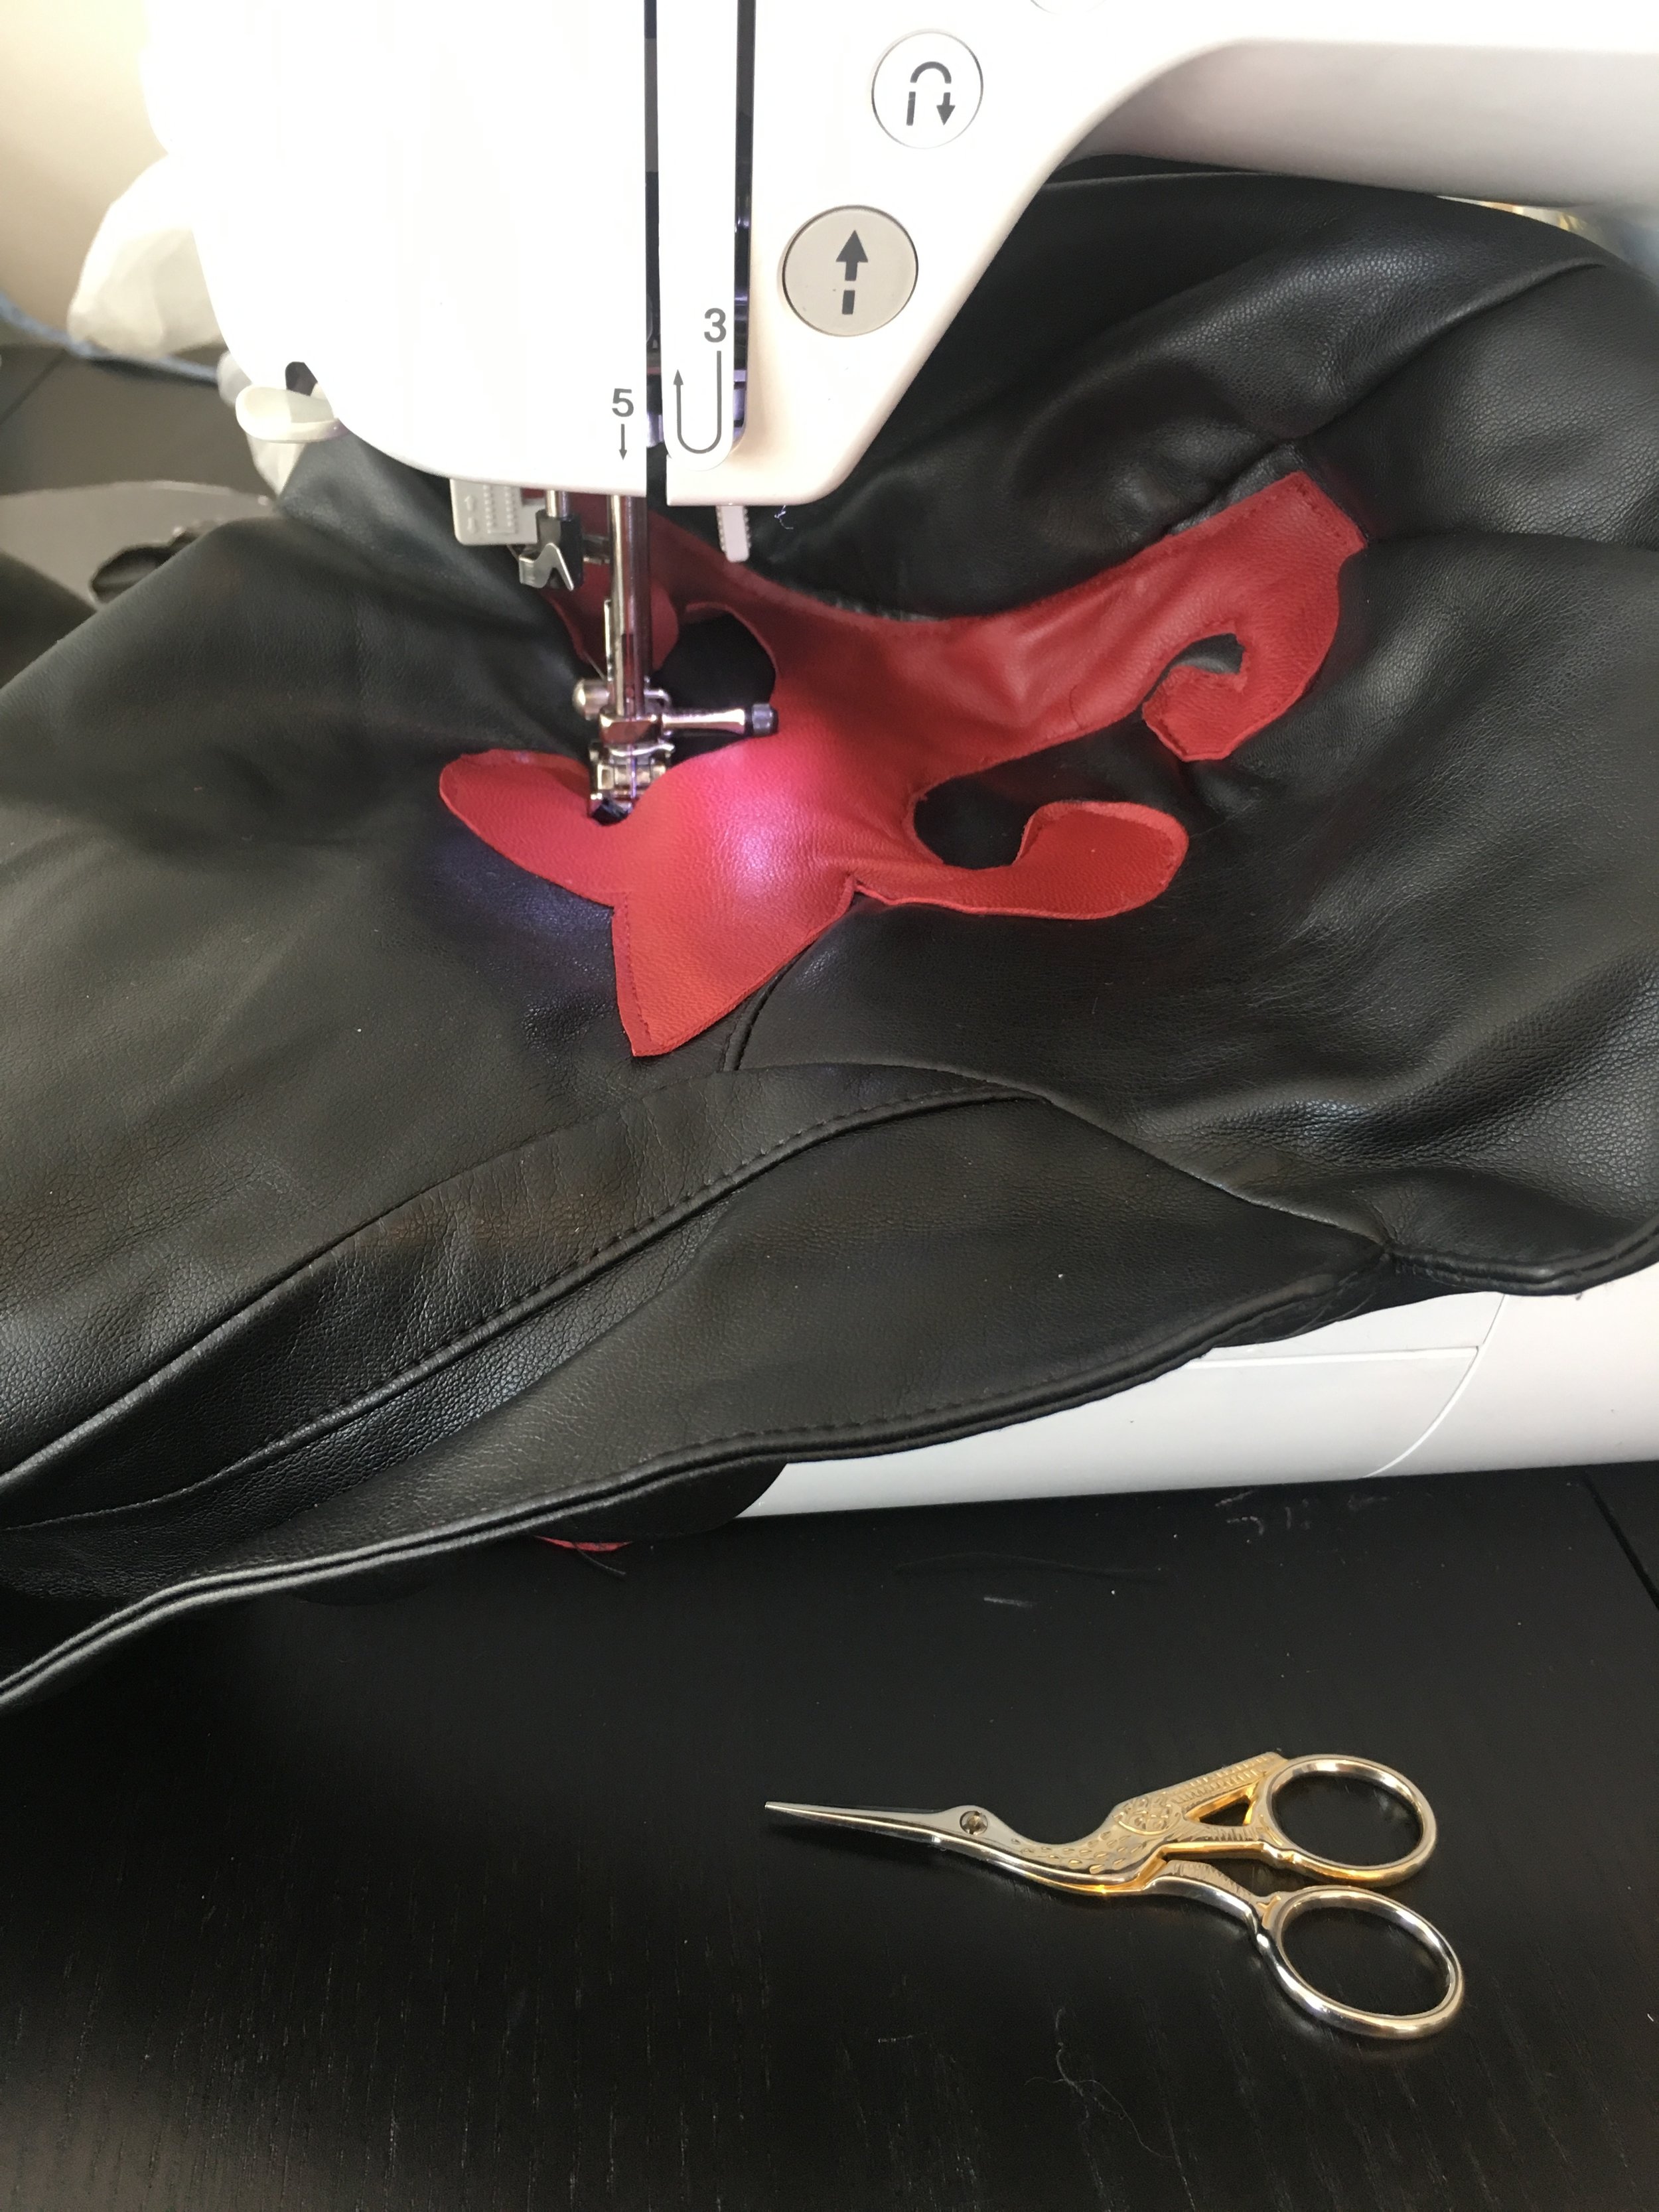
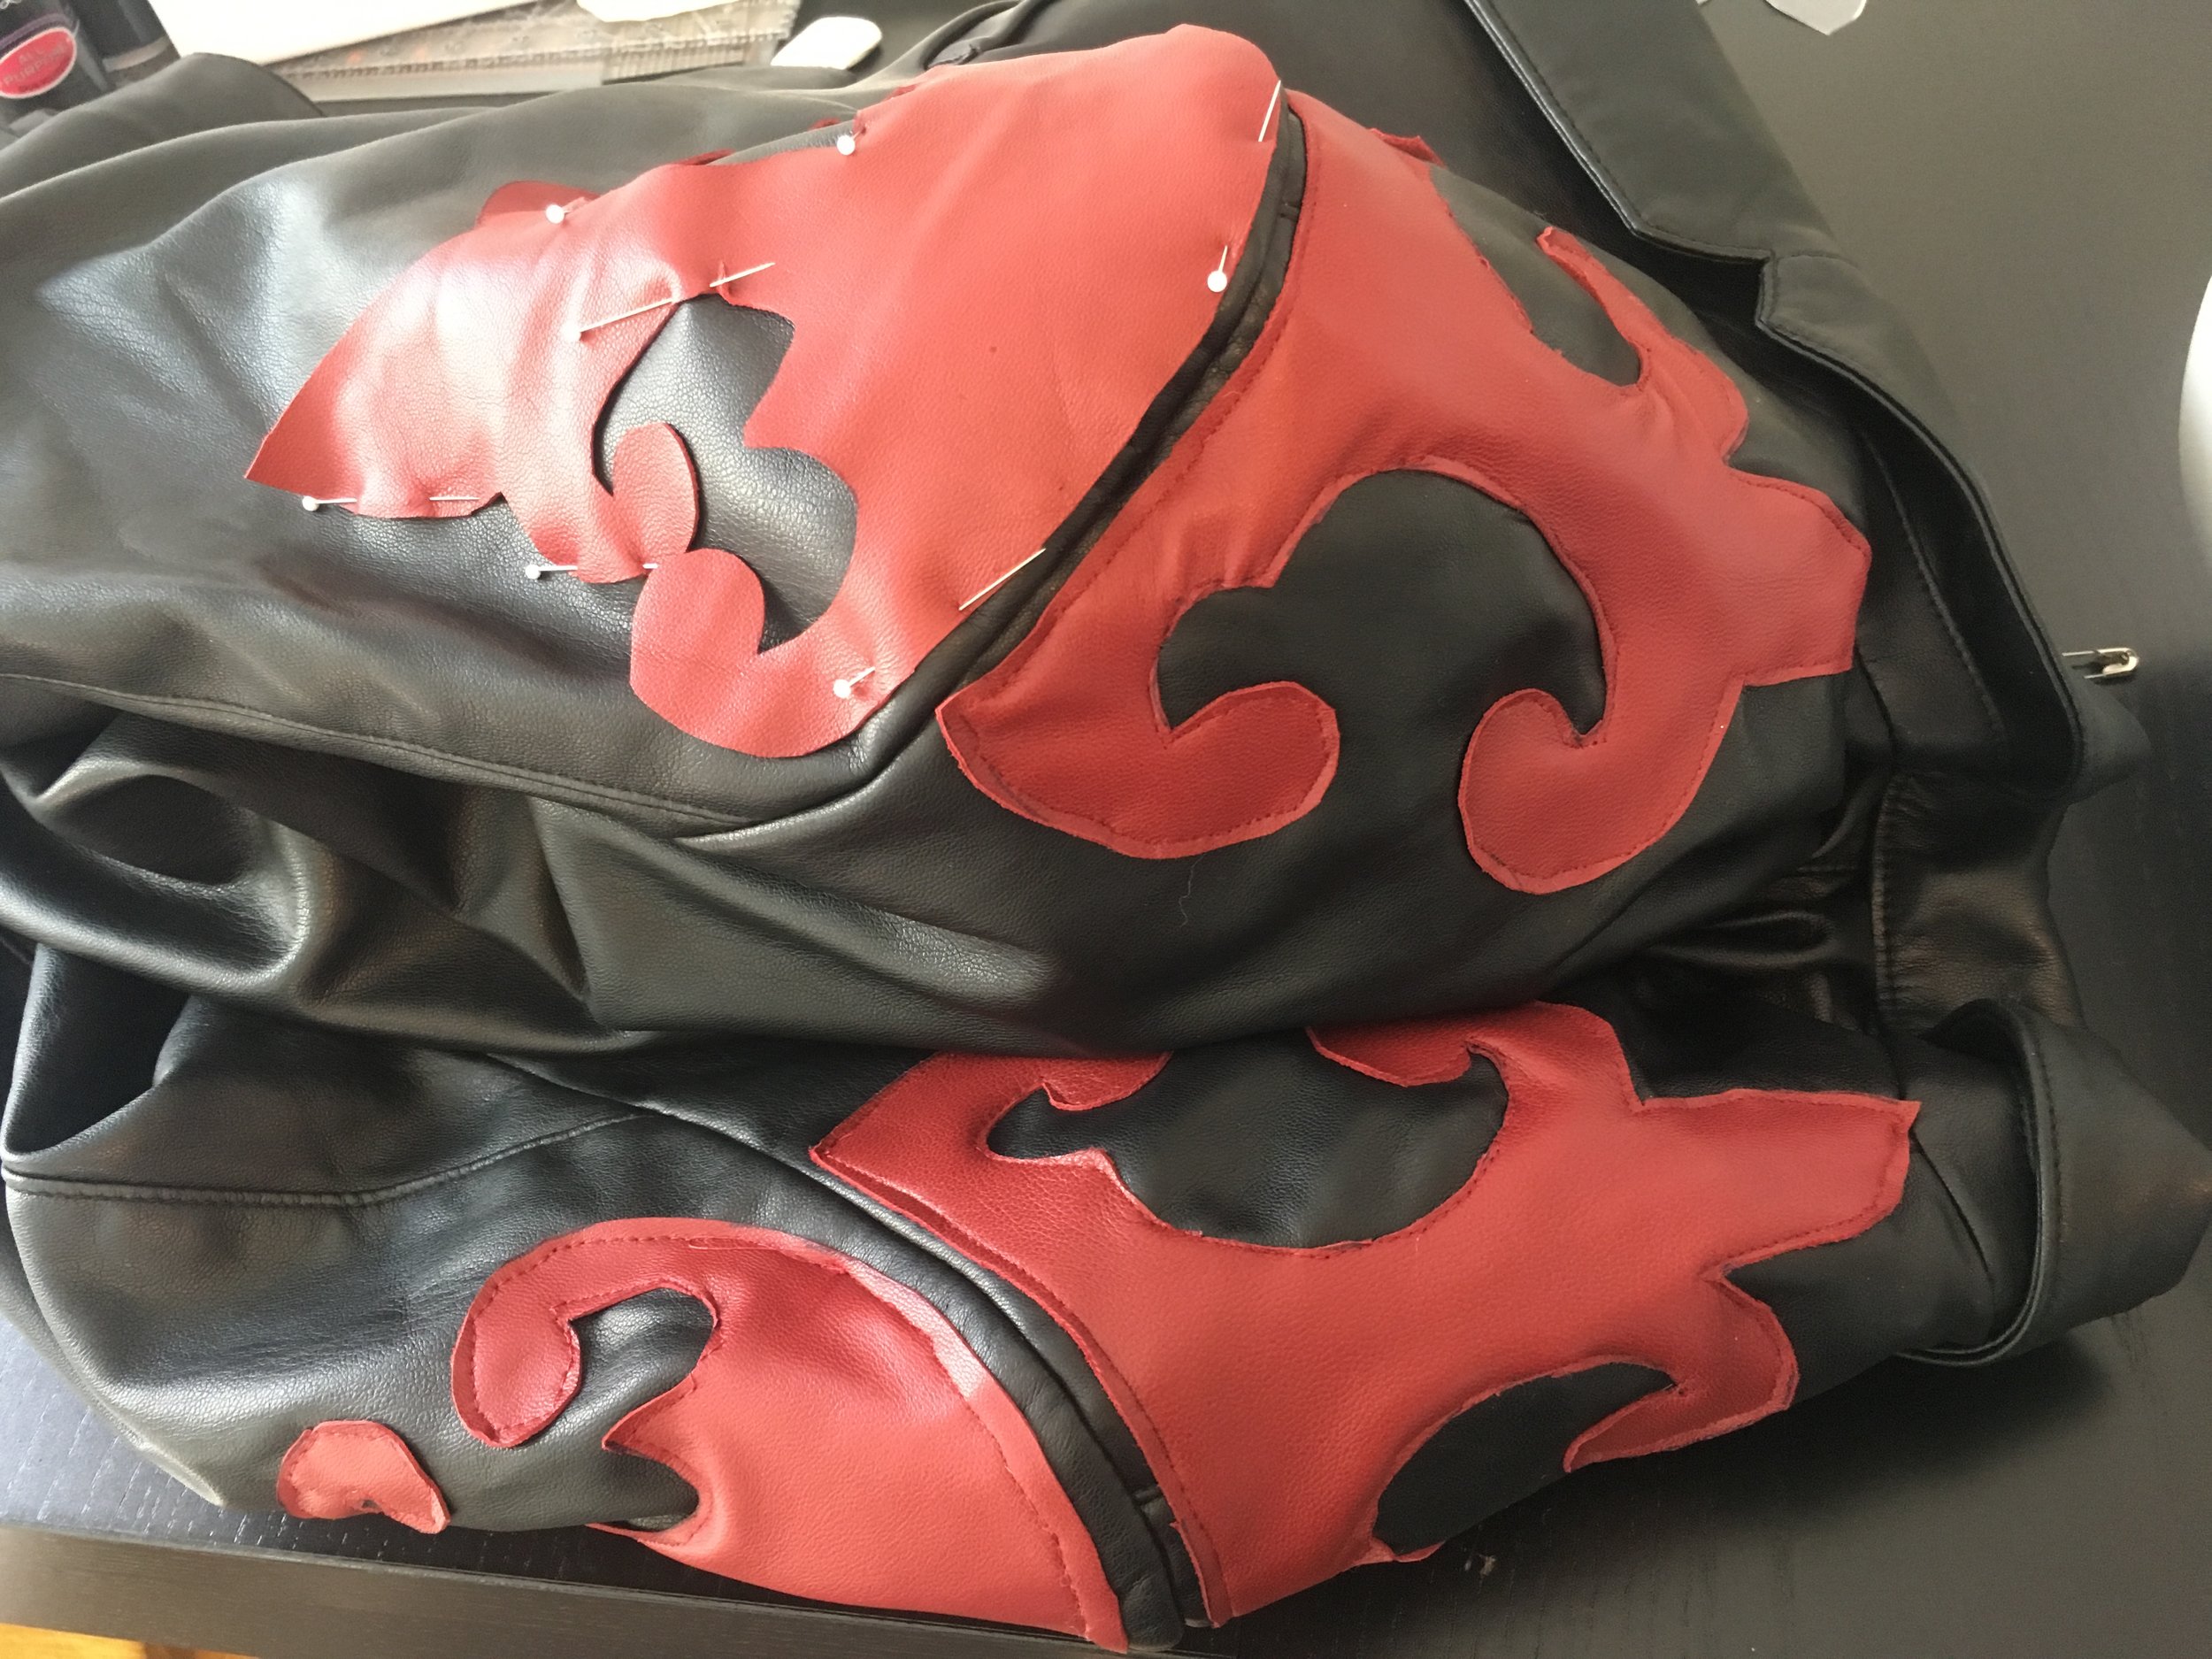
This piece started out as a black leather Zara jacket, with a sketched image on an iPad and some red leather. I blew up the image and had it printed 7" across (to fit the sleeve best I could) and cut it out. Since it wasn't quite symmetrical, I folded it in half and traced one side onto the other. This way, the left shoulder would be identical to the right shoulder - whereas if I cut two, right side up, the left shoulder would end up a mirror opposite of the right. Before touching the outside of the jacket, I detached the liner from the sleeve liner in order to avoid it while embellishing the outside.
I then placed that paper over my red leather pieces, traced it, and cut. I really enjoyed this piece because of what it taught me about leather, curves, and twists in my machine. Once my pieces were placed correctly, I went in and tacked each corner of the red leather pieces.

This was to keep my designs from sliding, because leather tends to stretch when you're sewing, turning, sewing, and turning it around. Once my designs were tacked down I went through with a 3.5mm stitch and worked around the outer edge. I did this for all four pieces, then reattached the liner to the sleeves on the inside.

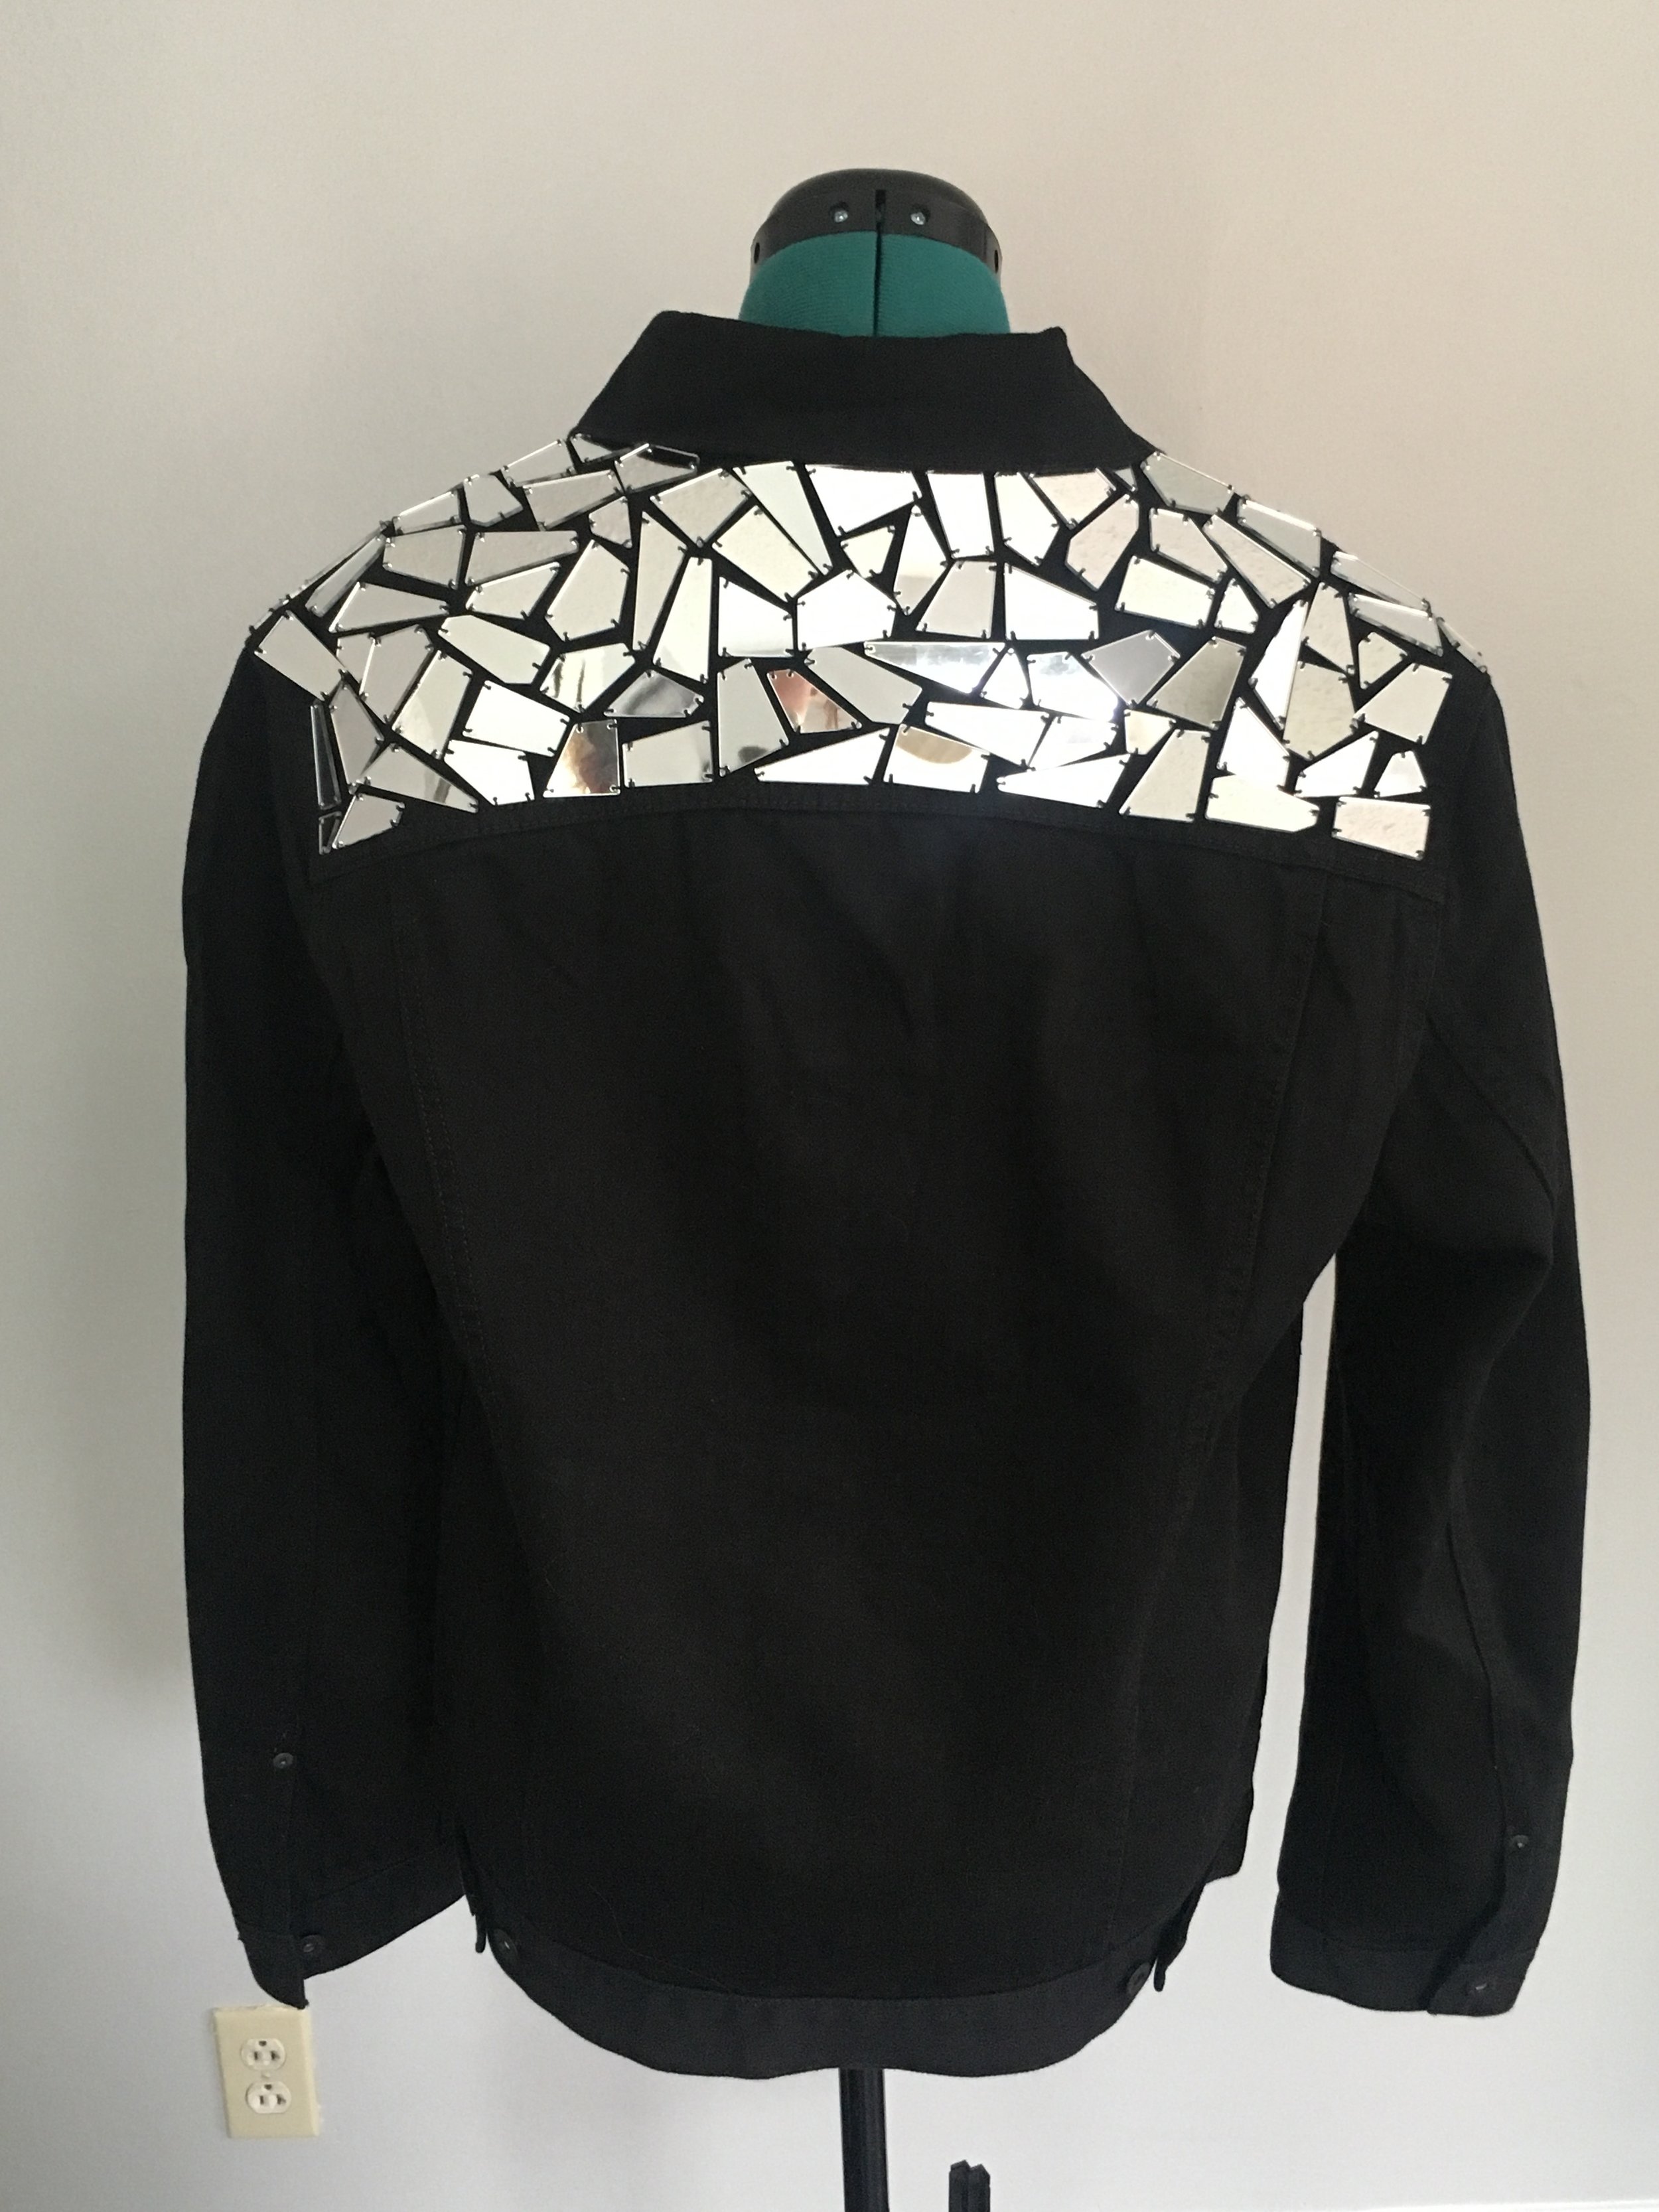
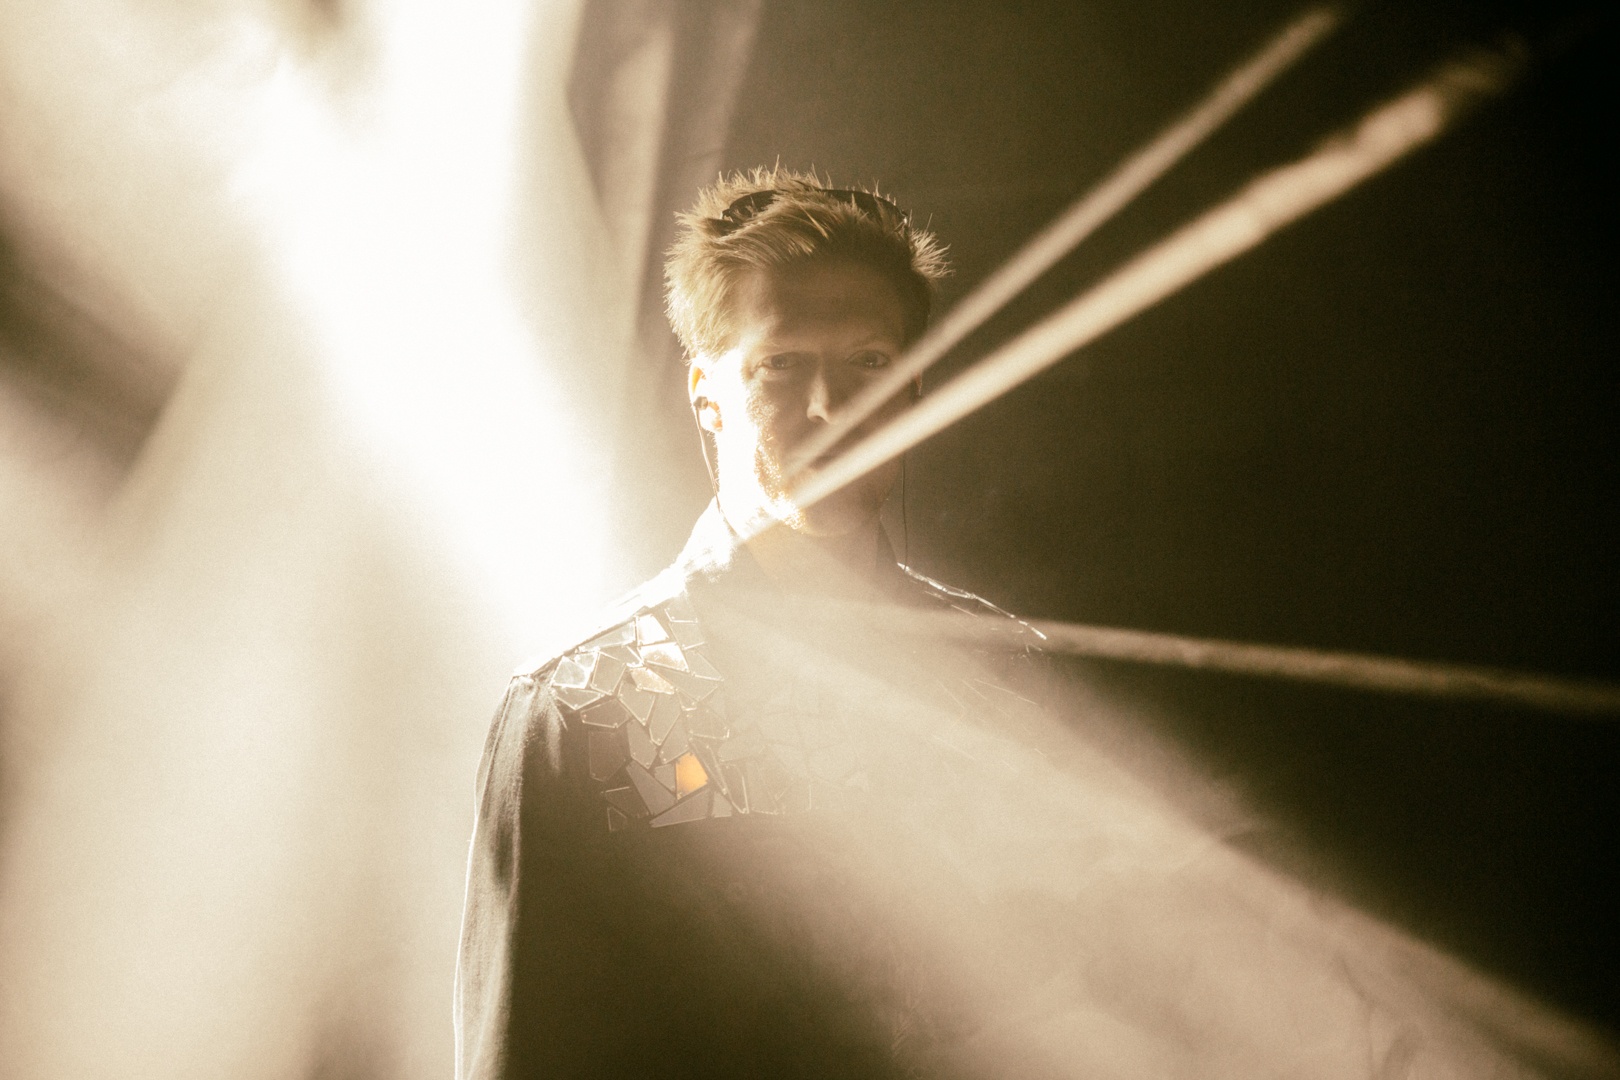
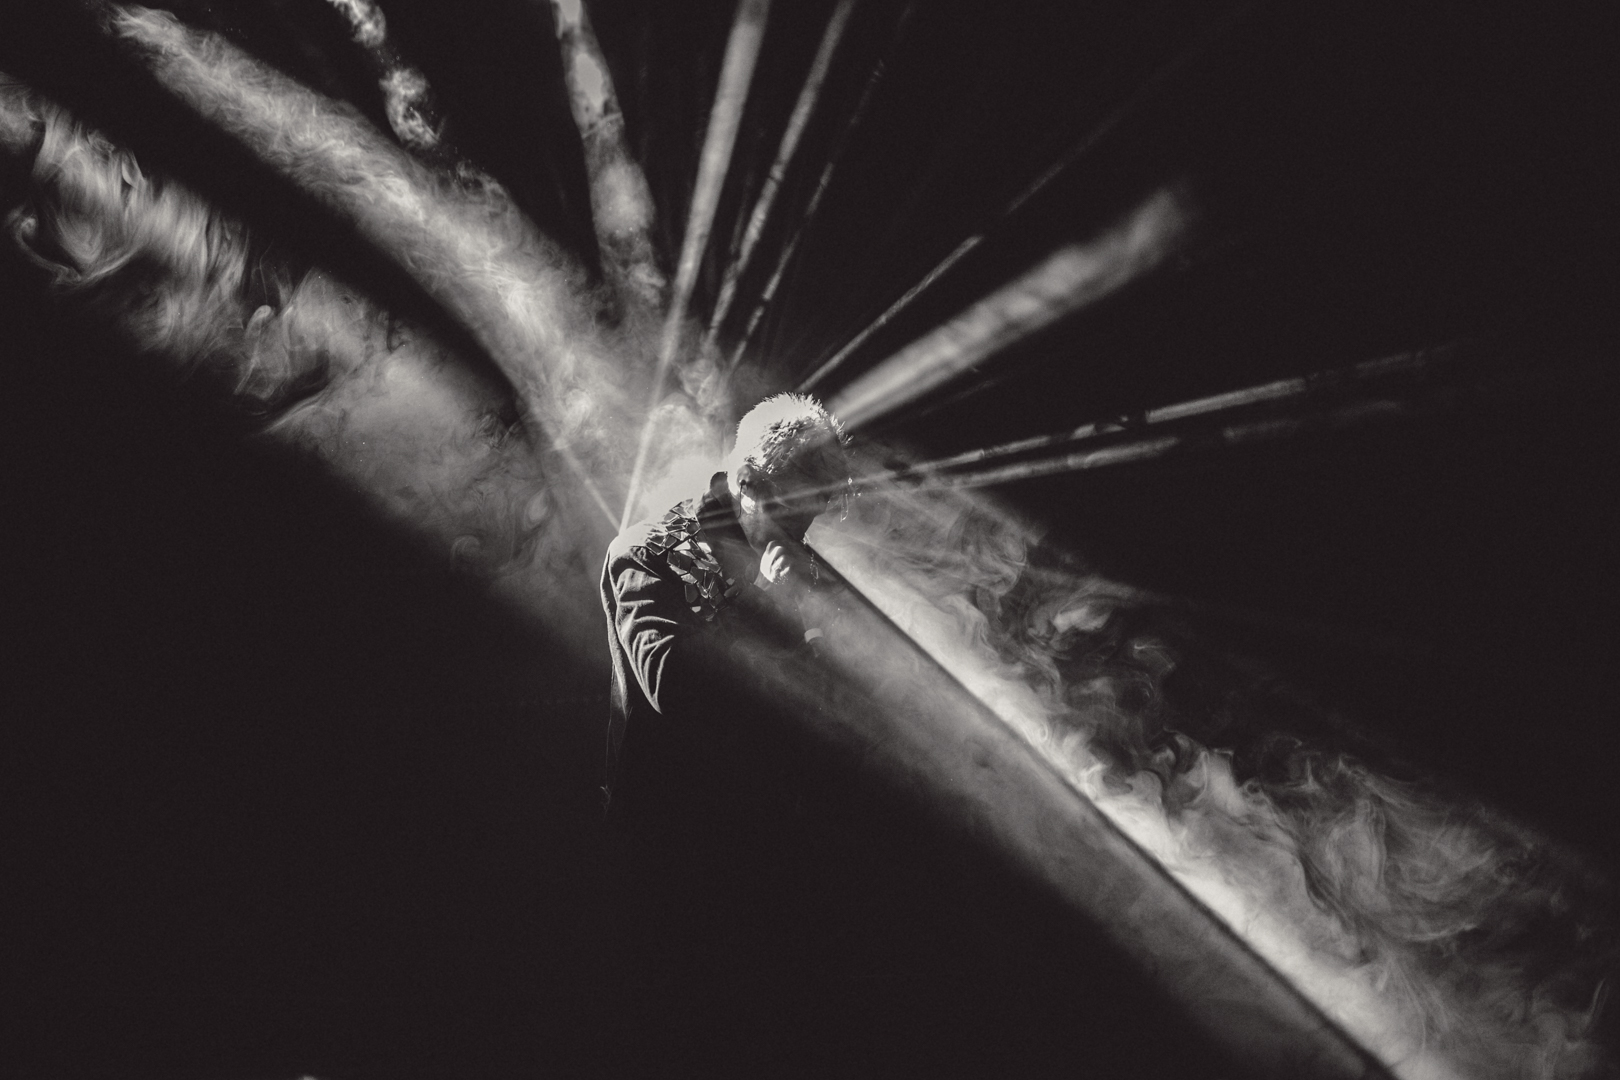
Black mirror jacket
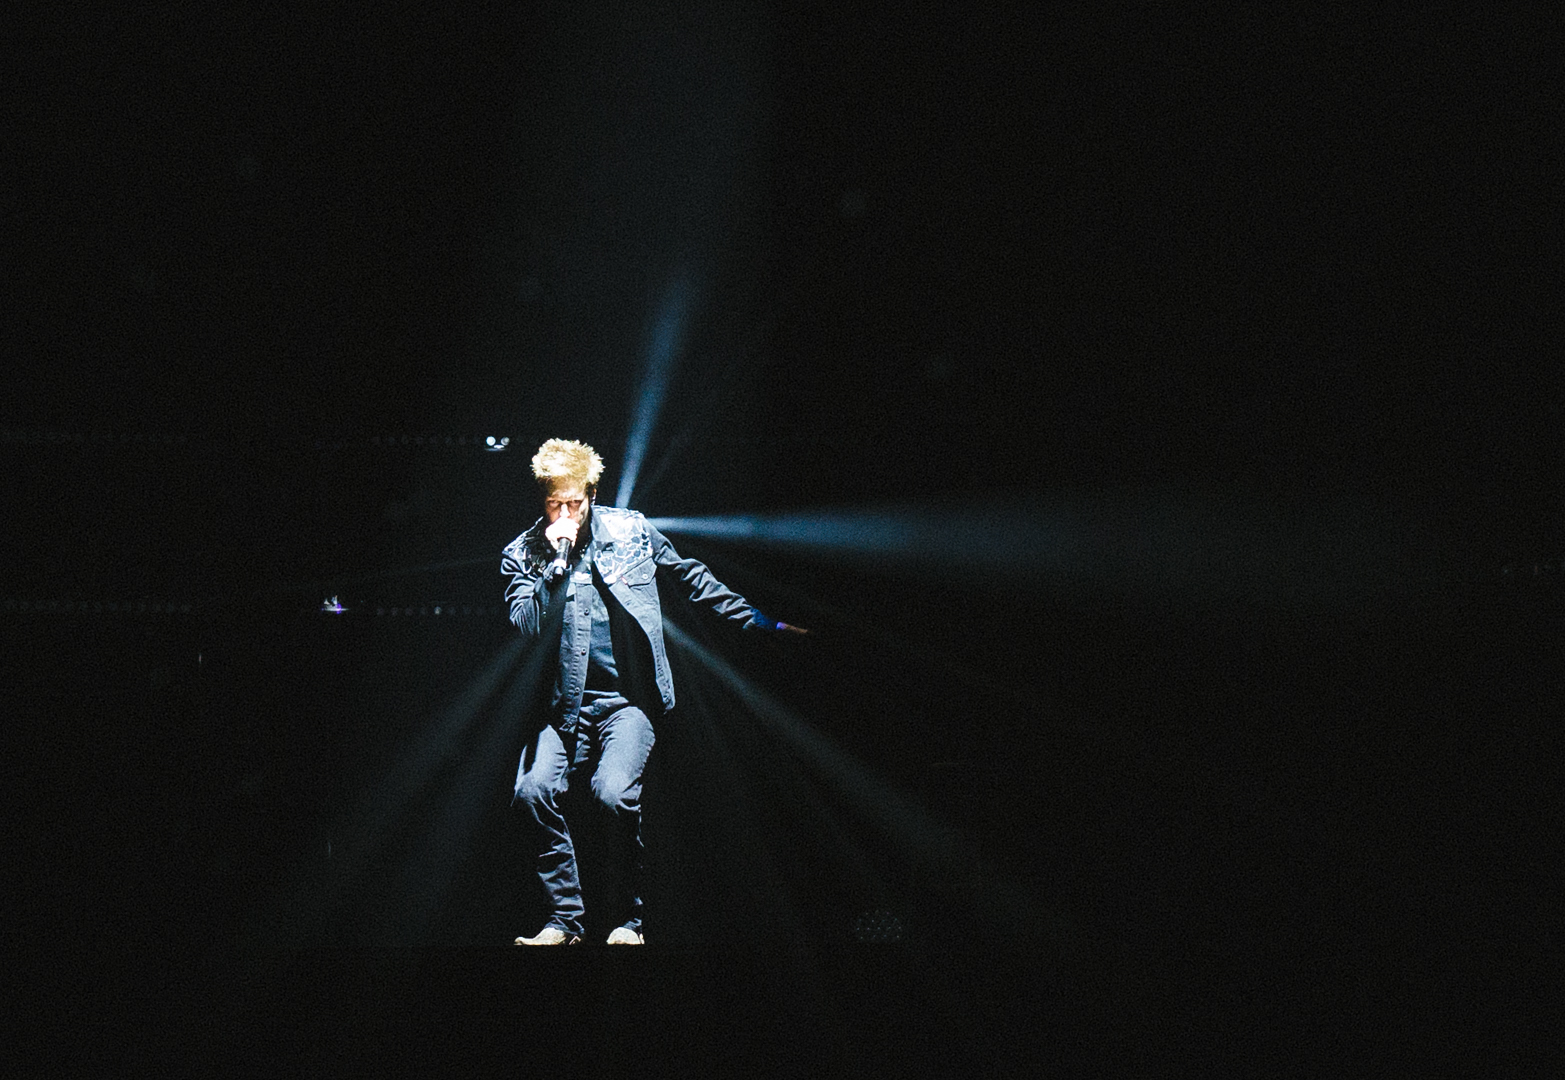
I won't do the same project for two bands, but I did get curious about using broken mirror pieces instead of circles this time around. While this is less of a lighting trick and more of a "holy crap that looks amazing" project, the same rules did not apply. I LOVED using these mirrors, but mis-matched shapes meant I was literally putting together a puzzle on both the front and backside of the jacket. With only 10 mirror shapes to go off of, I had to get creative, and often had to detach the last few that I had just sewn on to choose different pieces that wouldn't put me in a corner. I think it works really well for Adam, and packs that extra little punch for his beatboxing solos.

Every ridiculously good photo here was taken by Olena Lysenko.
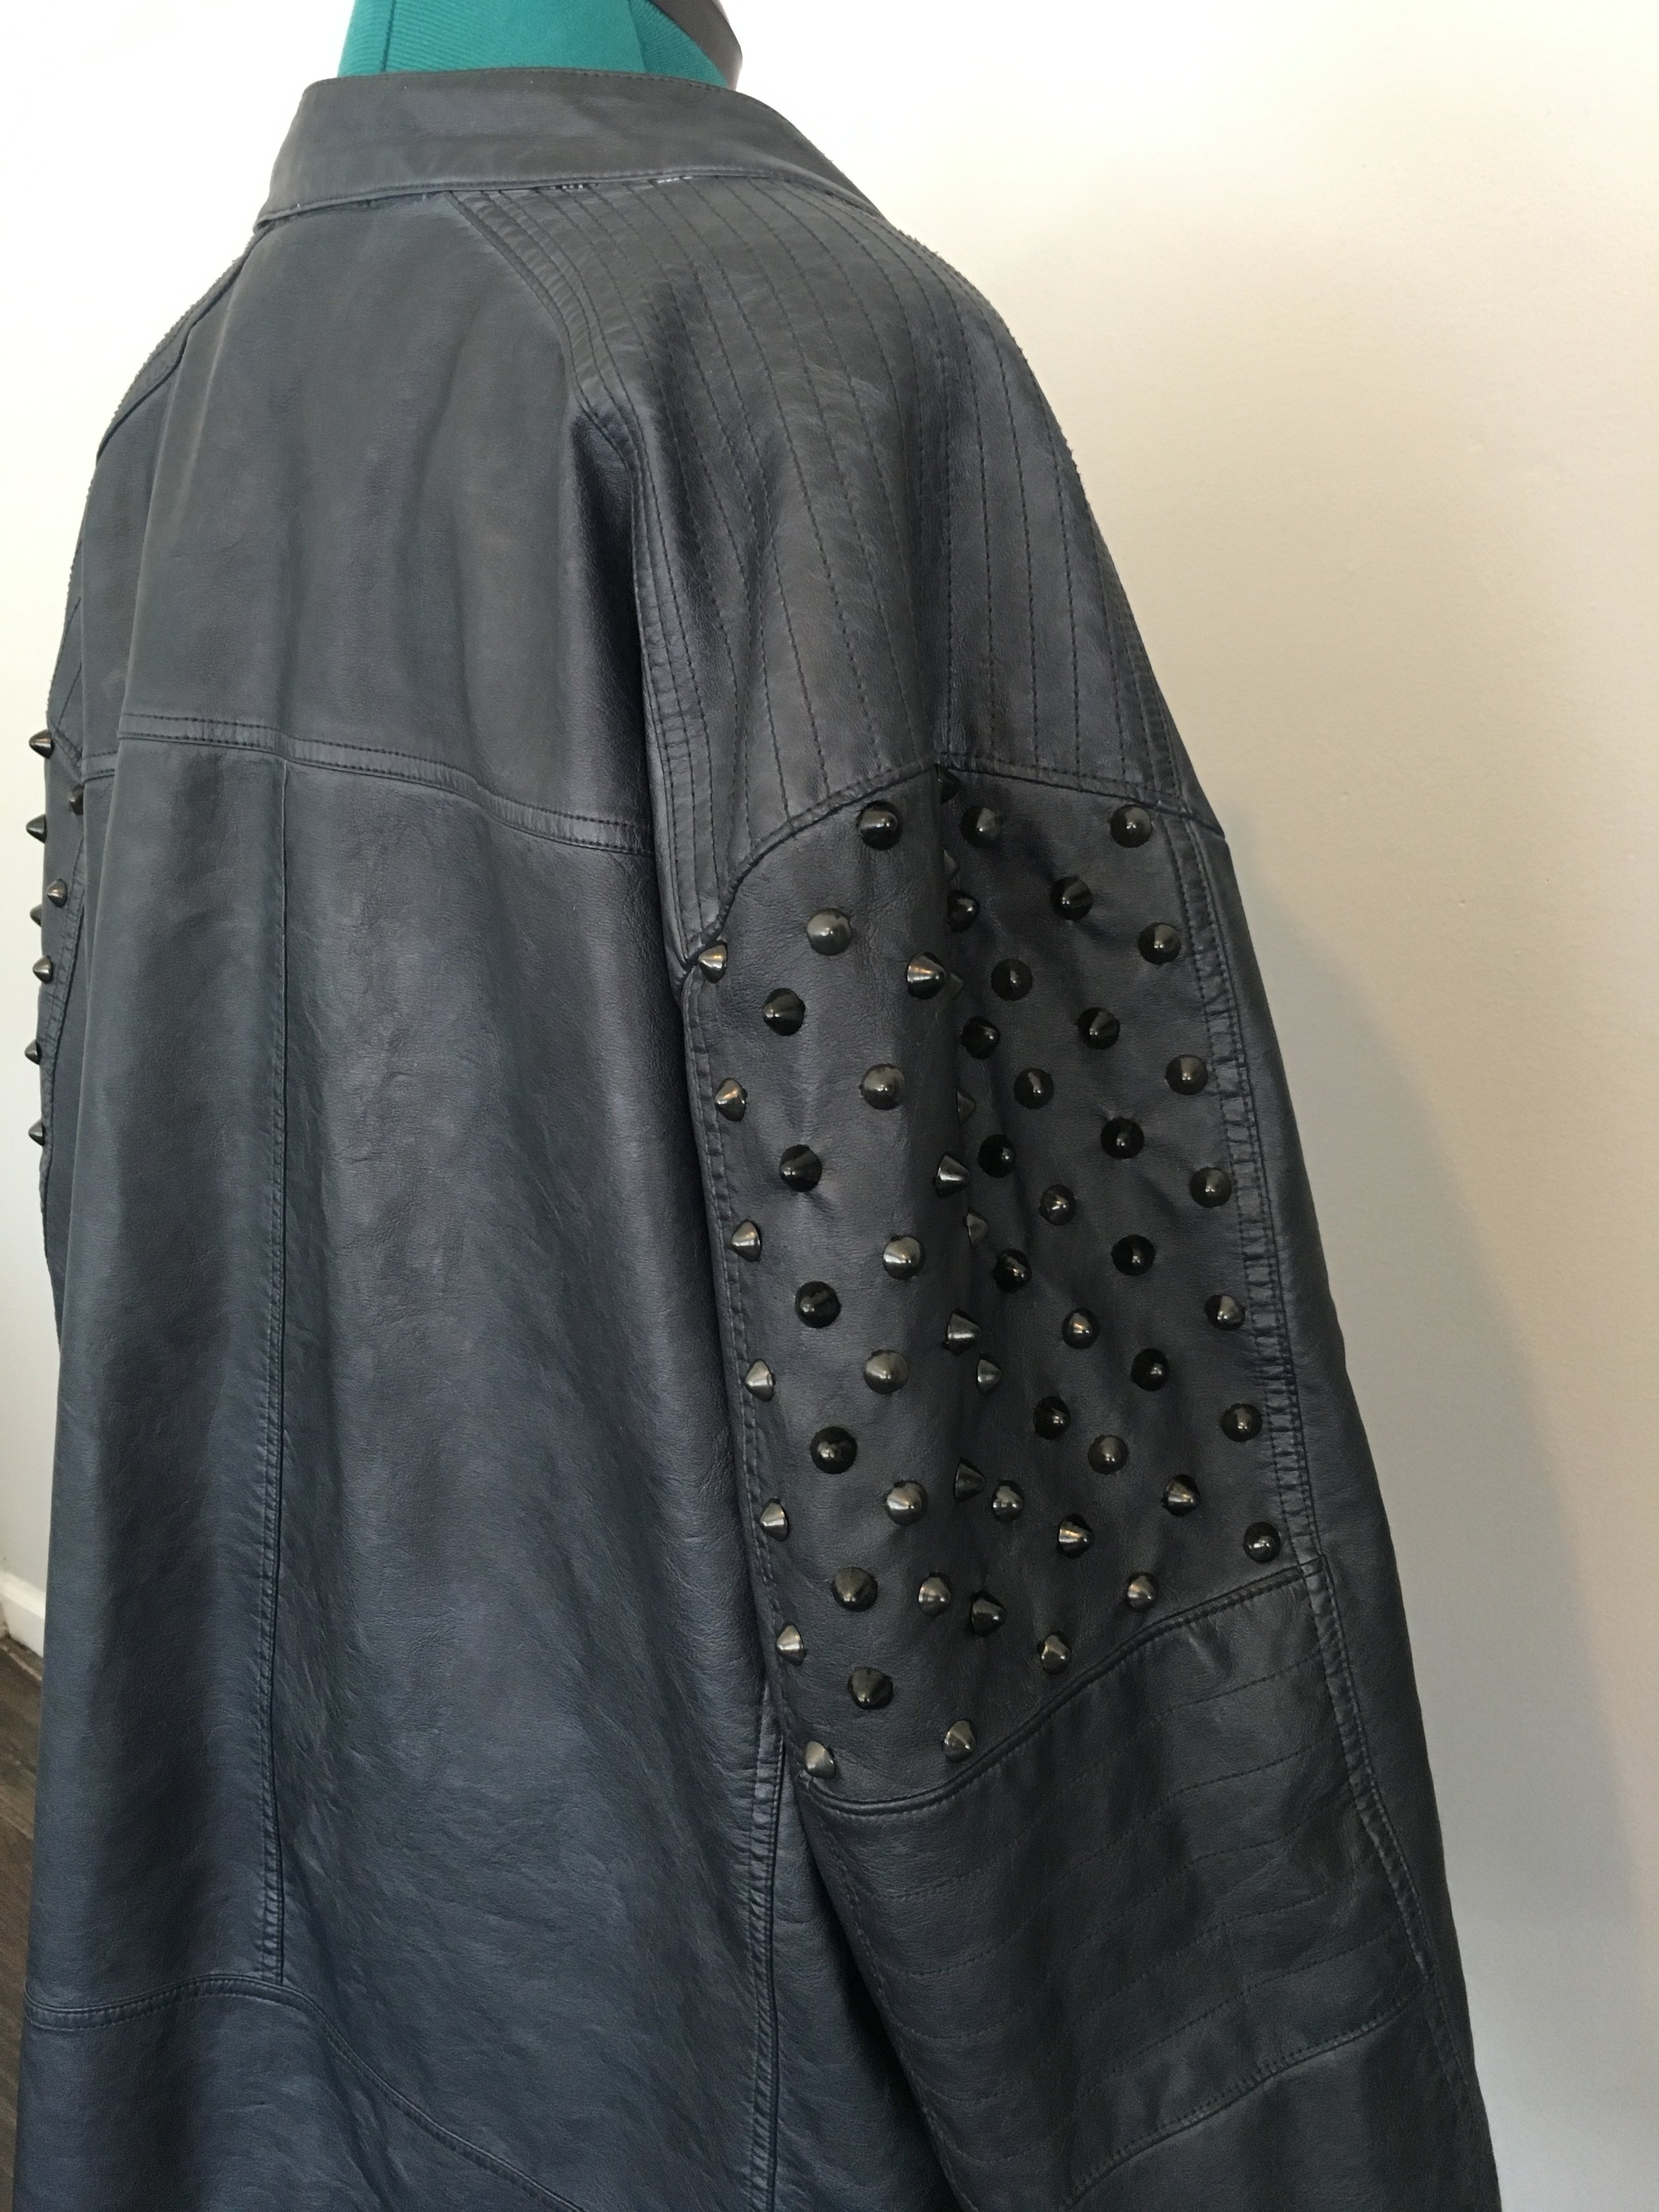
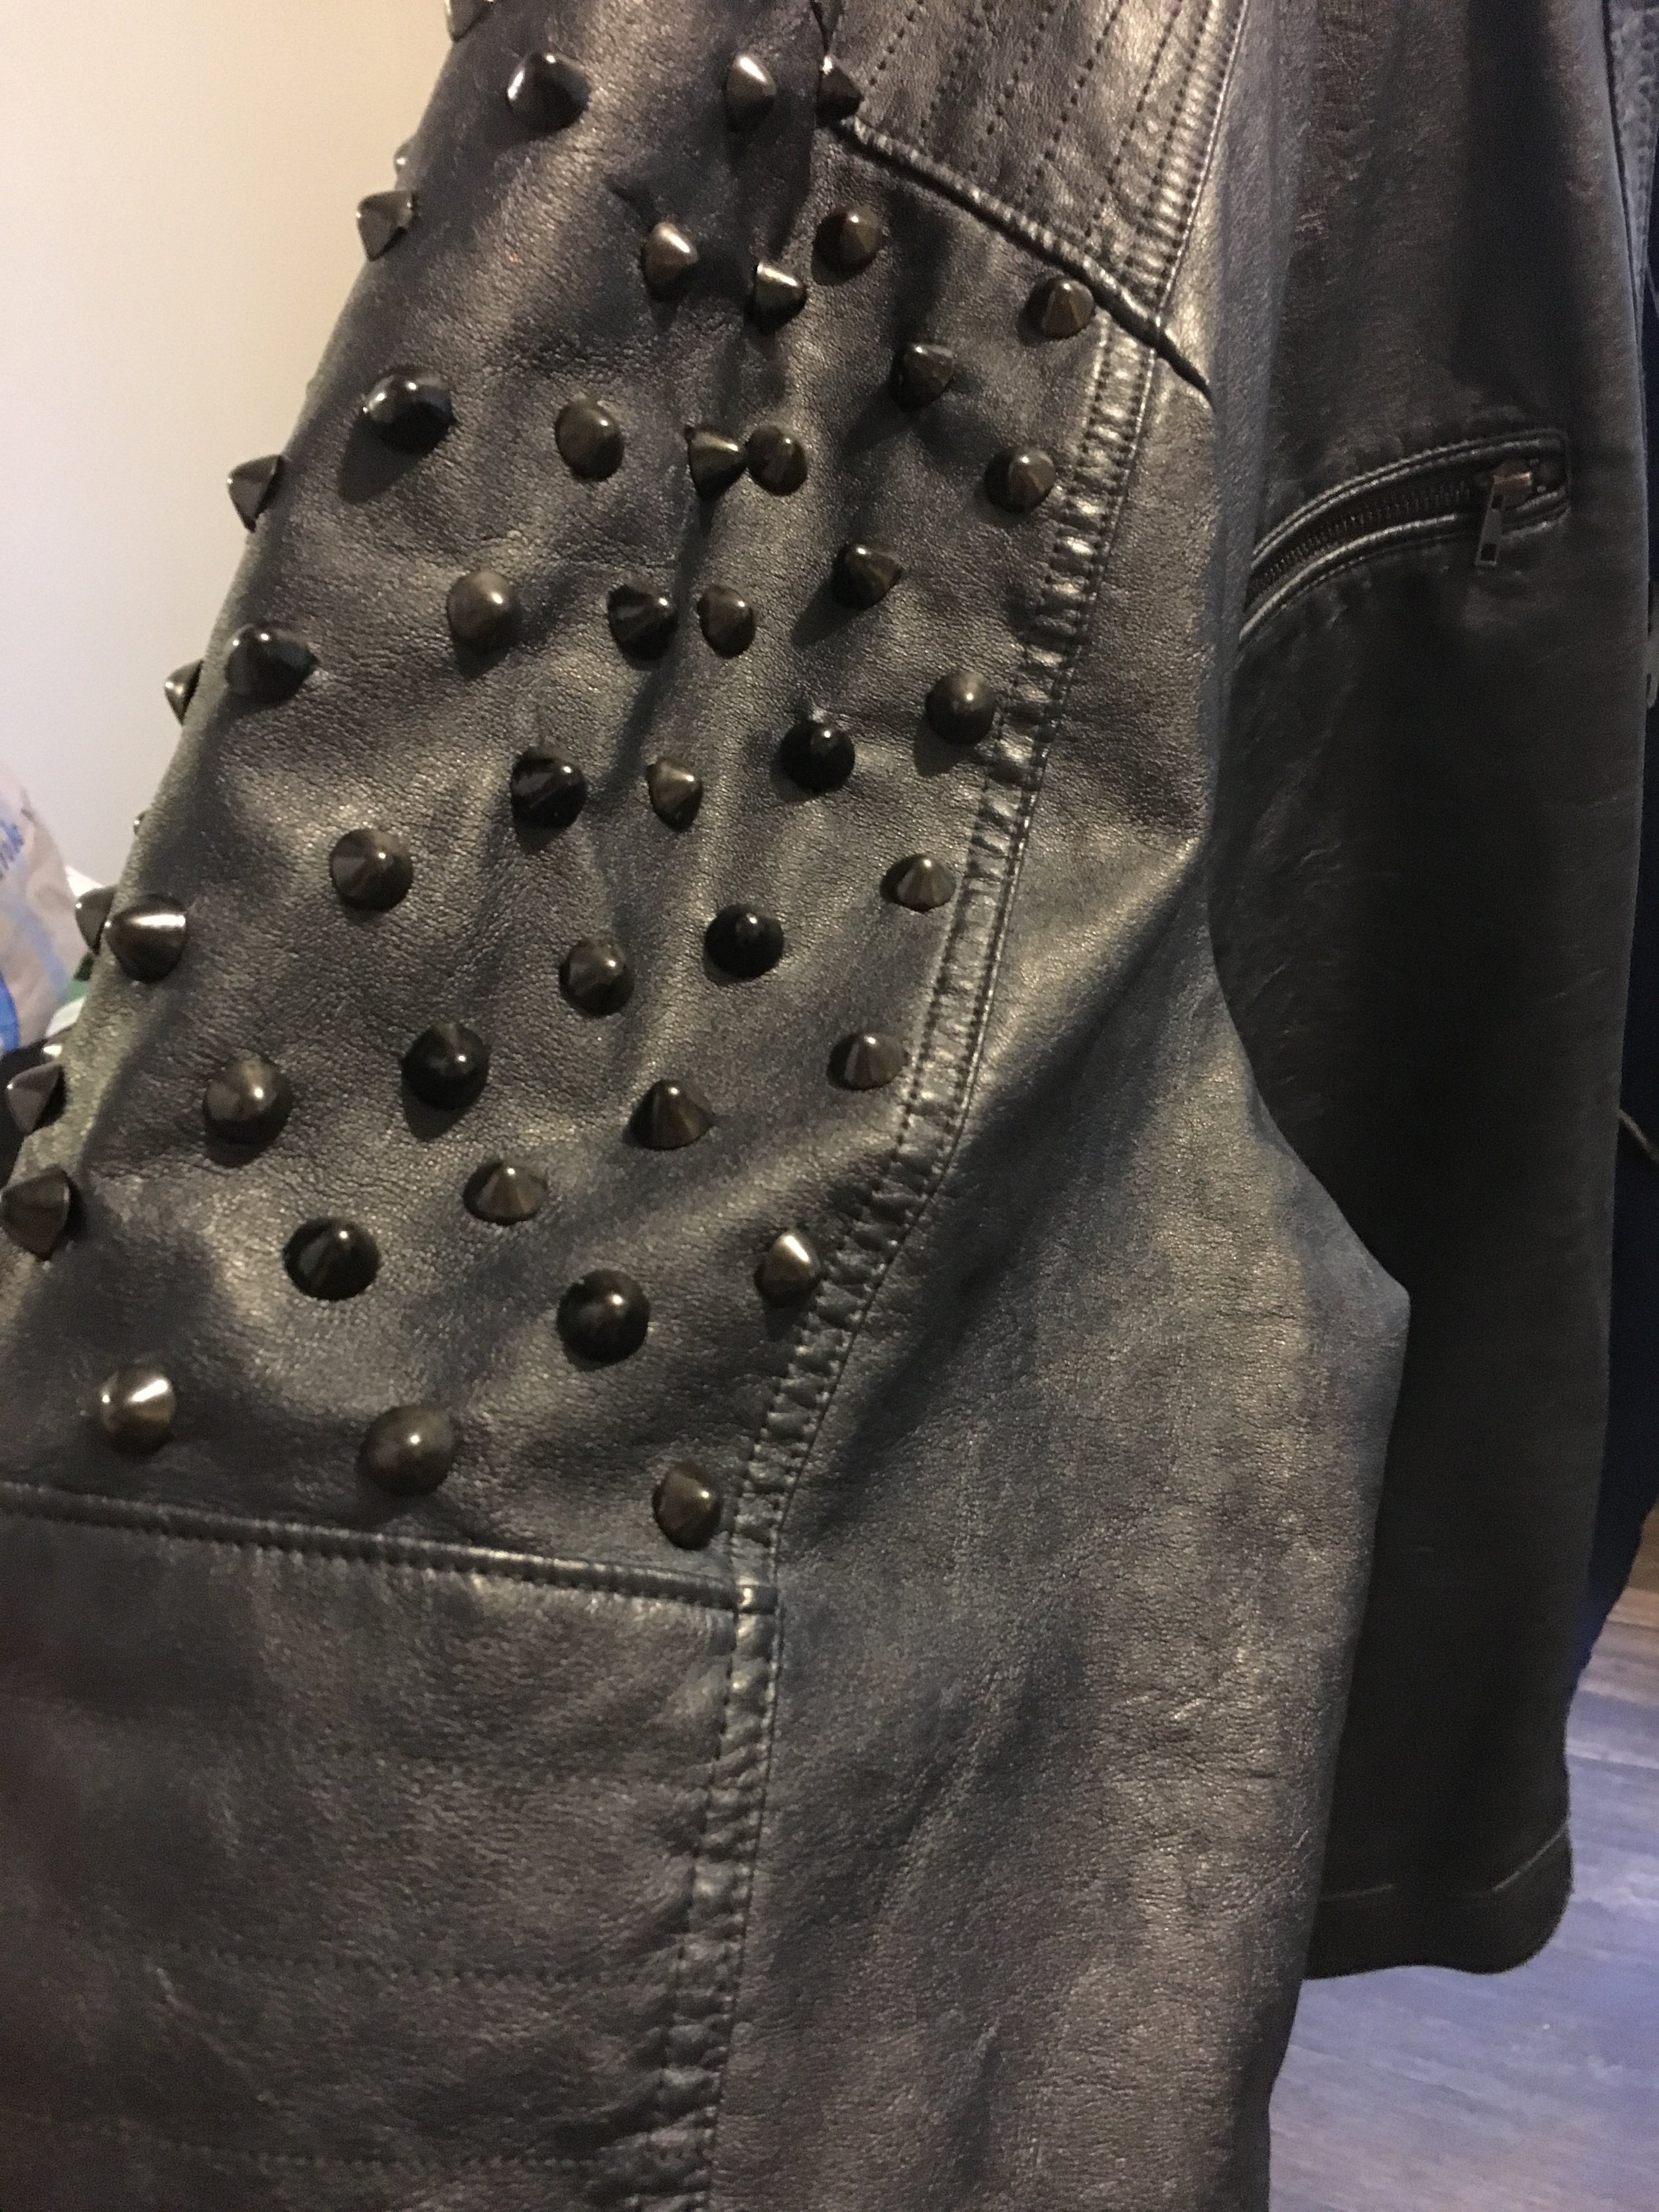
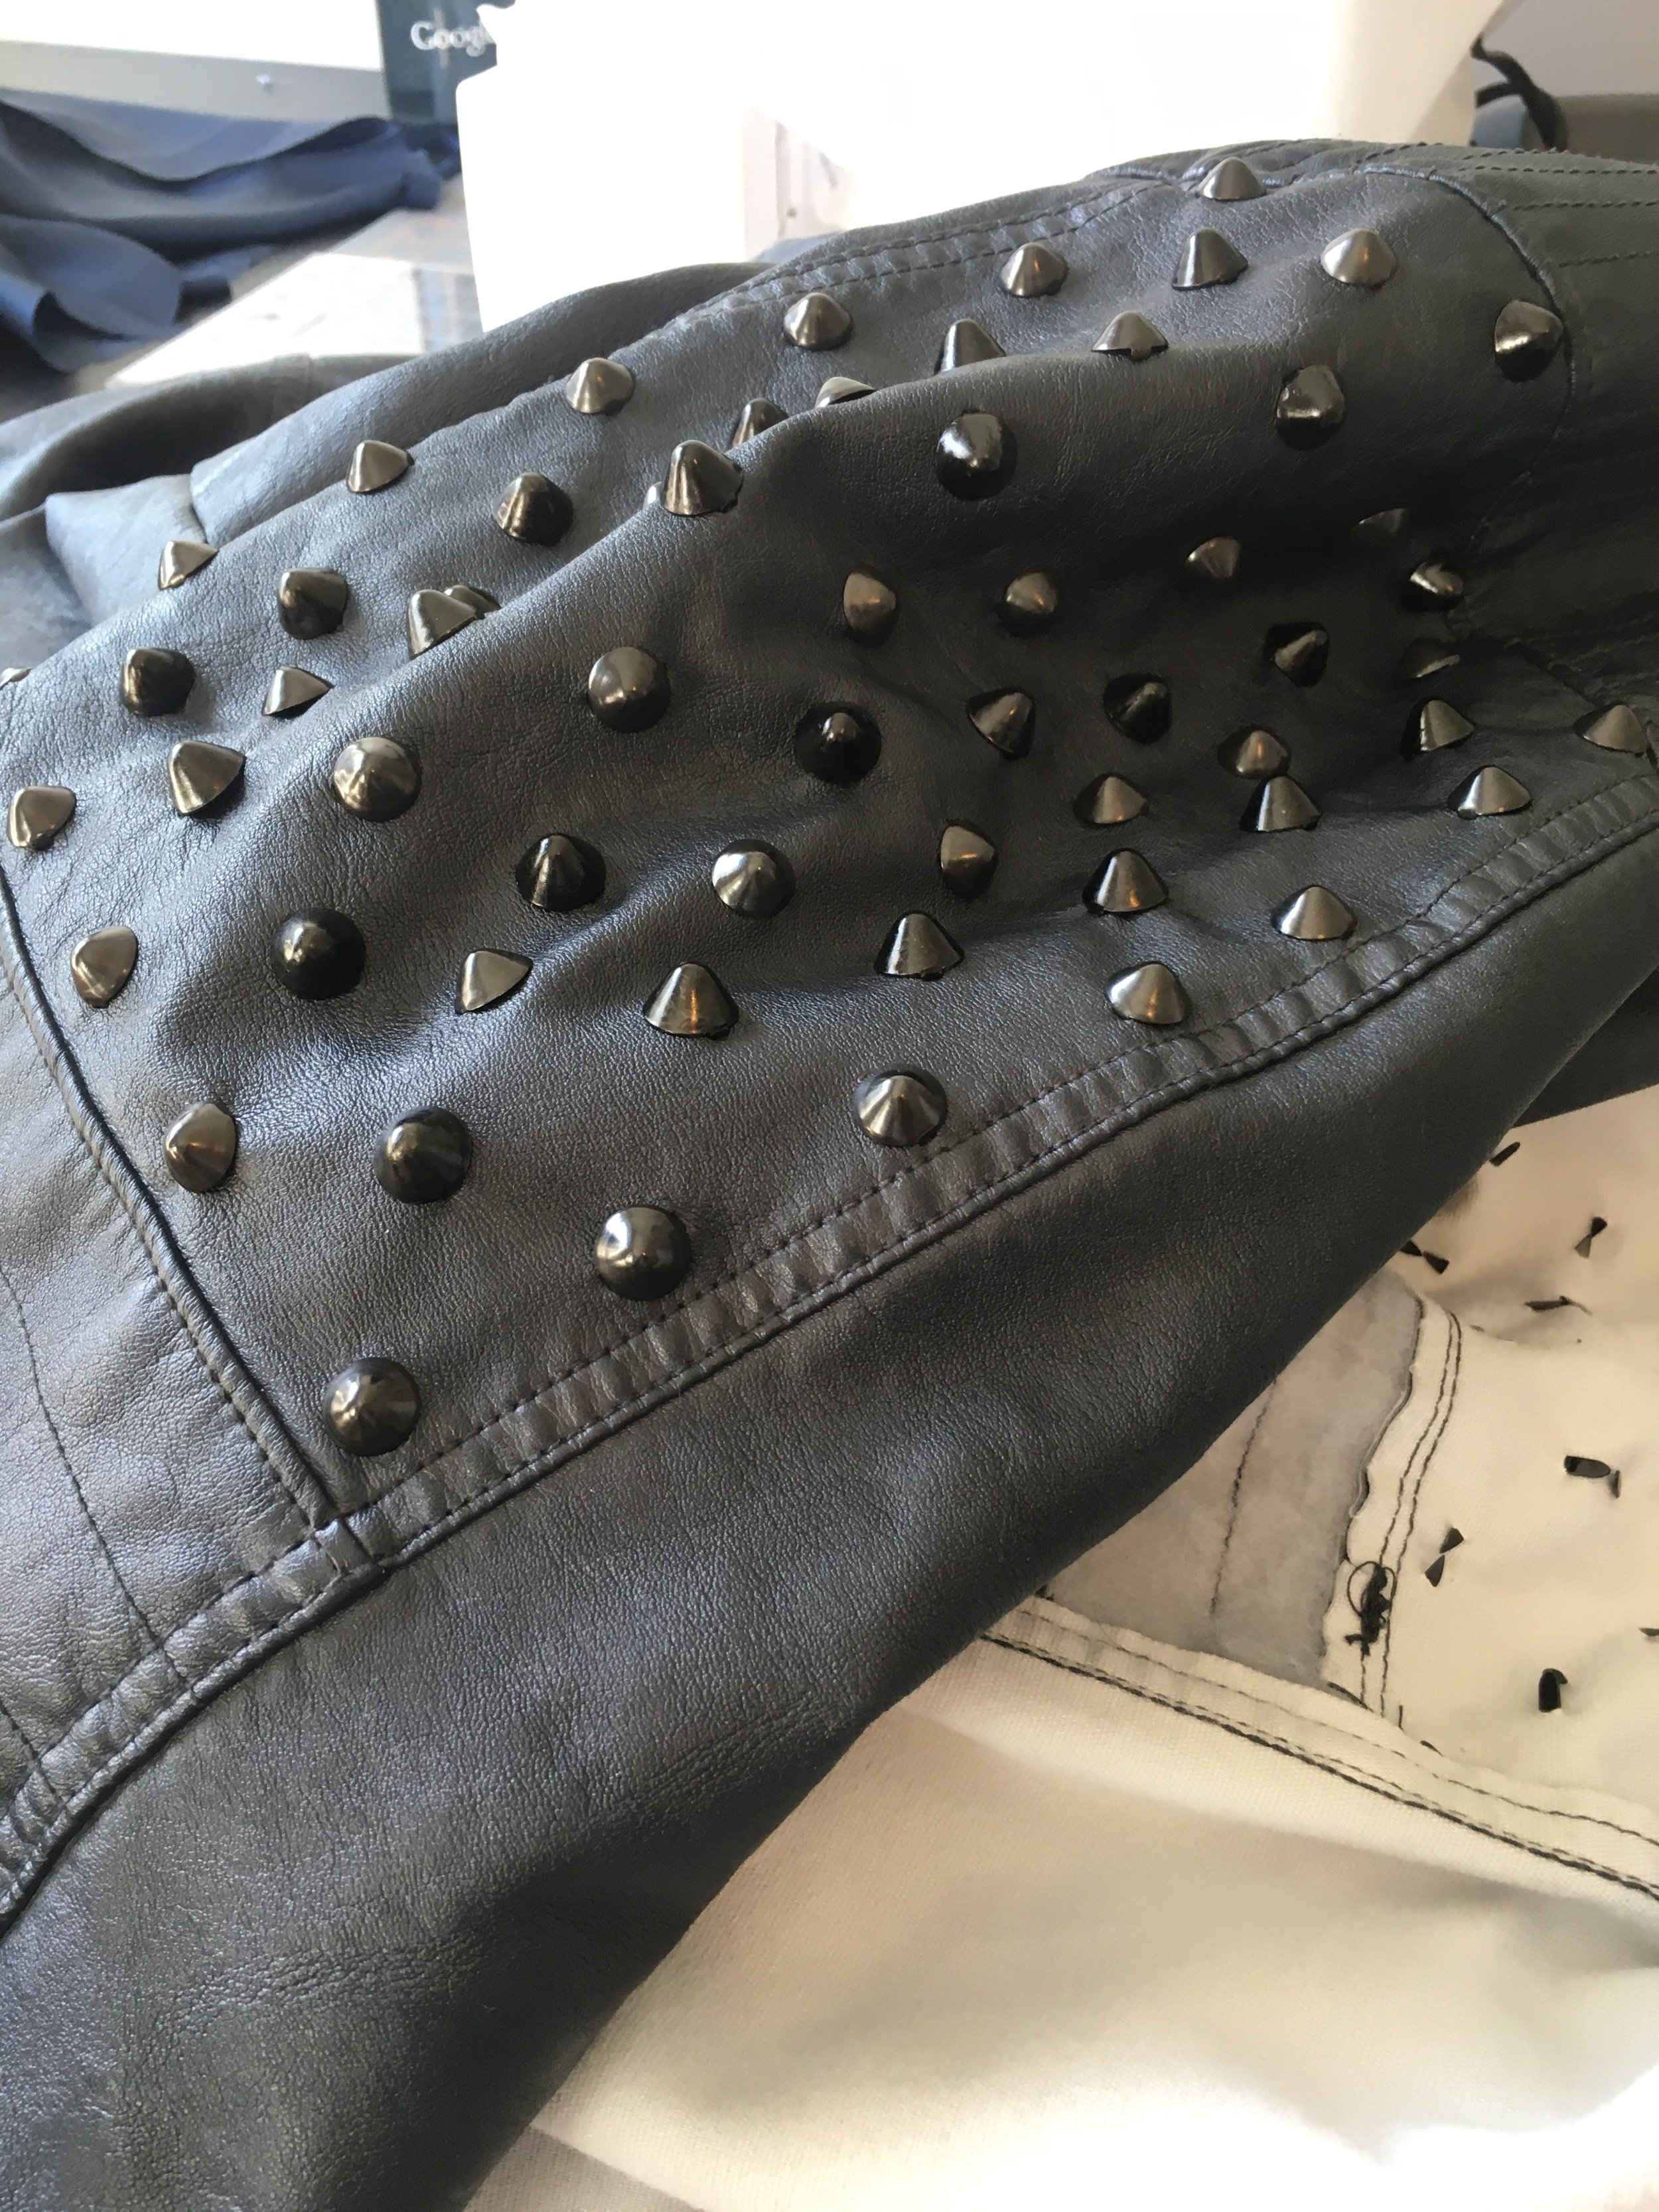
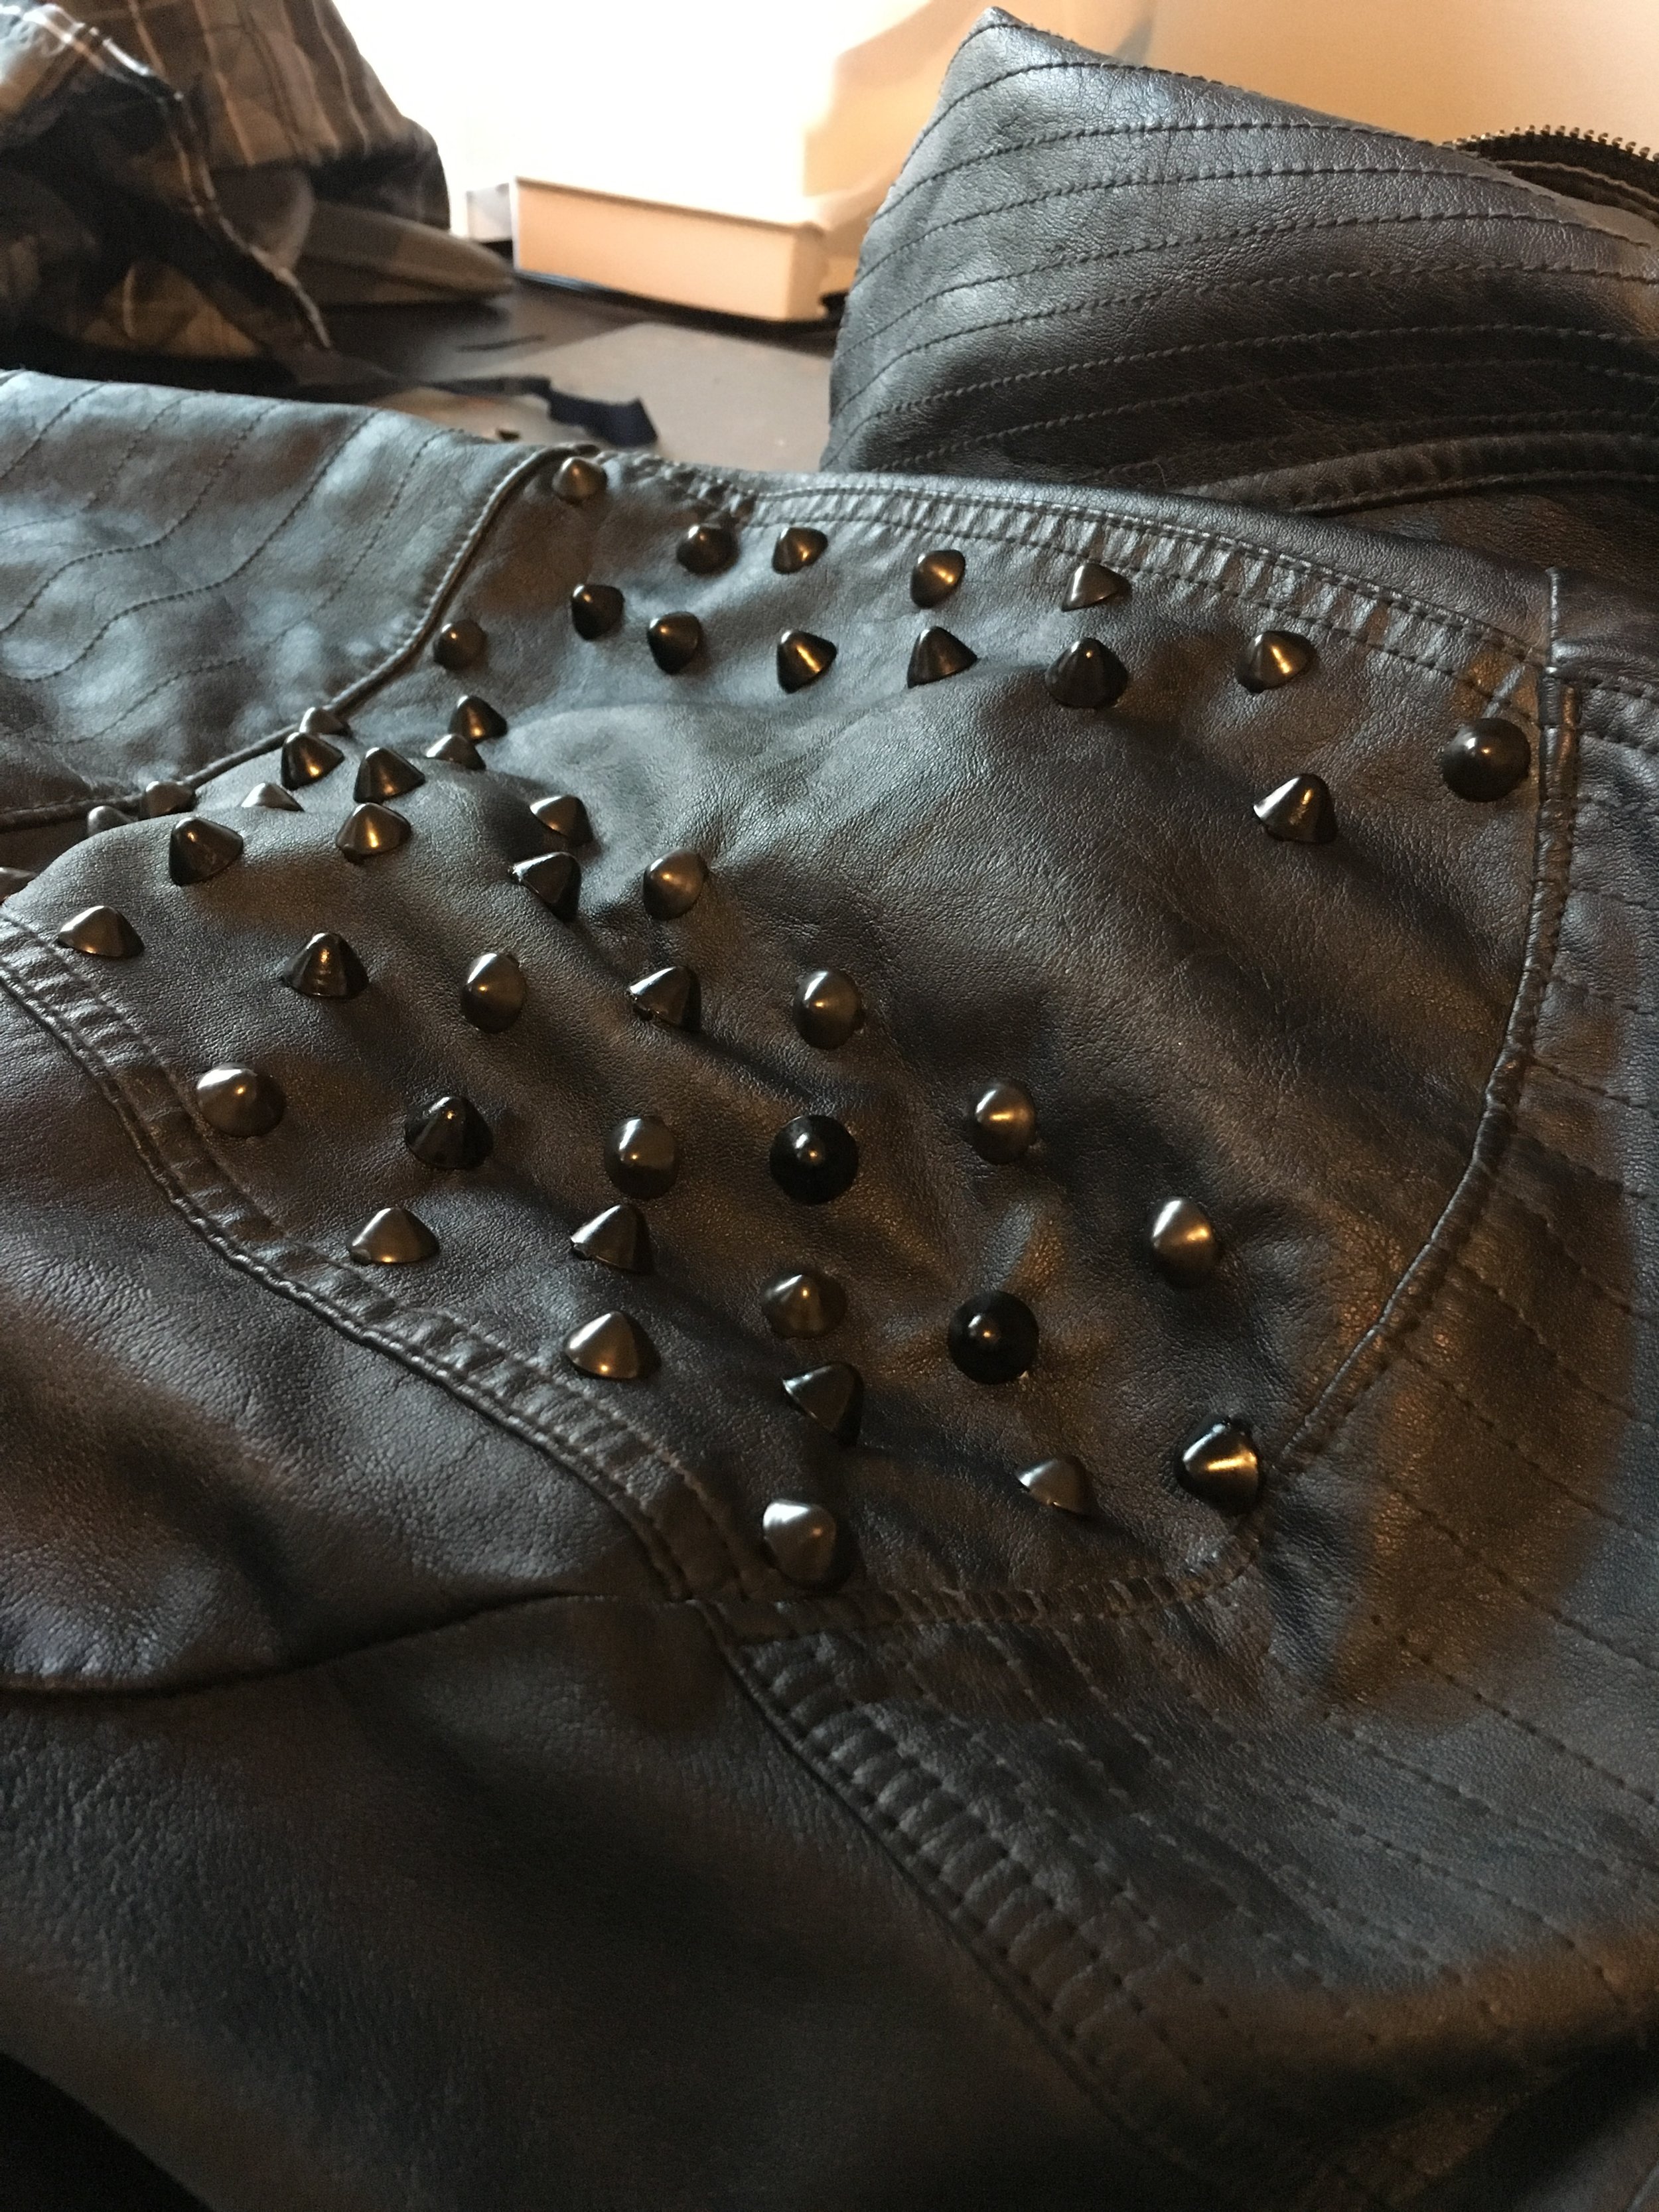
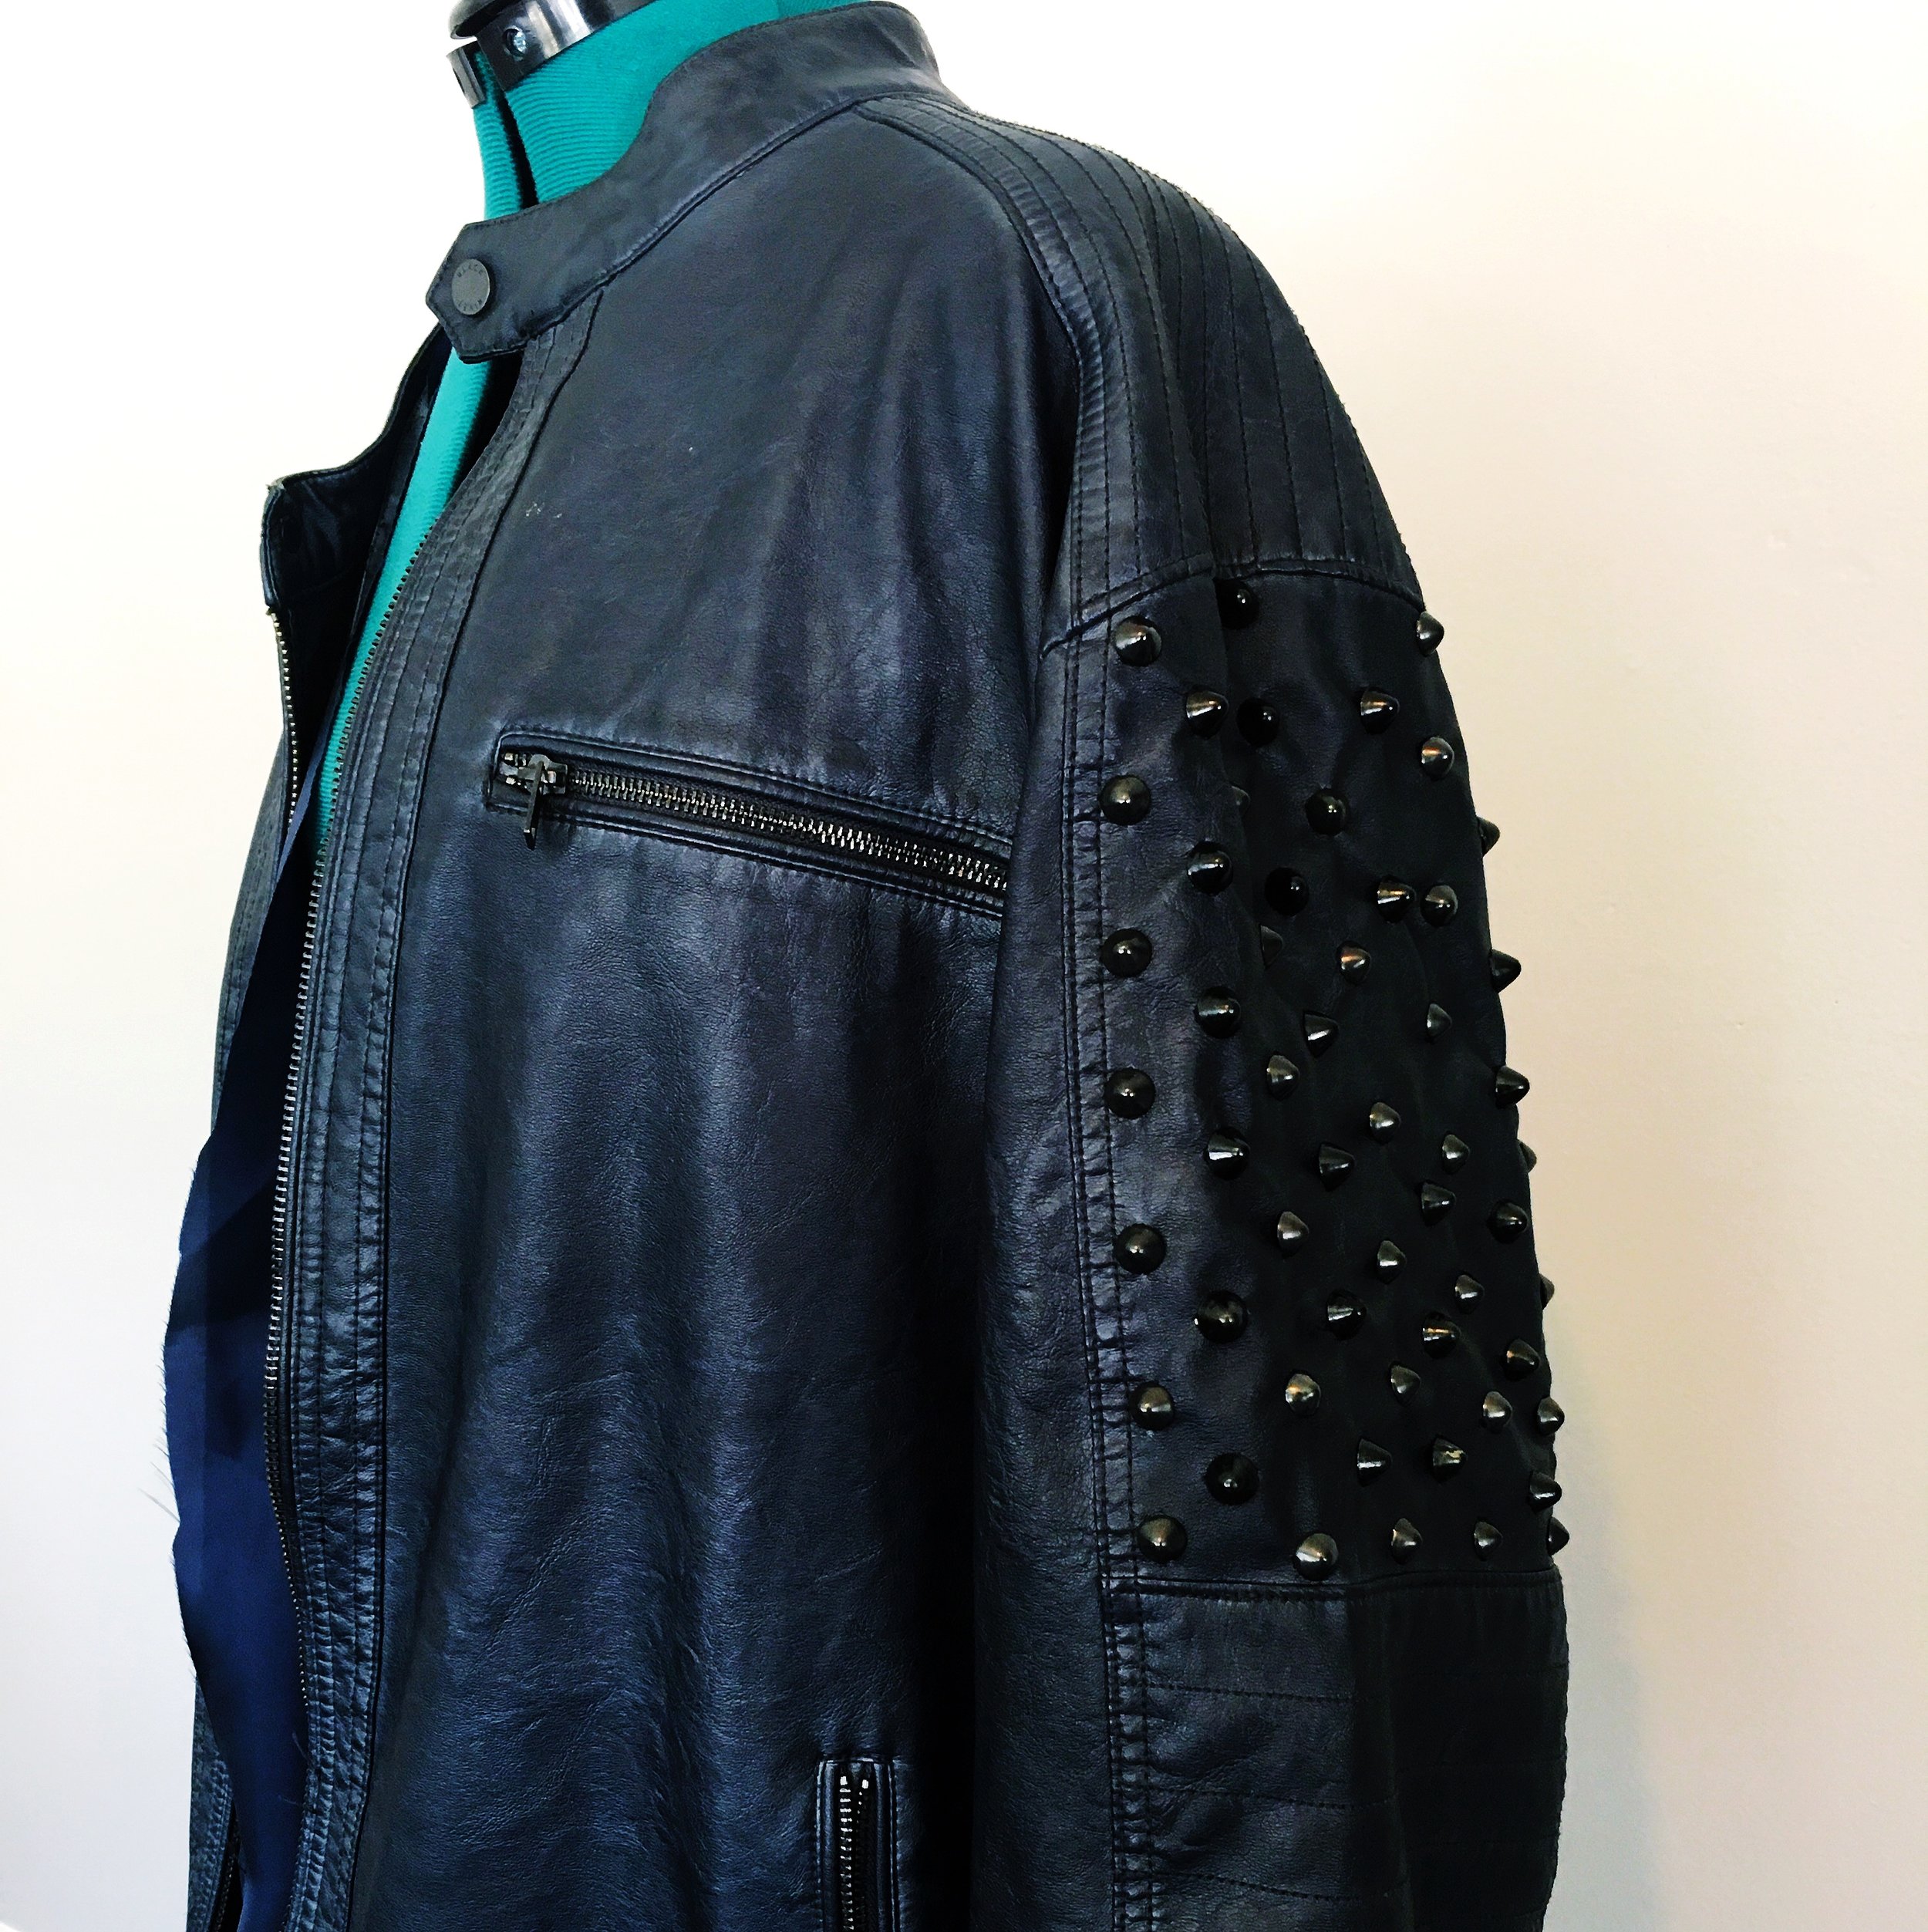
Studding and replacing the liner of a blue leather jacket
Blue leather and a flannel liner, this jacket was already amazing, but was a little too warm for Rob on stage. My solution was to pull the quilted liner out of the jacket and remake a new one out of basic liner material. After pulling the guts out of the jacket, I simply seam-ripped the liner so that I could use it as my pattern for the new one. I think that was actually the most time-intensive part.
After removing the leather-trimmed mitered pocket and all tags, I assembled the liner so that it was ready to get installed. In order to add a little something extra, I alternated between 3/5" and 5/8" studs on the sleeves, and filled the space we marked. After the jacket was studded, I popped the liner back into the jacket and called it a day.
Embellishing 2 button up shirts
As much simpler projects, these final two shirts got a little embellishing. I took thin leathers, one being a sand-colored shimmer leather and the other a simple black suede and traced the yoke of each shirt onto the backside of the leathers with chalk. While I couldn't pin the black leather to the pearl snap button up shirt, I could with the ivory shirt so that's what I did. Learning the hard way, I've figured out that the best way to ensure it gets locked down without any stretch, pucker, or sliding is to sew all edges of each piece in the same sitting/line.
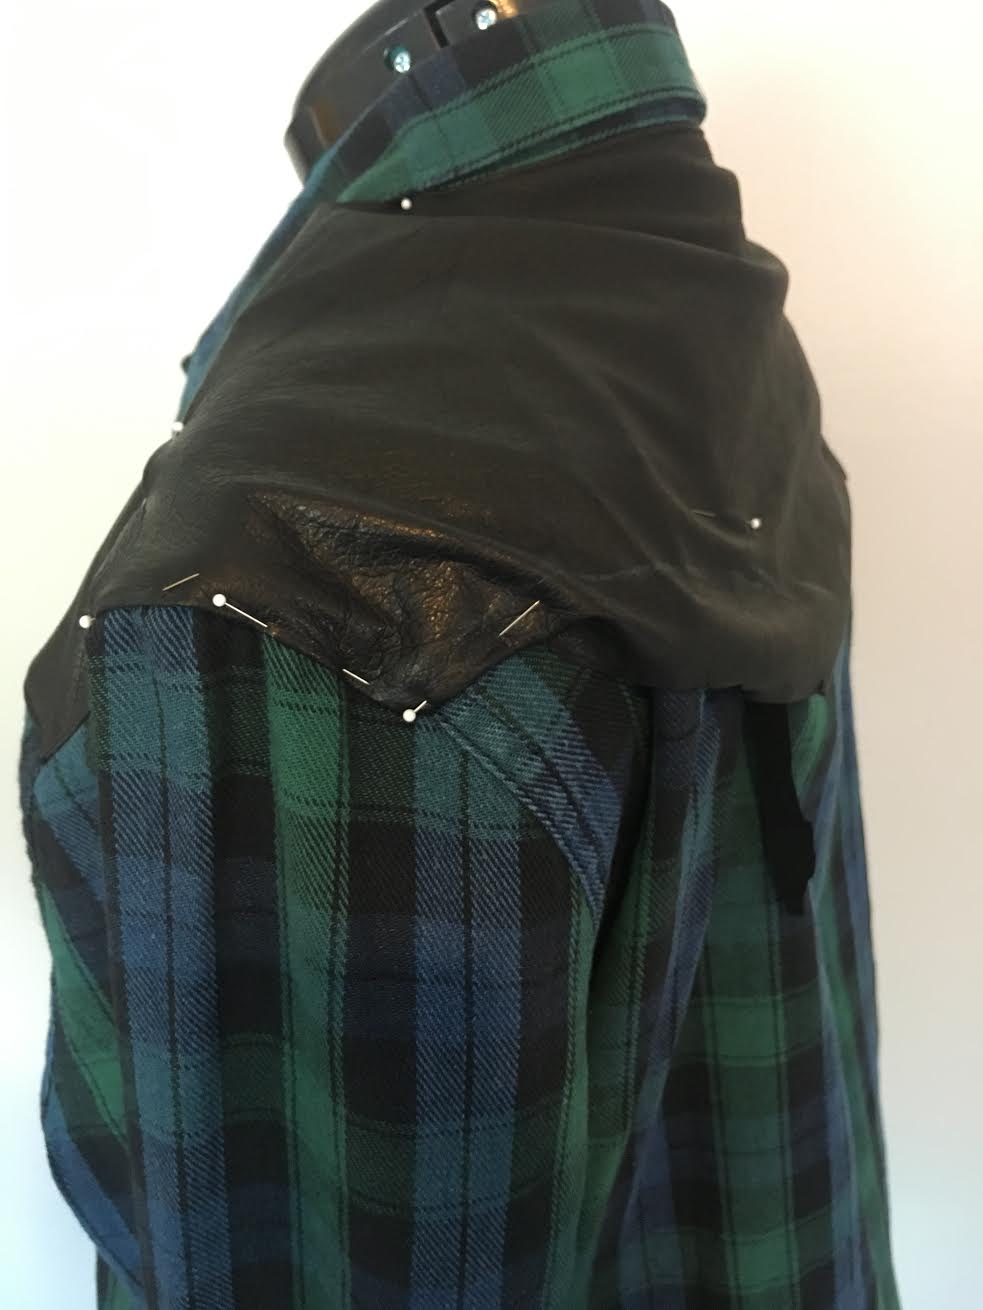
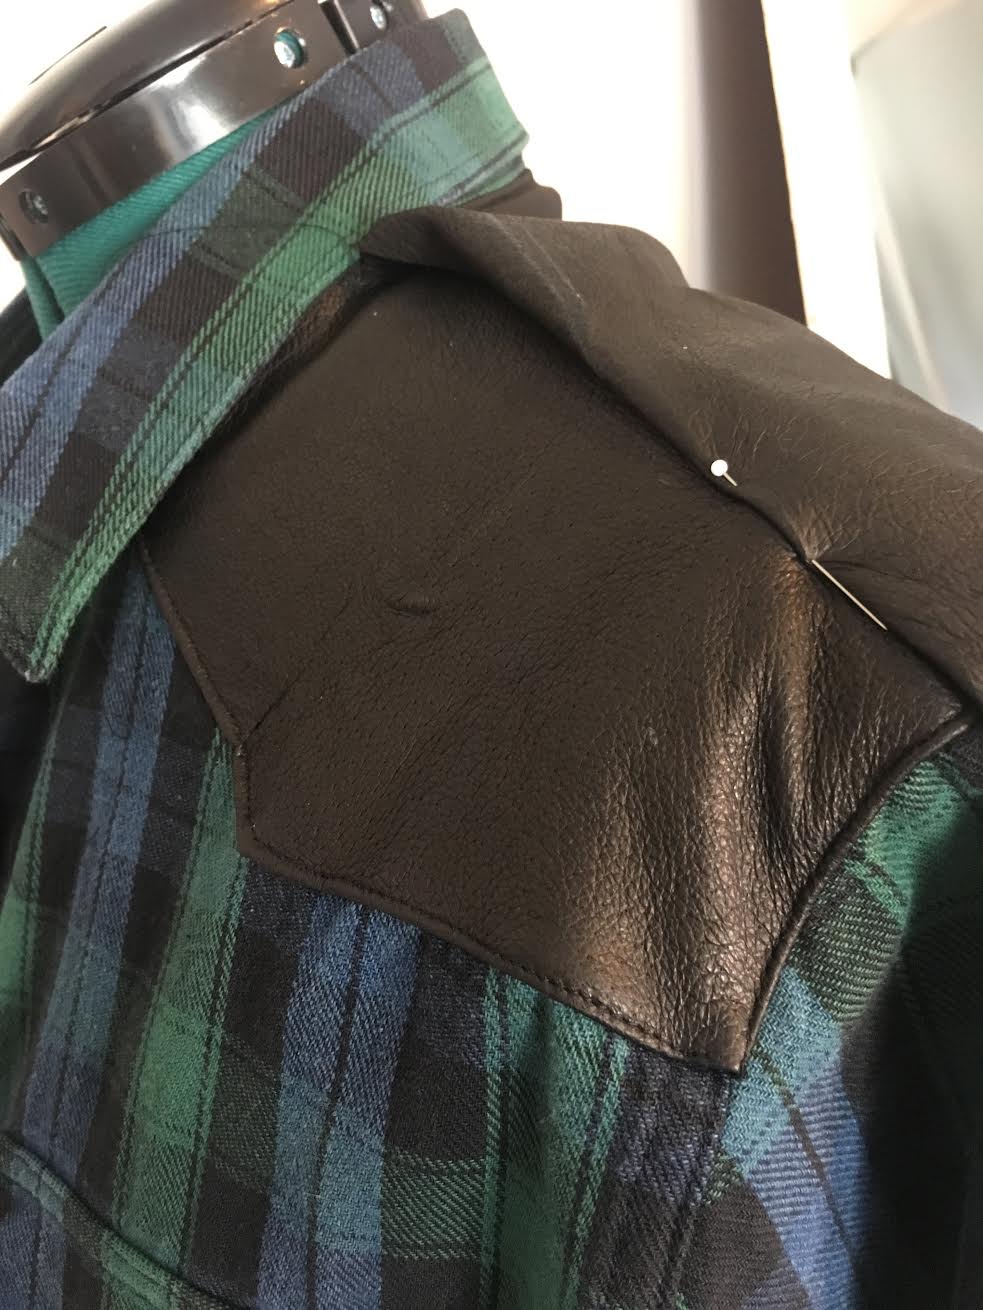


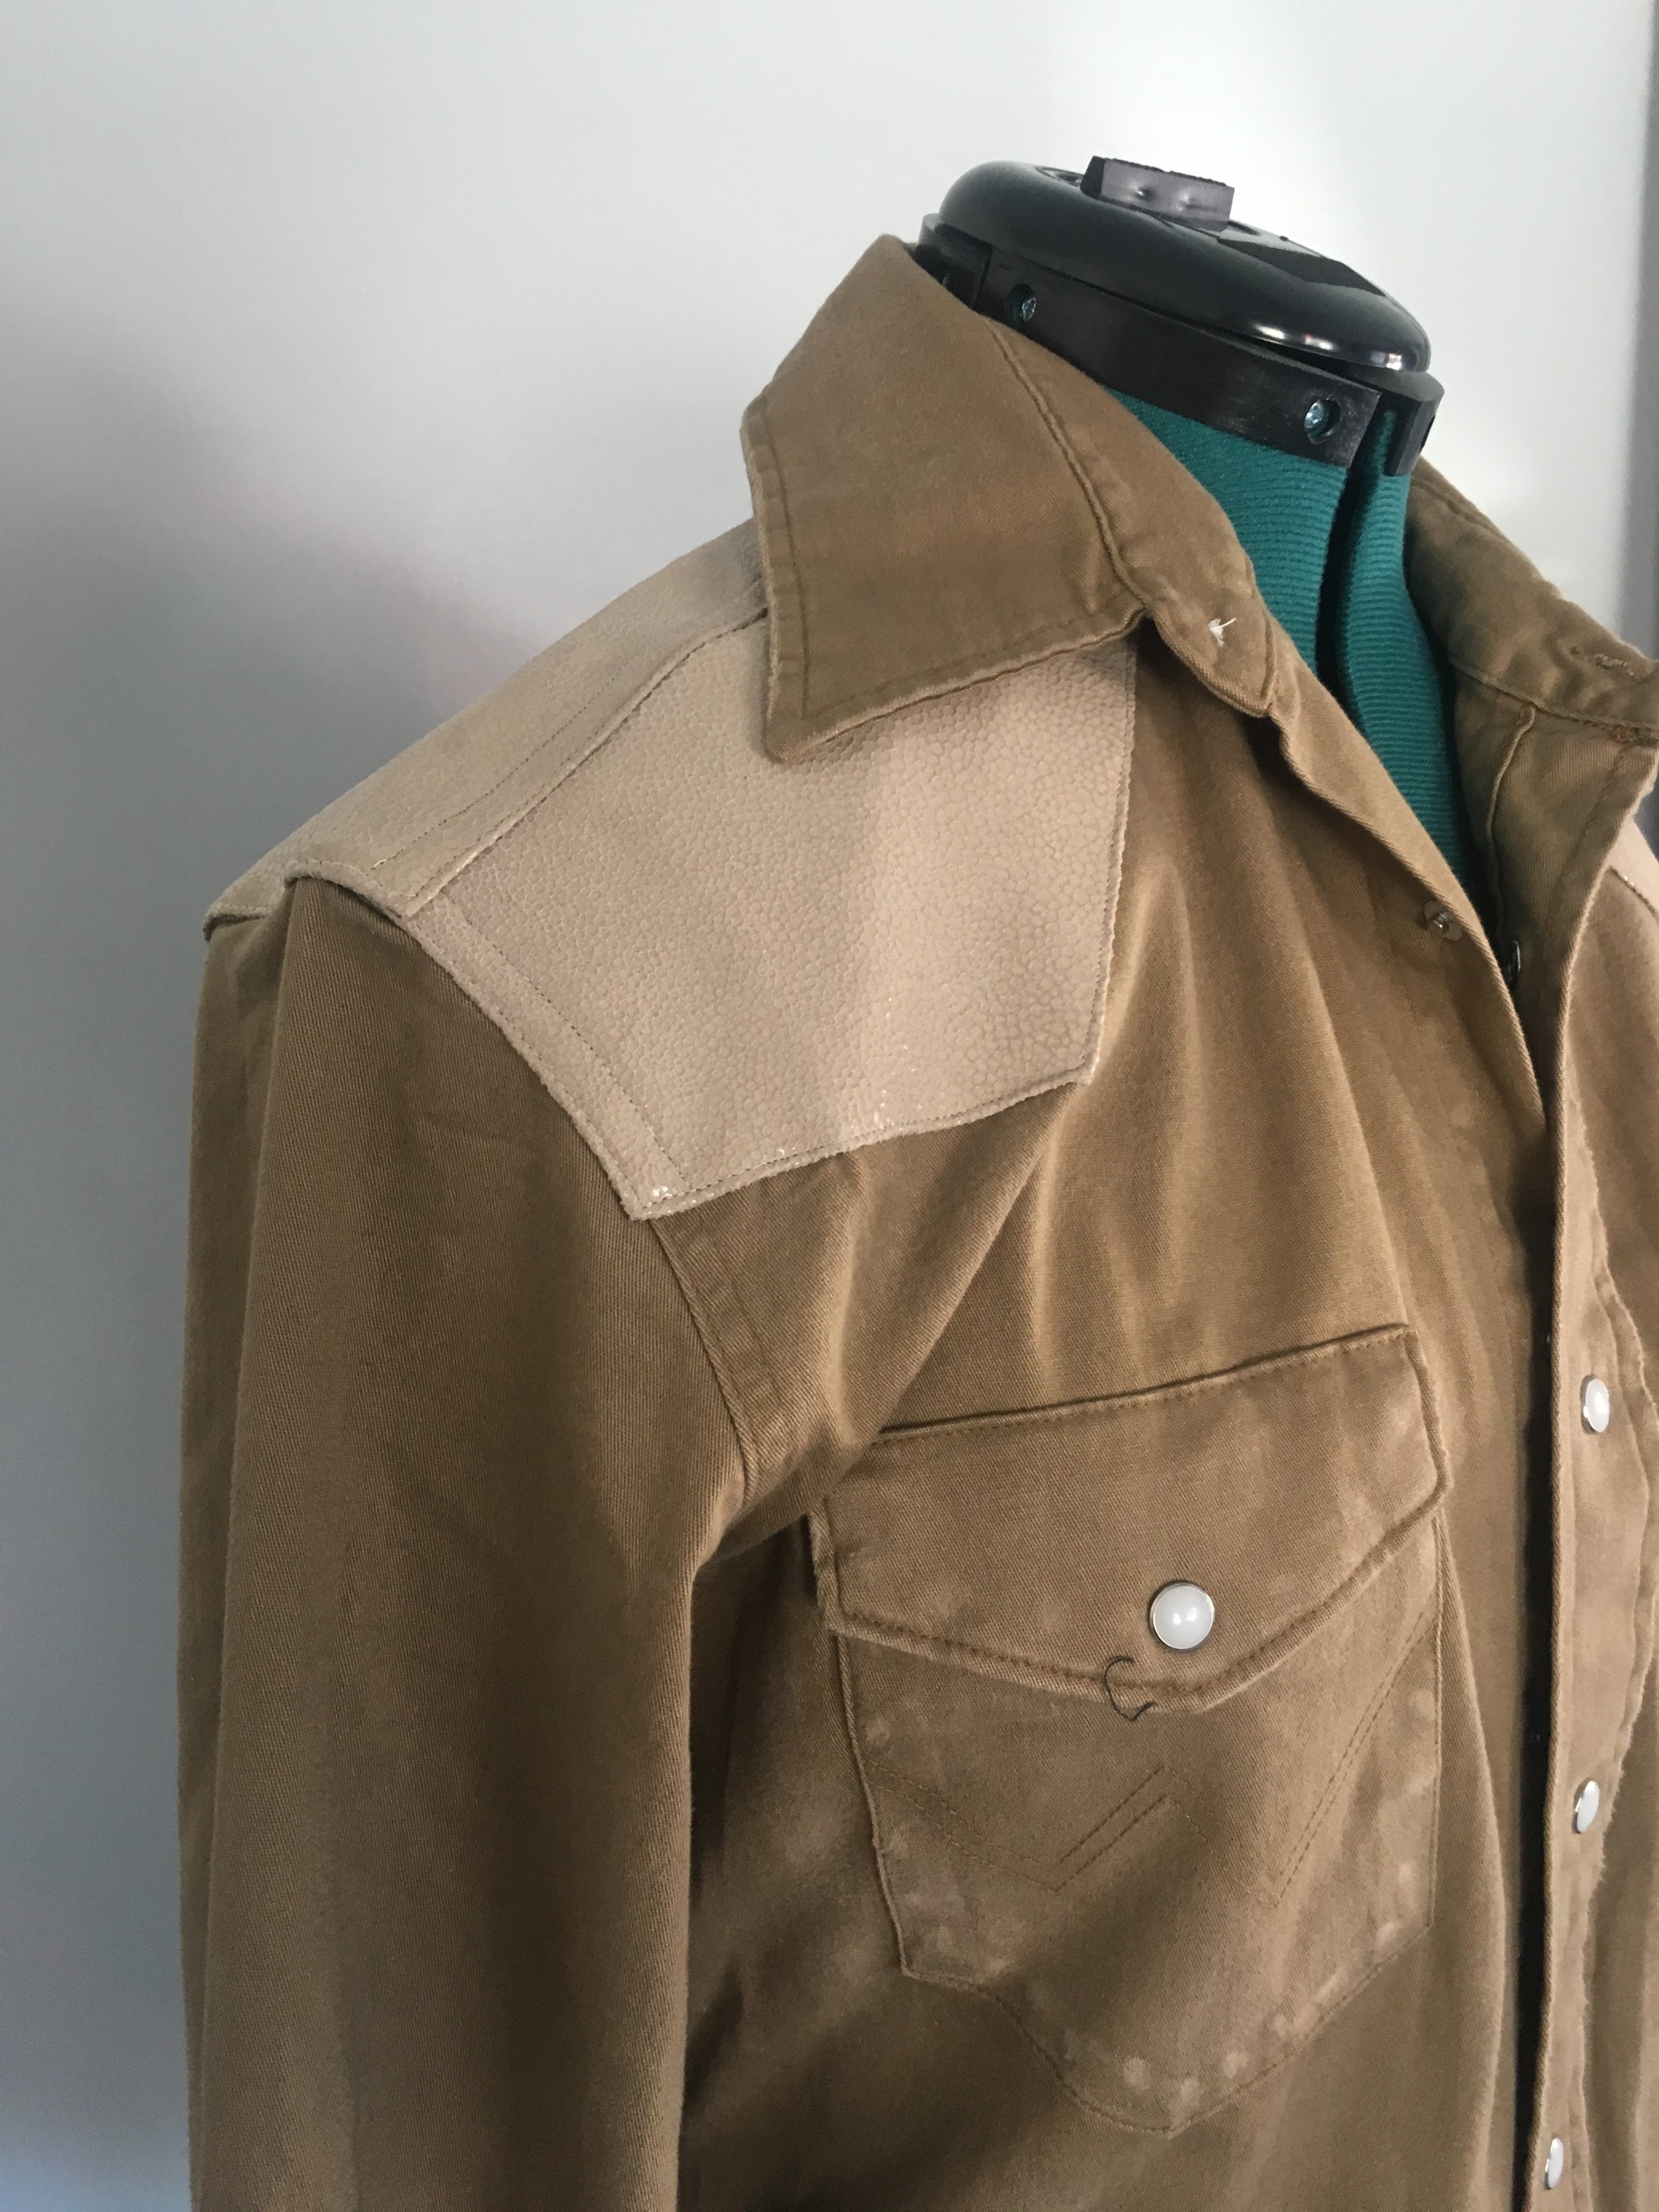
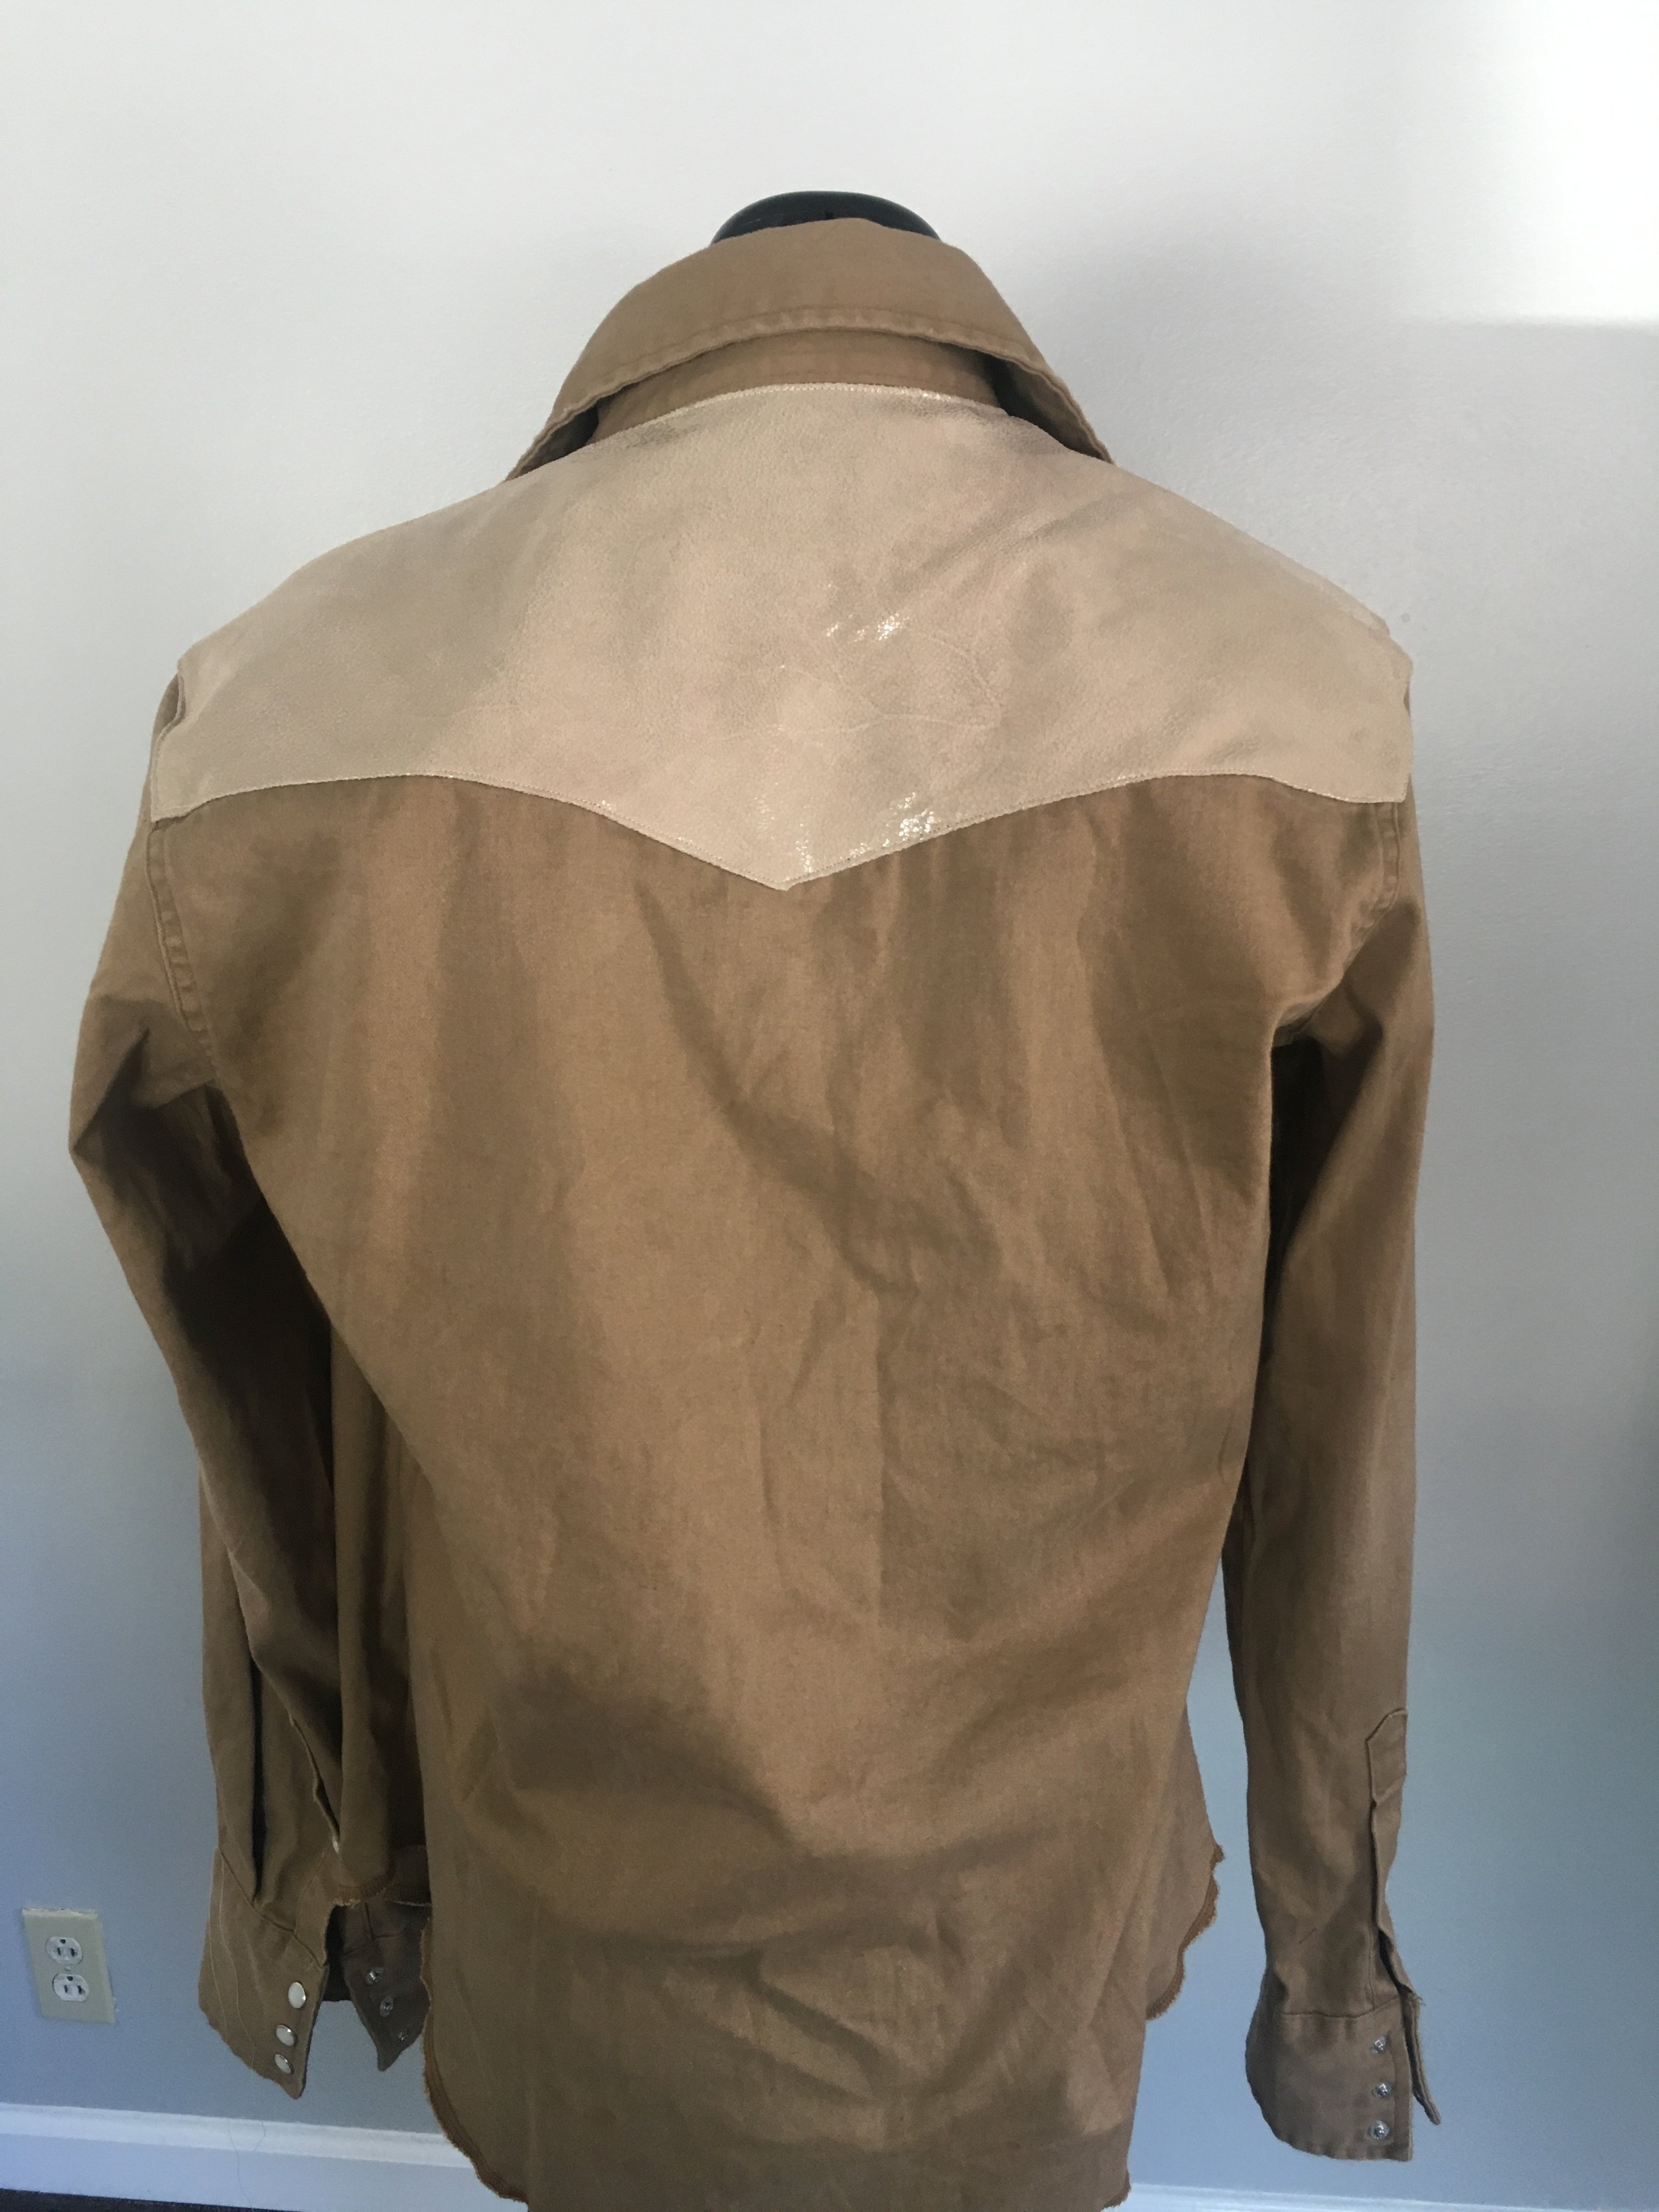
I stitch the front pieces first, then pin the back yoke to overlap it. Some additional topstitching puts the finishing touches on these, and on tour they go.


